Fluffy Buttermilk Pancakes
There’s nothing quite like waking up on a weekend morning to the smell of pancakes sizzling on the griddle. In our home, Sunday mornings are for pancakes, and this fluffy buttermilk pancake recipe has been a favorite for years. It’s light, airy, and packed with the rich, comforting flavors that make breakfast feel extra special.
What makes these pancakes so good? The secret is in the buttermilk. It gives them a beautifully soft and tender texture while adding just the right amount of tangy flavor. And the best part? This recipe is so easy to make with simple pantry ingredients!
So, whether you’re looking for the perfect weekend breakfast or a freezer-friendly option for busy mornings, this recipe will not disappoint.
Why You’ll Love These Buttermilk Pancakes
✔ Extra Fluffy & Soft – The buttermilk creates the perfect rise, making these pancakes thick and pillowy.
✔ Easy to Make – Just mix, rest, and cook! A beginner-friendly recipe.
✔ Meal-Prep Friendly – Make a big batch and freeze for quick breakfasts.
✔ Customizable – Add chocolate chips, blueberries, or a dash of cinnamon for variety.
Ingredients You’ll Need
Here’s everything you need to make the fluffiest buttermilk pancakes from scratch:
- 2 cups all-purpose flour – The base for the perfect pancake texture.
- 1/2 cup sugar – Adds a touch of sweetness.
- 4 tablespoons baking powder – Creates the light, fluffy rise.
- 1/2 teaspoon salt – Balances the sweetness and enhances flavor.
- 1/4 teaspoon baking soda – Works with the buttermilk for an even better rise.
- 1 3/4 cups buttermilk – The key to soft, tender pancakes!
- 1/4 cup melted butter – Adds richness and keeps the pancakes moist.
- 2 teaspoons vanilla or maple flavoring – Enhances the overall flavor.
- 1 large egg – Helps bind everything together.
📌 Tip: If you don’t have buttermilk, you can make your own! Just mix 1 3/4 cups of whole milk with 2 tablespoons of vinegar or lemon juice. Let it sit for 5 minutes before using.
How to Make Fluffy Buttermilk Pancakes
Step 1: Prepare the Dry Ingredients
In a large mixing bowl, whisk together flour, sugar, baking powder, baking soda, and salt. This helps distribute everything evenly for the best texture.
Step 2: Mix the Wet Ingredients
In a separate bowl, whisk together buttermilk, melted butter, vanilla (or maple flavoring), and the egg until well combined.
Step 3: Combine Wet & Dry Ingredients
Slowly pour the wet mixture into the dry ingredients. Gently mix until just combined—it’s okay if there are a few lumps! Overmixing can make the pancakes dense instead of fluffy.
Step 4: Let the Batter Rest
Let the batter sit for 20 minutes before cooking. This step is crucial! The buttermilk and baking powder need time to create those air pockets that make the pancakes extra fluffy.
Step 5: Cook the Pancakes
- Heat a buttered griddle or nonstick pan over medium heat.
- Use a ladle or 1/4 cup scoop to pour the batter onto the griddle.
- When bubbles form on top, flip the pancakes and cook for another 1-2 minutes until golden brown.
Step 6: Serve & Enjoy
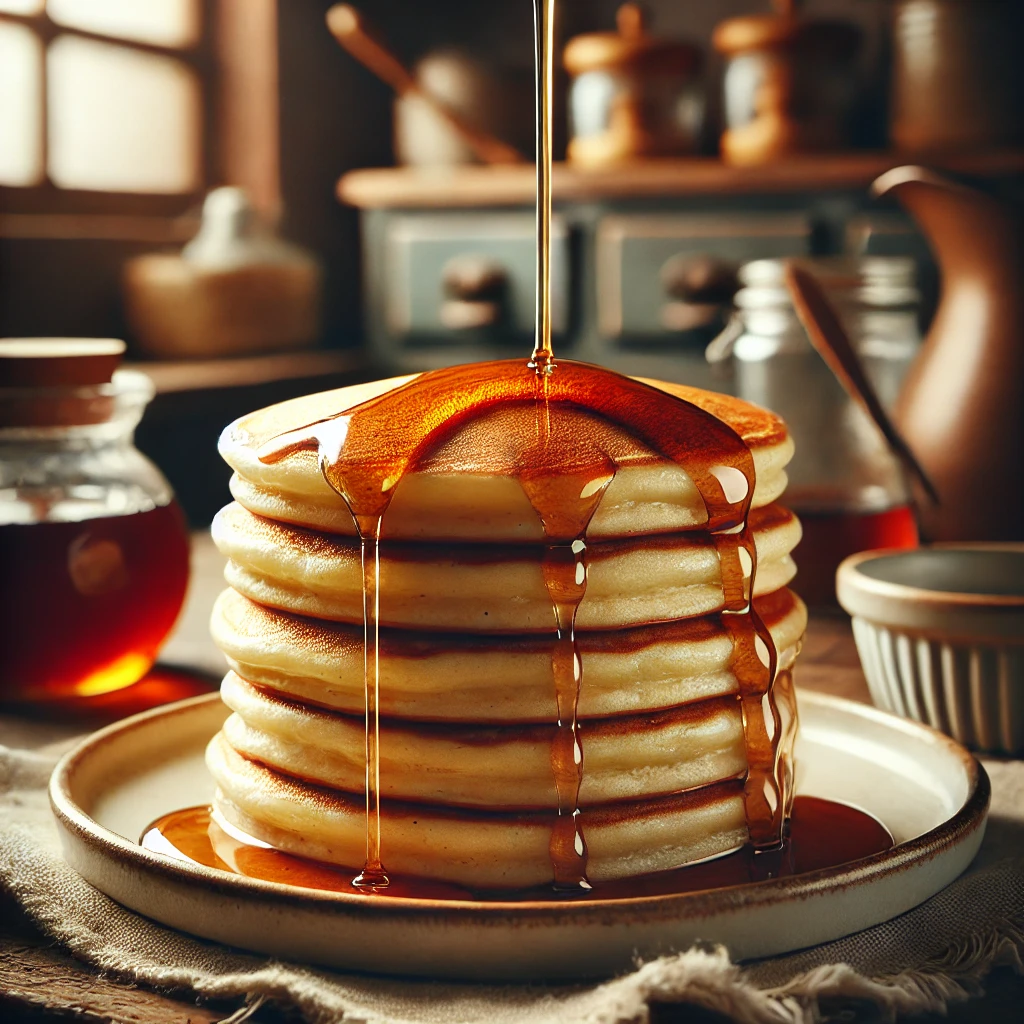
Serve warm with homemade maple syrup, fresh fruit, or a dusting of powdered sugar.
📌 Pro Tip: To keep pancakes warm while cooking, place them on a baking sheet in a 200°F oven until ready to serve!
How to Store & Freeze Pancakes
These pancakes store beautifully and make a great meal-prep breakfast!
- Refrigerate: Store leftovers in an airtight container for up to 3 days.
- Freeze: Let pancakes cool completely, then place them in a freezer bag with parchment paper between layers. Freeze for up to 3 months.
- Reheat: Warm in the microwave, toaster, or oven until heated through.
📌 Freezing Tip: To avoid pancakes sticking together, flash-freeze them on a baking sheet for 30 minutes before transferring them to a freezer bag.
FAQs – Your Pancake Questions Answered!
Q: Can I use regular milk instead of buttermilk?
A: Yes! Buttermilk gives the pancakes the best texture, but regular milk works too. Just add 1/2 teaspoon of vinegar to mimic the acidity.
Q: Why are my pancakes flat instead of fluffy?
A: This usually happens if the batter was overmixed or if it didn’t rest long enough. Make sure to let it sit for 20 minutes before cooking!
Q: Can I make this batter ahead of time?
A: Yes! Store the batter in the fridge for up to 12 hours, but let it sit at room temperature for 10 minutes before cooking.
Q: How do I make thinner pancakes?
A: Add 1/4 cup more buttermilk to the batter for a thinner consistency.
If you’re looking for the ultimate fluffy buttermilk pancakes, this recipe is a must-try! Whether you’re making them for a cozy Sunday breakfast or meal-prepping for the week, these pancakes are always a hit.
So grab your whisk, pour yourself a cup of coffee, and enjoy the slow, simple joy of homemade pancakes. Because breakfast just tastes better when it’s made from scratch.
Pro Tips for the Fluffiest Pancakes
✔ Use buttermilk! It makes the pancakes extra soft and fluffy. If you don’t have any, make your own by mixing 1 ¾ cups of milk with 1 tablespoon of vinegar or lemon juice and letting it sit for 5 minutes.
✔ Let the batter rest for 20 minutes. This step is crucial for extra fluffy pancakes!
✔ Don’t overmix! Stir the batter just until combined—lumps are okay. Overmixing will make the pancakes dense.
✔ Medium heat is best. Too high, and they’ll burn before cooking through; too low, and they’ll be pale and dry.
Serving Suggestions
Pair these fluffy buttermilk pancakes with:
✔ Homemade Maple Syrup (Recipe linked below!)
✔ Fresh fruit like strawberries, blueberries, or bananas
✔ A drizzle of honey or peanut butter for extra flavor
✔ A side of bacon or scrambled eggs for a complete breakfast
Fluffy Buttermilk Pancakes
Ingredients
Dry Ingredients:
- 2 cups all-purpose flour
- ½ cup sugar
- 4 tablespoons baking powder
- ½ teaspoon salt
- ¼ teaspoon baking soda
Wet Ingredients:
- 1 ¾ cups buttermilk
- ¼ cup melted butter
- 2 teaspoons vanilla extract or maple flavoring
- 1 large egg
Instructions
- In a large mixing bowl, whisk together the flour, sugar, baking powder, salt, and baking soda until evenly combined. Set aside.
- In a separate bowl, whisk together the buttermilk, melted butter, vanilla or maple flavoring, and egg until smooth.
- Pour the wet ingredients into the dry ingredients and gently stir until just combined. The batter should be slightly lumpy—do not overmix!
- Let the batter sit for 20 minutes to allow the buttermilk to activate the baking powder, making your pancakes extra fluffy.
- Heat a non-stick skillet or griddle over medium heat and lightly grease with butter.
- Ladle about ¼ cup of batter per pancake onto the hot surface.
- Cook for 2-3 minutes, or until bubbles form on the surface and the edges look set.
- Flip and cook for another 1-2 minutes until golden brown.
- Serve warm with homemade maple syrup, fresh fruit, butter, or your favorite toppings!
Notes
- Buttermilk Substitute: If you don’t have buttermilk, mix 1 ¾ cups whole milk with 1 tablespoon of white vinegar or lemon juice. Let it sit for 5 minutes before using.
- Flavor Variations: Try adding cinnamon, nutmeg, or even a handful of chocolate chips for a fun twist.
- Storage Tips: Leftover pancakes can be stored in an airtight container in the fridge for up to 3 days or frozen for up to 3 months.
- Reheating: Warm pancakes in the toaster, microwave, or oven at 300°F for a few minutes.
- Serving Suggestions: Serve with fresh fruit, homemade maple syrup, or a pat of butter for extra indulgence.
✨ Did you try this recipe? Let me know in the comments how it turned out! And don’t forget to pin this recipe for later. 🥞💛
Save This Recipe for Later!
🌟 Pin this recipe to your favorite breakfast board on Pinterest!
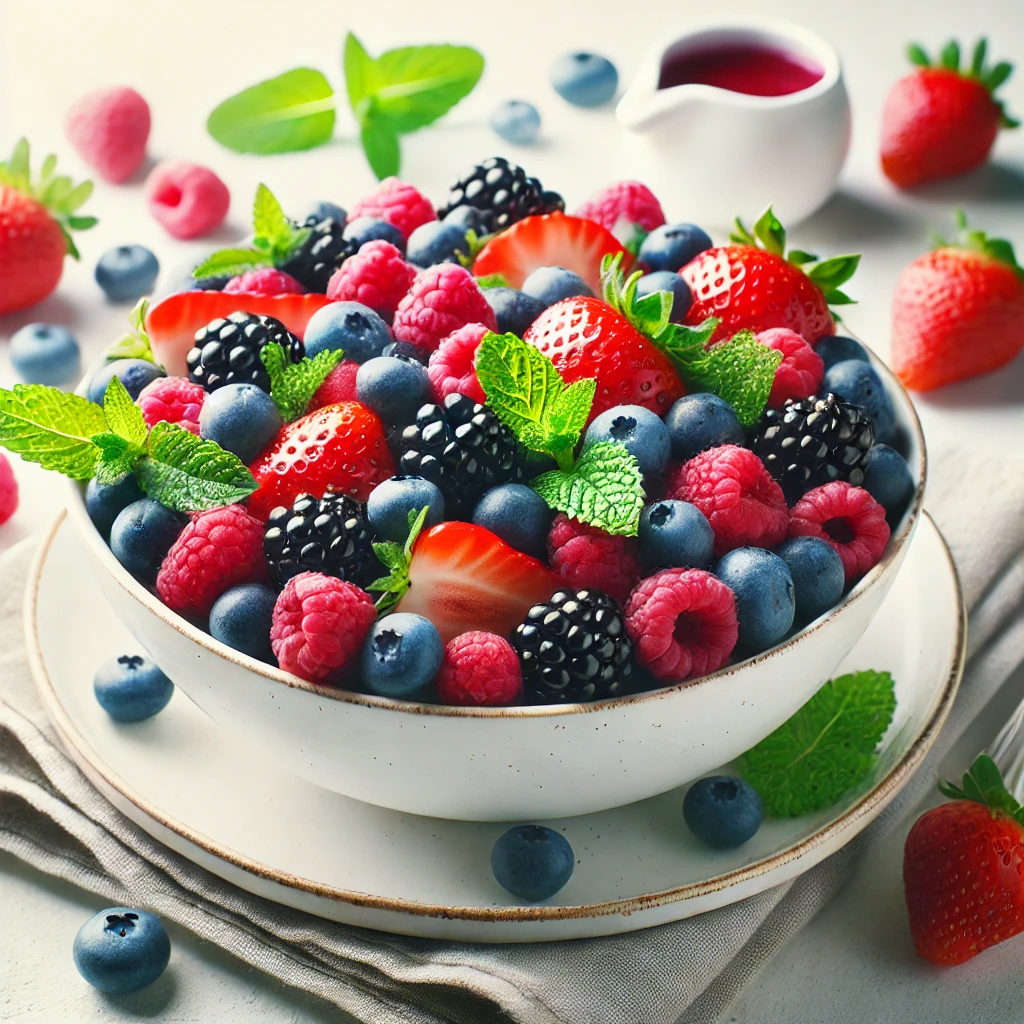
Berry Salad with Honey-Lime Dressing
This vibrant Berry Salad with Honey-Lime Dressing is the perfect balance of sweet, tangy, and refreshing flavors. Made with fresh berries, crunchy nuts, and a drizzle of homemade honey-lime dressing, it’s an easy, healthy dish for summer gatherings, brunch, or a light snack. Whether you’re hosting a party or looking for a simple side dish, this salad is sure to impress!
The Perfect Summer Salad
When the temperatures rise, there’s nothing better than a refreshing, no-cook meal. This Berry Salad with Honey-Lime Dressing is an ideal way to enjoy nature’s sweetest flavors while staying cool. The combination of strawberries, blueberries, raspberries, and blackberries creates a vibrant mix of colors and flavors that’s both visually appealing and delicious. Whether you’re serving it as a side dish, light meal, or healthy dessert, this salad is a crowd-pleaser that brings a touch of summer to any table.
A Nutrient-Packed Dish
Not only is this berry salad delicious, but it’s also packed with essential vitamins, minerals, and antioxidants. Berries are known for their high levels of fiber, vitamin C, and heart-healthy antioxidants, making them a fantastic addition to your diet. Adding nuts like pecans or walnuts provides a satisfying crunch and adds healthy fats, while feta cheese introduces a creamy, tangy element that complements the natural sweetness of the fruit. The honey-lime dressing enhances the flavors with a touch of citrusy freshness, making each bite even more irresistible.
Easy to Make, Easy to Customize
One of the best things about this salad is how simple it is to prepare. With just a handful of ingredients and minimal effort, you can have this dish ready in minutes. It’s also incredibly versatile—swap out the nuts, add seeds, or mix in granola for extra texture. If you prefer a dairy-free version, simply omit the cheese or use a plant-based alternative. You can also experiment with different fruit combinations, such as adding sliced peaches, mango, or pomegranate seeds for a unique twist.
A Dish for Every Occasion
This berry salad isn’t just for summer—it’s a fantastic choice for brunches, potlucks, or special occasions like Mother’s Day or Valentine’s Day. Serve it as a refreshing appetizer before a grilled meal, or enjoy it as a light and healthy dessert. You can even spoon it over yogurt for a quick breakfast. No matter how you serve it, this Berry Salad with Honey-Lime Dressing is guaranteed to bring a burst of freshness and flavor to your meal!
FAQs
1. Can I make this salad ahead of time?
Yes! For best results, prepare the dressing and berries separately. Combine them just before serving to keep the berries fresh.
2. Can I use frozen berries?
Fresh berries work best, but you can use thawed frozen berries in a pinch. Be sure to drain excess liquid before mixing.
3. What other nuts can I use?
Try almonds, cashews, or sunflower seeds for a different crunch and flavor.
4. Can I make this salad dairy-free?
Yes! Simply omit the feta cheese or use a dairy-free alternative.
5. How do I store leftovers?
Store leftovers in an airtight container in the refrigerator for up to 1 day. The berries may release juices, so it’s best enjoyed fresh.

Berry Salad with Honey-Lime Dressing
Ingredients
For the Salad:
- 1 cup strawberries hulled and sliced
- 1 cup blueberries
- 1 cup raspberries
- ½ cup blackberries
- ¼ cup pecans or walnuts chopped
- ¼ cup feta cheese optional
- 1 tablespoon fresh mint leaves chopped
For the Honey-Lime Dressing:
- 2 tablespoons honey
- Juice of 1 lime
- 1 teaspoon lime zest
- 1 teaspoon vanilla extract
- 1 tablespoon olive oil
Instructions
- In a small bowl, whisk together honey, lime juice, lime zest, vanilla extract, and olive oil until smooth. Set aside.
- In a large bowl, gently combine the strawberries, blueberries, raspberries, and blackberries.
- Sprinkle chopped nuts, feta cheese (if using), and fresh mint over the salad.
- Pour the honey-lime dressing over the berries and toss gently to coat.
- Serve immediately or refrigerate for 10-15 minutes to allow the flavors to blend.
Notes
- For added protein, mix in grilled chicken or quinoa.
- Swap honey for maple syrup or agave for a vegan-friendly option.
- Enhance the flavor with a dash of cinnamon or a sprinkle of coconut flakes.
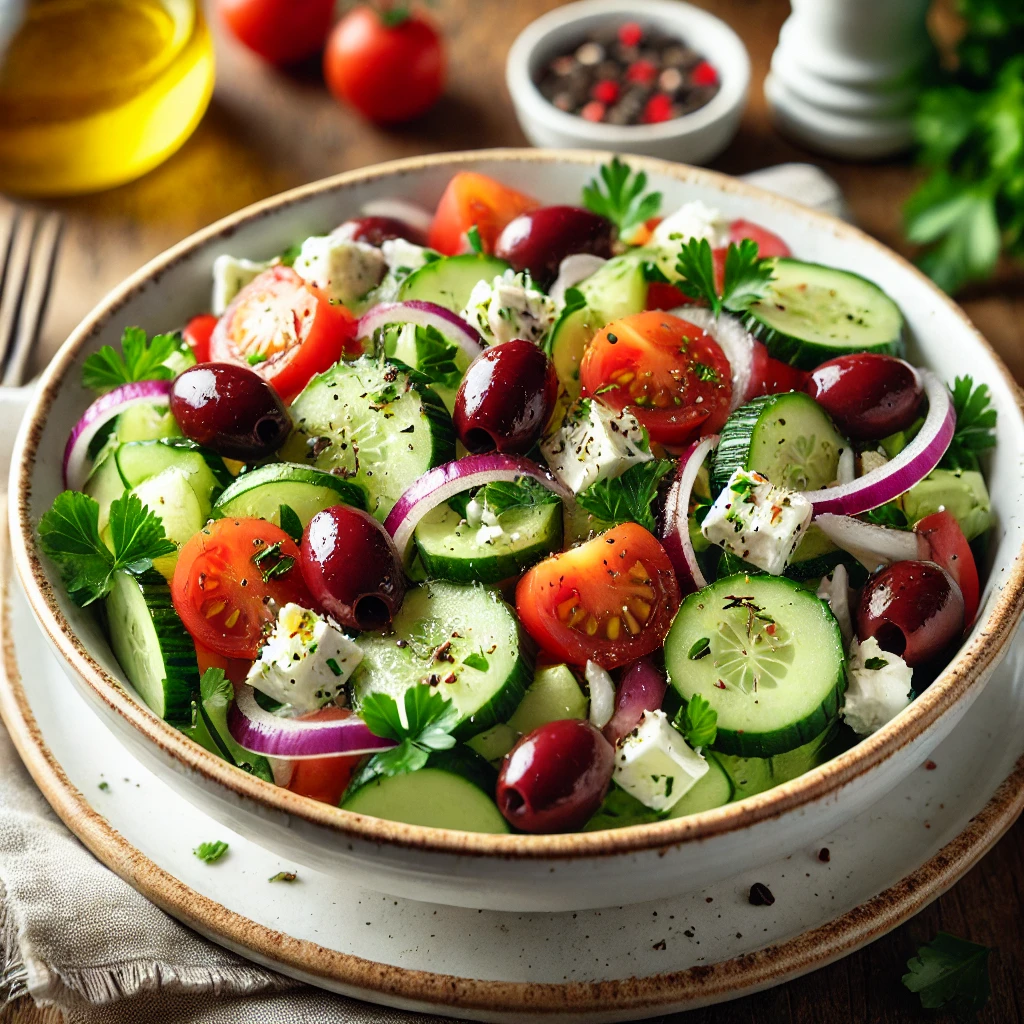
Classic Mediterranean Chopped Salad
A fresh, vibrant, and nutrient-packed salad featuring crisp vegetables, tangy feta, and a zesty homemade dressing.
Why You’ll Love This Salad
This Mediterranean Chopped Salad is the perfect balance of freshness and flavor. With crunchy cucumbers, juicy tomatoes, red onion, and briny olives, every bite bursts with Mediterranean goodness. The zesty lemon-garlic dressing ties everything together, making it a refreshing yet satisfying dish. Whether served as a light meal or a side dish, this salad is both nutritious and delicious.
How to Make a Flavorful Chopped Salad
The key to a great chopped salad is uniformity. Finely dice all the ingredients so that each bite has a mix of flavors and textures. Using fresh produce enhances the salad’s crispness, while the homemade dressing ensures a bold and tangy finish. You can prepare this salad ahead of time and let it sit for a few minutes, allowing the flavors to meld beautifully.
Serving Suggestions & Variations
This salad is perfect on its own, but you can customize it in several ways. Add grilled chicken or shrimp for protein, mix in quinoa for a heartier meal, or swap feta for goat cheese for a creamier texture. If you prefer a dairy-free version, skip the cheese and add more olives for a briny kick.
Storage Tips & Meal Prep
This salad stays fresh for up to 2 days when stored in an airtight container in the refrigerator. However, if meal prepping, keep the dressing separate and add it right before serving to maintain the crunch of the vegetables. If making ahead for a gathering, toss everything together 15 minutes before serving to let the flavors blend without losing texture.
Frequently Asked Questions (FAQs)
1. Can I make this salad ahead of time?
Yes! For the best texture, store the chopped veggies separately from the dressing and mix them before serving.
2. What can I substitute for feta cheese?
Goat cheese, fresh mozzarella, or a dairy-free alternative work great as substitutes.
3. How can I make this a complete meal?
Add protein like grilled chicken, shrimp, or chickpeas to make it more filling.
4. What other dressings pair well with this salad?
A balsamic vinaigrette or a tahini-lemon dressing would be great alternatives.
5. Can I use store-bought dressing instead of homemade?
Absolutely! However, homemade dressing is fresher, healthier, and more flavorful.
Classic Mediterranean Chopped Salad
Ingredients
For the Salad:
- 1 large cucumber diced
- 1 cup cherry tomatoes halved
- ½ red onion finely chopped
- ½ cup Kalamata olives sliced
- ½ cup feta cheese crumbled
- ¼ cup fresh parsley chopped
For the Dressing:
- 3 tbsp extra virgin olive oil
- 2 tbsp fresh lemon juice
- 1 garlic clove minced
- 1 tsp dried oregano
- ½ tsp salt
- ¼ tsp black pepper
Instructions
- In a large mixing bowl, combine the diced cucumbers, cherry tomatoes, red onion, olives, feta cheese, and parsley. Toss to evenly distribute the ingredients.
- In a small bowl or jar, whisk together the olive oil, lemon juice, minced garlic, oregano, salt, and pepper.
- Drizzle the dressing over the salad and toss gently to coat all the ingredients.
- Let the salad sit for about 5 minutes to absorb the flavors, then serve fresh!
Notes
- Best Served Fresh: While this salad can be stored, it’s best enjoyed immediately for the freshest flavors.
- Make It Vegan: Omit the feta cheese or substitute it with a dairy-free alternative.
- Dressing Tip: If you prefer a milder garlic flavor, let the dressing sit for 10 minutes before adding it to the salad.

Pumpkin Cream Cold Brew (Starbucks Copycat Recipe)
Indulge in the flavors of fall with this Starbucks Pumpkin Cream Cold Brew copycat recipe! This smooth, creamy, and perfectly spiced drink is easy to make at home and costs a fraction of the price. Made with homemade pumpkin cream, real pumpkin, and cold brew coffee, it’s the ultimate fall-inspired drink you’ll want to enjoy all season long.
Why You’ll Love this Recipe
You’ll love this recipe because it tastes just like the beloved Starbucks Pumpkin Cream Cold Brew, giving you all the cozy fall flavors right at home. Not only is it easy and affordable, but it’s also made with simple, budget-friendly ingredients that you likely already have in your kitchen. Plus, it’s completely customizable—you can adjust the sweetness, choose your preferred dairy option, and even control the strength of your coffee to match your taste. If you’re looking for a dairy-free version, simply swap in oat milk or coconut cream for a creamy and delicious alternative.
Serving Suggestions & Variations
- Make it Sweeter – Add more maple syrup or brown sugar.
- Iced Pumpkin Latte – Blend the pumpkin cream into hot coffee for a latte-style drink.
- Extra Frothy – Use a hand frother for an ultra-creamy topping.
- Dairy-Free Option – Use coconut milk or almond milk instead of heavy cream.
FAQs
1. Can I make this in advance?
Yes! Store the pumpkin cream in an airtight container in the refrigerator for up to 3 days. Shake well before using.
2. Can I use regular brewed coffee instead of cold brew?
Absolutely! Just chill your brewed coffee before making the drink.
3. What’s the best way to froth the pumpkin cream?
A milk frother, hand mixer, or whisk can be used to achieve a thick, creamy texture.
4. Can I make this without pumpkin puree?
Yes, but the flavor won’t be as authentic. You can substitute with more pumpkin pie spice for a similar effect.
5. Can I make this hot instead of iced?
Yes! Simply warm the pumpkin cream and pour it over hot brewed coffee instead of cold brew.

Pumpkin Cream Cold Brew (Starbucks Copycat Recipe)
Ingredients
For the Pumpkin Cream:
- ½ cup heavy cream
- ¼ cup whole milk or dairy-free alternative
- 2 tablespoons pumpkin puree
- 2 tablespoons maple syrup or brown sugar
- ½ teaspoon pumpkin pie spice
- ½ teaspoon vanilla extract
For the Cold Brew Coffee:
- 1 cup cold brew coffee store-bought or homemade
- Ice cubes
- 1 teaspoon vanilla syrup optional
Garnish:
- Extra pumpkin pie spice for sprinkling
Instructions
- In a small mixing bowl, whisk together the heavy cream, milk, pumpkin puree, maple syrup, pumpkin pie spice, and vanilla extract. Use a milk frother or a hand mixer to whip the mixture until it becomes thick and frothy but still pourable.
- Fill a glass with ice cubes and pour in the cold brew coffee. If you like a sweeter drink, stir in vanilla syrup.
- Slowly pour the whipped pumpkin cream over the cold brew coffee. It will naturally float to the top, creating a creamy, layered effect.
- Sprinkle extra pumpkin pie spice on top and enjoy immediately with a straw or stir to combine flavors.
Notes
- Adjust Sweetness – Add more or less maple syrup or sugar to suit your taste.
- Dairy-Free Option – Use oat milk, almond milk, or coconut cream for a non-dairy version.
- Stronger Coffee Flavor – Brew a more concentrated cold brew or use espresso for a bolder taste.
- Make It Frothier – Blend the pumpkin cream mixture longer for an ultra-creamy, foamy topping.
- Storage Tips – Store leftover pumpkin cream in an airtight container in the fridge for up to 3 days. Shake before use.
- Spice Variation – Add extra cinnamon, nutmeg, or pumpkin pie spice for a stronger autumn flavor.
- Iced or Hot – While traditionally served cold, you can also top hot coffee with the pumpkin cream for a cozy version.
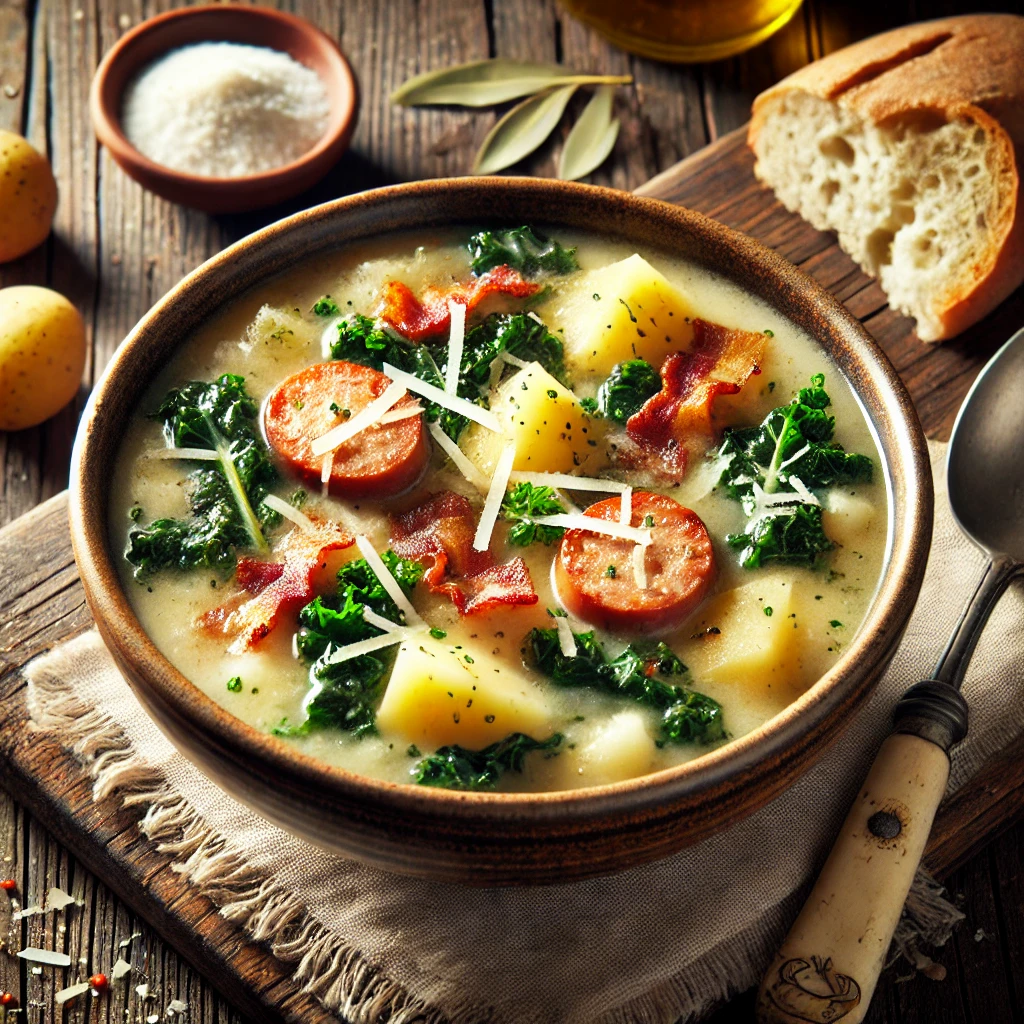
Zuppa Toscana (Olive Garden Copycat)
A rich and creamy soup loaded with Italian sausage, tender potatoes, and kale, this Copycat Olive Garden Zuppa Toscana is a restaurant-quality dish made easily at home. Warm, comforting, and packed with bold flavors, this soup is perfect for chilly evenings or a cozy family dinner.
There’s nothing quite like a warm, creamy bowl of Zuppa Toscana on a chilly evening. This copycat version of the popular Olive Garden soup brings the same bold flavors to your home kitchen, without the restaurant price tag. Loaded with savory Italian sausage, tender potatoes, fresh kale, and crispy bacon, this soup is the perfect balance of rich and hearty flavors. Whether you’re making it for a cozy dinner or meal prepping for the week, this soup is sure to become a household favorite.
Why You’ll Love This Recipe
This Zuppa Toscana recipe is incredibly easy to make, requiring just one pot and minimal ingredients. With a creamy, garlicky broth and perfectly seasoned sausage, each bite is packed with warmth and comfort. Plus, it’s highly customizable—swap the sausage for a milder version, add extra veggies, or use turkey bacon for a lighter twist. You can even make it dairy-free by substituting coconut milk for the heavy cream!
Serving Suggestions & Pairings
This soup is a meal on its own, but it pairs beautifully with crusty bread, homemade garlic knots, or a fresh side salad. If you want to keep things simple, serve it alongside a warm loaf of Italian bread to soak up the rich, flavorful broth. For an extra touch of indulgence, top your soup with freshly grated Parmesan cheese and a drizzle of olive oil.
Storage & Meal Prep Tips
Zuppa Toscana is perfect for meal prepping and storing leftovers. Keep it in an airtight container in the fridge for up to 4 days, and simply reheat it on the stovetop or in the microwave. If you want to freeze it, hold off on adding the cream until you’re ready to serve. Just thaw the soup, heat it up, and stir in the cream for a fresh, velvety finish.
This easy Copycat Zuppa Toscana Soup is a restaurant-quality dish that you can enjoy anytime at home. Whether you’re cooking for a family dinner or making a big batch for leftovers, it’s a comforting, satisfying meal that never disappoints!

Zuppa Toscana (Olive Garden Copycat)
Ingredients
- 1 lb Italian sausage mild or spicy
- 4 slices bacon chopped
- 1 small onion diced
- 4 cloves garlic minced
- 4 cups chicken broth
- 3 large russet potatoes sliced into thin rounds
- 1 tsp salt adjust to taste
- ½ tsp black pepper
- ½ tsp crushed red pepper flakes optional for spice
- 1 cup heavy cream
- 2 cups fresh kale chopped (or substitute with spinach)
- ½ cup grated Parmesan cheese for garnish
- Extra bacon crumbles for topping optional
Instructions
- In a large pot or Dutch oven over medium heat, cook the chopped bacon until crispy. Remove with a slotted spoon and set aside. In the same pot, add the Italian sausage, breaking it into crumbles as it cooks. Once browned, remove and drain excess grease, leaving about 1 tablespoon for added flavor.
- Add diced onion to the pot and sauté for 3-4 minutes until softened. Stir in the minced garlic and cook for an additional 30 seconds until fragrant.
- Pour in the chicken broth, scraping up any browned bits from the bottom of the pot for extra flavor. Add the thinly sliced potatoes, salt, black pepper, and crushed red pepper flakes. Bring to a boil, then reduce the heat and let it simmer for about 15 minutes, or until the potatoes are tender.
- Once the potatoes are soft, stir in the heavy cream and fresh kale. Let it simmer for another 5 minutes until the kale is wilted and the soup is creamy.
- Ladle the soup into bowls and top with crispy bacon crumbles, grated Parmesan cheese, and additional red pepper flakes if desired. Serve hot with warm breadsticks or crusty bread.
Notes
- Make It Lighter: Use turkey sausage instead of pork, replace heavy cream with half-and-half, and swap bacon for turkey bacon.
- Storage: Store in an airtight container in the refrigerator for up to 4 days. Reheat over low heat, adding a splash of broth if needed.
- Freezing: Freeze for up to 3 months, but leave out the cream and add it fresh when reheating.
- Spicy Version: Use hot Italian sausage and extra red pepper flakes for a bolder kick.
- Vegetarian Option: Swap sausage for plant-based sausage and use vegetable broth instead of chicken broth.

Creamy Homestyle Potato Soup
This Creamy Homestyle Potato Soup is the ultimate comfort food, packed with rich flavors and a velvety texture. Made with simple, wholesome ingredients, it’s the perfect dish for chilly evenings, family dinners, or meal prep. Topped with crispy bacon, shredded cheese, and fresh green onions, this potato soup is both satisfying and easy to make.
The Secret to a Rich and Creamy Potato Soup
The secret to achieving a luxuriously creamy potato soup lies in how the potatoes are cooked and blended. Start by simmering the diced potatoes in broth until fork-tender. This ensures they absorb maximum flavor while softening perfectly. Instead of blending the entire batch, mash half of the potatoes for a thick, creamy consistency while leaving some chunks for a satisfying texture. Adding a roux made from butter and flour helps create a smooth, velvety base.
How to Make the Best Potato Soup
1️⃣ Sauté the Aromatics: In a large pot, melt butter over medium heat. Add the chopped onion and cook until soft, about 3-4 minutes. Stir in the minced garlic and cook for another 30 seconds until fragrant.
2️⃣ Simmer the Potatoes: Pour in the broth and add the diced potatoes. Bring to a gentle boil, then reduce the heat and let simmer for about 15-20 minutes, or until the potatoes are fork-tender.
3️⃣ Make it Creamy: In a small bowl, whisk together flour and a few tablespoons of milk until smooth. Stir this mixture into the soup, then slowly add the remaining milk, stirring constantly. Simmer for another 5-10 minutes until the soup thickens.
4️⃣ Blend for Perfect Texture: Mash half of the potatoes using a potato masher or blend part of the soup with an immersion blender for extra creaminess while keeping some chunks.
5️⃣ Finish with Flavor: Stir in sour cream, salt, black pepper, and smoked paprika. Simmer for another 5 minutes to let the flavors meld.
Best Toppings for Potato Soup
The toppings you choose can take this soup to the next level! Classic options like shredded cheddar cheese, crispy bacon, and sliced green onions add the perfect balance of creaminess and crunch. If you love a hint of spice, add a dash of hot sauce or cayenne pepper. Want a lighter version? Skip the bacon and opt for Greek yogurt instead of sour cream.
How to Store & Reheat Potato Soup
This potato soup stores beautifully, making it an excellent meal prep option.
- Refrigeration: Store leftovers in an airtight container for up to 4 days.
- Freezing: This soup can be frozen, but dairy-based soups may slightly change texture. Freeze in portions and thaw overnight before reheating.
- Reheating: Warm over medium-low heat on the stove, stirring occasionally. If needed, add a splash of milk or broth to bring back the creamy consistency.
FAQs for Creamy Potato Soup
1. Can I use a different type of potato?
Yes! Russet potatoes create a fluffy, starchy texture, but Yukon Gold or red potatoes will work well too.
2. How can I make this soup dairy-free?
Use coconut milk or cashew cream instead of milk and sour cream. Substitute butter with olive oil.
3. Can I make this soup in a slow cooker?
Absolutely! Add all ingredients except the milk, flour, and sour cream to a slow cooker. Cook on low for 6-7 hours or high for 3-4 hours, then stir in the dairy components before serving.
4. How can I thicken the soup more?
For an even thicker soup, add an extra tablespoon of flour to the roux or blend more potatoes.
5. Can I make this soup vegetarian?
Yes! Swap the chicken broth for vegetable broth and skip the bacon topping.

Creamy Homestyle Potato Soup
Ingredients
For the Soup:
- 4 large russet potatoes peeled and diced
- 1 small onion finely chopped
- 3 cloves garlic minced
- 4 cups chicken or vegetable broth
- 1 ½ cups whole milk or heavy cream
- ½ cup sour cream
- 2 tablespoons butter
- 2 tablespoons all-purpose flour
- ½ teaspoon salt or to taste
- ½ teaspoon black pepper
- ½ teaspoon smoked paprika optional
For Toppings (Optional):
- ½ cup shredded cheddar cheese
- 4 slices bacon cooked and crumbled
- 2 green onions sliced
- ¼ cup sour cream
Instructions
- Sauté the Aromatics: In a large pot, melt butter over medium heat. Add the chopped onion and cook until soft, about 3-4 minutes. Stir in the minced garlic and cook for another 30 seconds until fragrant.
- Simmer the Potatoes: Pour in the broth and add the diced potatoes. Bring to a gentle boil, then reduce the heat and let simmer for about 15-20 minutes, or until the potatoes are fork-tender.
- Make it Creamy: In a small bowl, whisk together flour and a few tablespoons of milk until smooth. Stir this mixture into the soup, then slowly add the remaining milk, stirring constantly. Simmer for another 5-10 minutes until the soup thickens.
- Blend for Perfect Texture: Mash half of the potatoes using a potato masher or blend part of the soup with an immersion blender for extra creaminess while keeping some chunks.
- Finish with Flavor: Stir in sour cream, salt, black pepper, and smoked paprika. Simmer for another 5 minutes to let the flavors meld.
Notes
- Choosing the Right Potatoes: Russet potatoes make the soup extra creamy, while Yukon Gold adds a buttery flavor. Use a mix for the best results.
- Thickening Tip: If you prefer a thicker soup, mash some of the potatoes after cooking or add an extra tablespoon of flour when making the roux.
- Make it Dairy-Free: Swap the butter for olive oil, use coconut milk or cashew cream instead of heavy cream, and opt for a plant-based cheese substitute.
- Storage & Reheating: Store leftovers in an airtight container in the refrigerator for up to 4 days. Reheat on the stovetop over low heat, adding a splash of milk or broth if it thickens too much.
- Freezing Instructions: To freeze, let the soup cool completely, then transfer to freezer-safe containers. Freeze for up to 3 months. Thaw overnight in the fridge before reheating.
- Topping Variations: Try adding crispy fried onions, sour cream, croutons, or even a drizzle of hot sauce for extra flavor.
- Serving Suggestions: Pair with warm, crusty bread, a side salad, or a grilled cheese sandwich for the ultimate cozy meal.
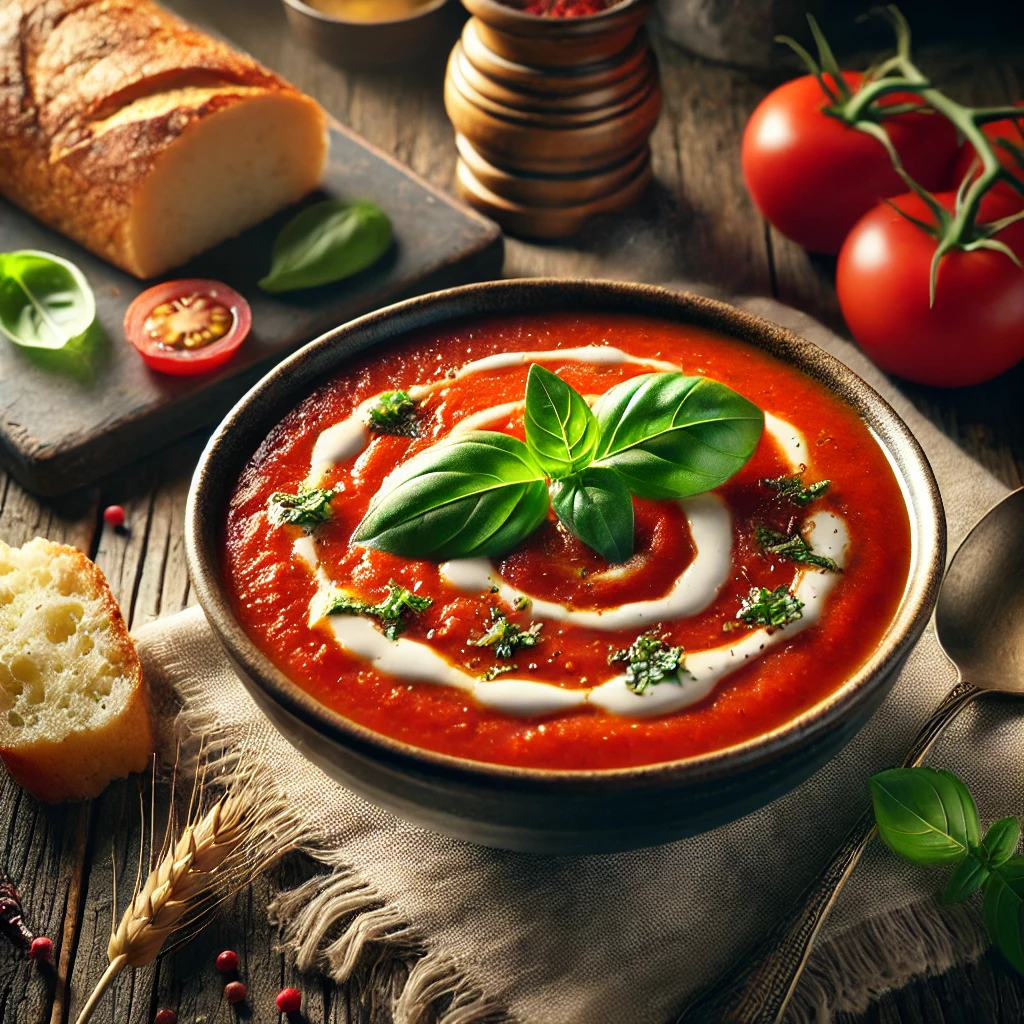
Creamy Roasted Tomato Basil Soup
A comforting bowl of Creamy Roasted Tomato Basil Soup is the perfect way to warm up on chilly days. This homemade soup is packed with deep, rich flavors from roasted tomatoes, garlic, and fresh basil. It’s creamy, smooth, and pairs beautifully with a side of crusty bread or a classic grilled cheese sandwich. Best of all, it’s easy to make and can be customized to your taste!
Nothing warms the soul quite like a bowl of Creamy Roasted Tomato Basil Soup. Whether it’s the chill of winter or a rainy spring evening, this classic soup delivers rich, velvety texture and deep tomato flavor with every spoonful. Roasting the tomatoes enhances their natural sweetness while garlic and fresh basil add layers of complexity. The best part? It’s easy to make and requires simple pantry ingredients. Serve it as a main dish with a warm loaf of crusty bread or alongside a hearty sandwich for a complete and satisfying meal.
The Secret to Perfect Roasted Tomatoes
The key to making this soup burst with flavor lies in the roasting process. Fresh tomatoes are sliced in half and drizzled with olive oil, then sprinkled with oregano, salt, and pepper before being slow-roasted in the oven. This caramelizes the natural sugars in the tomatoes, deepening their flavor and giving them a subtle smokiness. Roasted garlic cloves, added to the pan, infuse the soup with a mild, aromatic sweetness that blends beautifully with the acidity of the tomatoes. The result is a soup that tastes like it’s been simmering for hours, even though it only takes about 40 minutes to prepare.
Why Fresh Basil Makes All the Difference
Fresh basil is the star herb in this soup, bringing in a bright, slightly sweet contrast to the richness of the roasted tomatoes. Adding it toward the end of cooking ensures that its delicate, fragrant notes remain fresh and vibrant rather than cooked down. If you don’t have fresh basil on hand, dried basil can be used as a substitute, though the flavor won’t be as bold. Some cooks like to blend in a small amount of Parmesan cheese with the basil for an extra savory kick, but the soup is just as delicious in its simplest form.
How to Make This Soup Extra Creamy
A good creamy tomato soup should have a velvety consistency without being too heavy. This is achieved by blending the roasted tomato mixture until completely smooth. A high-speed blender or an immersion blender works best for this step, ensuring that no chunks remain. Adding a splash of heavy cream (or coconut milk for a dairy-free version) gives the soup a luxurious texture while mellowing out any acidity from the tomatoes. For an even silkier finish, straining the soup through a fine-mesh sieve can remove any lingering bits of tomato skin or seeds.
Serving Ideas & Perfect Pairings
This soup is delicious on its own, but pairing it with homemade croutons, grilled cheese sandwiches, or garlic bread takes it to the next level. For a lighter option, serve it with a crisp green salad drizzled with balsamic vinaigrette. If you’re looking for a heartier meal, add shredded rotisserie chicken or cooked white beans for extra protein. Drizzling a swirl of basil pesto, balsamic glaze, or even a touch of chili oil on top before serving can add layers of depth and a gourmet touch to your homemade soup. Whether enjoyed as a cozy lunch or an elegant appetizer, this recipe is sure to become a staple in your kitchen.
FAQs
1. Can I use canned tomatoes instead of fresh?
Yes! Use two 28-ounce cans of whole peeled tomatoes and reduce the broth slightly.
2. Can I make this soup without cream?
Absolutely! The roasted tomatoes provide enough creaminess, or you can use coconut milk for a dairy-free alternative.
3. What’s the best way to make this soup spicier?
Add red pepper flakes while blending or a dash of hot sauce before serving.
4. How can I thicken the soup?
Simmer the soup longer to reduce excess liquid or stir in a small amount of cornstarch slurry (1 tsp cornstarch + 1 tbsp water).
5. What’s the best way to make this soup extra creamy?
Use an immersion blender to get a silky smooth texture and add an extra ½ cup of heavy cream.
Creamy Roasted Tomato Basil Soup
Ingredients
For the Roasted Tomatoes:
- 2 lbs fresh Roma or vine-ripened tomatoes halved
- 3 tbsp olive oil
- 4 cloves garlic peeled and smashed
- 1 tsp salt
- ½ tsp black pepper
- 1 tsp dried oregano
For the Soup:
- 1 tbsp butter or olive oil
- 1 small onion finely chopped
- 2 cups vegetable broth or chicken broth
- ½ cup heavy cream or coconut milk for dairy-free
- 1 tsp sugar optional, helps balance acidity
- ½ tsp red pepper flakes optional, for heat
- ½ cup fresh basil leaves chopped
- Salt & pepper to taste
Instructions
- Preheat your oven to 400°F (200°C).
- Arrange the halved tomatoes and garlic on a baking sheet. Drizzle with olive oil and sprinkle with salt, black pepper, and oregano.
- Roast for 30-35 minutes, until the tomatoes are soft and slightly caramelized.
- In a large pot, melt butter or olive oil over medium heat.
- Add chopped onions and sauté until soft, about 3-4 minutes.
- Stir in the roasted tomatoes and garlic, then pour in the vegetable broth.
- Using an immersion blender, puree the soup until smooth. If using a regular blender, work in batches and blend carefully.
- Return the soup to the pot and stir in heavy cream (or coconut milk), sugar, and red pepper flakes if using.
- Simmer for 5 more minutes, then add chopped fresh basil and stir well.
- Taste and adjust seasoning as needed.
Notes
Recipe Notes
- Best tomatoes to use? Roma, vine-ripened, or San Marzano tomatoes provide the best flavor.
- Want a smoky taste? Add a pinch of smoked paprika for depth.
- Make it vegan by using vegetable broth and replacing dairy with coconut milk.
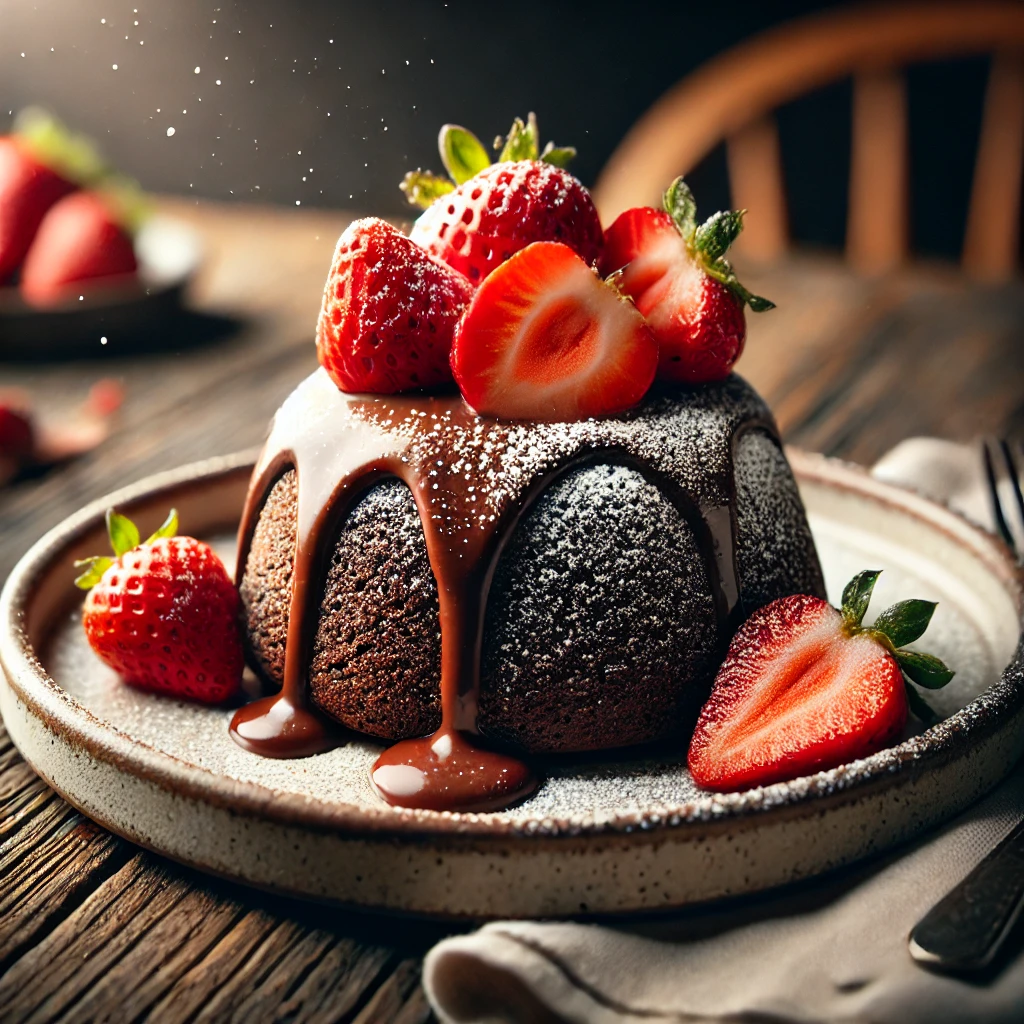
Strawberry Chocolate Lava Cakes
These Strawberry Chocolate Lava Cakes are the perfect Valentine’s Day treat, featuring a rich and gooey molten chocolate center with a sweet strawberry surprise. With a crispy outer layer and a warm, indulgent filling, these individual-sized cakes are sure to impress your loved ones.
Why You’ll Love These Strawberry Chocolate Lava Cakes
There’s something truly special about cutting into a warm, rich chocolate cake and watching the molten center ooze out. These Strawberry Chocolate Lava Cakes take it up a notch with a sweet, fruity surprise in the middle. The balance of decadent chocolate and fresh strawberry filling creates an irresistible dessert that feels both indulgent and refreshing. Whether you’re celebrating Valentine’s Day or simply craving a luxurious treat, this recipe is guaranteed to impress!
The Secret to a Perfect Lava Cake
The key to getting the perfect lava cake texture is baking just the right amount of time. Too long in the oven, and you’ll end up with a fully set cake instead of a molten center. Too little, and the cake won’t hold its shape when flipped. Aim for 10-12 minutes of baking, ensuring the edges are firm while the center stays soft. The strawberry filling also enhances the gooeyness, blending seamlessly with the warm chocolate once cut open.
Customizing Your Lava Cakes
These lava cakes are versatile and easy to customize based on your taste. Instead of strawberry jam, you can use raspberry preserves, peanut butter, or caramel sauce for different flavor twists. If you love extra indulgence, add chocolate chips or a splash of espresso to intensify the chocolate richness. Prefer a touch of crunch? Sprinkle in some crushed nuts or shredded coconut for added texture.
Serving Suggestions for the Ultimate Dessert Experience
Lava cakes taste amazing on their own, but pairing them with ice cream or whipped cream makes them even more delightful. A scoop of vanilla bean ice cream melting over the warm cake creates a luscious combination. For extra elegance, drizzle melted chocolate or caramel sauce on top, or garnish with fresh mint and berries to add a refreshing contrast.
Storage and Make-Ahead Tips
If you’re hosting a romantic dinner or planning ahead, these lava cakes can be prepped in advance. Simply assemble the batter and fill the ramekins, then refrigerate them for up to 24 hours before baking. When ready, pop them in the oven and enjoy a fresh, gooey dessert without any hassle. Leftovers? While lava cakes are best eaten fresh, you can store them in an airtight container for up to 2 days. Reheat in the microwave for 15-20 seconds, and they’ll be warm and gooey all over again!
FAQs for Strawberry Chocolate Lava Cakes
1. Can I use frozen strawberries instead of fresh ones?
Yes! If using frozen strawberries, thaw and drain any excess liquid before using. This prevents the filling from becoming too watery and helps maintain the cake’s structure.
2. How do I know when the lava cakes are done baking?
The edges should be firm and set, while the center should still look slightly soft and jiggly. This typically takes about 10-12 minutes in a preheated oven at 425°F (218°C).
3. Can I make these lava cakes ahead of time?
Yes! Prepare the batter, pour it into ramekins, and refrigerate for up to 24 hours before baking. When ready, bake directly from the fridge, adding an extra 1-2 minutes to the baking time.
4. Can I bake these lava cakes without ramekins?
If you don’t have ramekins, you can use a muffin tin instead. Just be sure to grease and flour each cup well so the cakes release easily after baking.
5. What can I use instead of strawberry jam for the filling?
You can swap it with raspberry jam, caramel sauce, peanut butter, Nutella, or even a piece of chocolate for different flavors.
6. How do I prevent the lava cakes from sticking to the ramekins?
Generously grease and dust the ramekins with butter and cocoa powder before adding the batter. This helps the cakes release easily after baking.
7. Can I reheat leftover lava cakes?
Yes, but reheating can cause the gooey center to set. For best results, microwave for 15-20 seconds or reheat in a 350°F oven for a few minutes until warm.
8. Can I make this recipe gluten-free?
Absolutely! Substitute gluten-free all-purpose flour in place of regular flour. The texture may vary slightly, but it will still be delicious.
9. What type of chocolate should I use?
Use high-quality dark chocolate (60-70% cocoa) for the best results. Chocolate chips can work in a pinch, but they may not create as rich of a molten center.
10. How do I store leftover lava cakes?
Store them in an airtight container in the fridge for up to 2 days. To reheat, microwave for 15-20 seconds or bake at 350°F for 5 minutes.

Strawberry Chocolate Lava Cakes
Ingredients
For the Lava Cakes:
- ½ cup 1 stick unsalted butter, plus extra for greasing
- 4 oz semi-sweet chocolate chopped
- 2 large eggs
- 2 large egg yolks
- ½ cup powdered sugar
- ¼ cup all-purpose flour
- ½ teaspoon vanilla extract
- ¼ teaspoon salt
For the Strawberry Center:
- ¼ cup strawberry jam or preserves
- 2 tablespoons fresh strawberries finely chopped
For Garnish (Optional):
- Powdered sugar for dusting
- Fresh strawberries halved
- Whipped cream or vanilla ice cream
Instructions
- Preheat your oven to 425°F (220°C). Grease four 6-ounce ramekins with butter and lightly dust them with cocoa powder to prevent sticking.
- In a microwave-safe bowl, combine the chopped chocolate and butter. Microwave in 20-second intervals, stirring after each, until smooth. Set aside to cool slightly.
- In a separate bowl, whisk together the eggs, egg yolks, powdered sugar, vanilla extract, and salt until light and fluffy. Gradually fold in the melted chocolate mixture. Sift in the flour and gently mix until fully combined.
- In a small bowl, mix the strawberry jam and finely chopped strawberries. Divide half of the cake batter between the ramekins. Spoon about 1 teaspoon of the strawberry filling into the center of each, then cover with the remaining batter.
- Place the ramekins on a baking sheet and bake for 10-12 minutes, until the edges are firm but the center is slightly soft. The cakes should still have a molten, gooey center.
- Let the lava cakes cool for 1-2 minutes, then run a knife around the edges and carefully invert them onto plates. Dust with powdered sugar, add fresh strawberries, and serve with whipped cream or vanilla ice cream.
Notes
Recipe Notes
✔ Make-Ahead Option: You can refrigerate the filled ramekins for up to 24 hours before baking. Just add an extra 1-2 minutes to the baking time. ✔ Dairy-Free Alternative: Use vegan butter and dairy-free chocolate. ✔ Different Flavors: Try swapping the strawberry jam for raspberry or caramel sauce for a unique twist. ✔ Storage & Reheating: Store leftovers in an airtight container for up to 2 days. Reheat in the microwave for 15-20 seconds for a warm, gooey center.
Raspberry White Chocolate Mousse Cups
Creamy Raspberry White Chocolate Mousse Cups make the perfect no-bake Valentine’s Day dessert! Light, elegant, and easy to make ahead.They feature layers of smooth, creamy white chocolate mousse, a tangy raspberry compote, and a crisp chocolate shell. This no-bake treat is elegant, easy to make, and a show-stopping dessert for any special occasion. Whether you’re planning a romantic dinner, a festive gathering, or simply treating yourself, these mousse cups are a dreamy combination of sweet and tangy flavors.
What Makes These Raspberry White Chocolate Mousse Cups Special?
These Raspberry White Chocolate Mousse Cups are the ultimate Valentine’s Day treat, combining the rich creaminess of white chocolate with the sweet and tart flavor of fresh raspberries. The delicate mousse is light and airy, making each bite melt in your mouth. Whether you’re planning a romantic dinner at home or hosting a festive gathering, these elegant dessert cups will impress your loved ones. Best of all, they require minimal effort but deliver maximum indulgence.
The Perfect Balance of Flavors
One of the best things about this dessert is the perfect harmony between the creamy white chocolate mousse and the refreshing raspberry compote. The mousse is made with high-quality white chocolate and whipped cream, giving it a luxurious texture. The raspberry layer adds a touch of tartness, balancing out the sweetness and making each spoonful irresistible. If you’re a fan of chocolate-covered strawberries, this dessert will be right up your alley.
Easy Make-Ahead Dessert
If you’re short on time but still want to serve a fancy dessert, this recipe is perfect for you. The mousse can be prepared in advance and stored in the refrigerator until ready to serve. The raspberry compote can also be made ahead, allowing you to assemble everything effortlessly when it’s time to enjoy. This makes it an excellent choice for dinner parties or Valentine’s Day celebrations, where you want to spend less time in the kitchen and more time with your loved ones.
Serving Ideas and Presentation Tips
Presentation plays a big role in making desserts feel extra special. Serve these mousse cups in elegant glasses, small ramekins, or even chocolate cups for a stunning look. Garnish with fresh raspberries, white chocolate shavings, or a dusting of powdered sugar for a beautiful finishing touch. For an extra romantic flair, add an edible flower or a drizzle of raspberry sauce on top.
Customizing the Recipe
This recipe is incredibly versatile and can be adapted to suit your preferences. If you prefer a richer taste, try adding a splash of raspberry liqueur to the compote. For a lower-sugar option, swap out the white chocolate for sugar-free chocolate and use a natural sweetener. You can also experiment with different fruit toppings like strawberries, blueberries, or blackberries to give the mousse a fresh twist.
Storage and Make-Ahead Tips
To keep your Raspberry White Chocolate Mousse Cups fresh, store them in the refrigerator for up to 3 days. Cover them with plastic wrap or airtight lids to prevent them from absorbing any odors. If you’re making them ahead for a special occasion, prepare the mousse and compote separately, then assemble them just before serving for the best texture and flavor.
Variations & Substitutions
✔ Dairy-Free Option: Use dairy-free white chocolate and coconut cream instead of heavy cream.
✔ Different Berries: Swap raspberries for strawberries, blueberries, or blackberries.
✔ Dark Chocolate Mousse: Replace white chocolate with semi-sweet or dark chocolate for a richer taste.
FAQs
1. Can I make these mousse cups ahead of time?
Yes! These mousse cups are perfect for make-ahead desserts. Prepare them 1-2 days in advance and store them in the fridge until serving.
2. What can I use instead of silicone molds?
If you don’t have silicone muffin cups, you can use paper cupcake liners. Simply peel them off once the chocolate has hardened.
3. How do I prevent my mousse from being too runny?
Ensure that the whipping cream is properly whipped to soft peaks before folding in the white chocolate. Also, let the melted white chocolate cool slightly before combining.
4. Can I use store-bought raspberry jam instead of homemade compote?
Yes, but homemade raspberry compote has a fresher, tangier flavor that balances the sweetness of the mousse.
5. What other toppings can I add?
You can top your mousse cups with chopped nuts, coconut flakes, chocolate curls, or even edible flowers for an elegant look.

Raspberry White Chocolate Mousse Cups
Ingredients
For the Chocolate Cups:
- 1 ½ cups semi-sweet or dark chocolate chips
- 1 teaspoon coconut oil
For the White Chocolate Mousse:
- 1 cup white chocolate chips
- ½ cup heavy whipping cream for melting
- 1 cup heavy whipping cream for whipping
- 2 tablespoons powdered sugar
- 1 teaspoon vanilla extract
For the Raspberry Compote:
- 1 ½ cups fresh or frozen raspberries
- 3 tablespoons granulated sugar
- 1 tablespoon lemon juice
- 1 teaspoon cornstarch mixed with 1 tablespoon water
For Garnishing:
- Fresh raspberries
- White chocolate shavings
- Mint leaves
Instructions
Step 1: Make the Chocolate Cups
- Melt the chocolate chips with coconut oil in a microwave-safe bowl, heating in 20-second intervals, stirring in between until smooth.
- Using a pastry brush or spoon, coat the insides of silicone muffin cups or cupcake liners with the melted chocolate. Make sure to create a thick, even layer.
- Place the cups in the freezer for about 15 minutes to harden.
- If necessary, apply a second coat of melted chocolate and freeze again for another 10 minutes.
- Once set, carefully peel off the silicone molds or cupcake liners and place the chocolate cups on a tray.
Step 2: Prepare the Raspberry Compote
- In a small saucepan over medium heat, combine raspberries, sugar, and lemon juice.
- Stir occasionally and allow the mixture to simmer for about 5 minutes, until raspberries begin to break down.
- Mix the cornstarch with water and stir it into the raspberry mixture. Cook for another 1-2 minutes, until thickened.
- Remove from heat and let the compote cool completely.
Step 3: Make the White Chocolate Mousse
- In a microwave-safe bowl, melt white chocolate chips with ½ cup of heavy cream in 20-second intervals, stirring between each until smooth. Let cool slightly.
- In a separate large bowl, beat the remaining 1 cup of heavy cream with powdered sugar and vanilla extract until soft peaks form.
- Gently fold the melted white chocolate mixture into the whipped cream until fully incorporated.
Step 4: Assemble the Mousse Cups
- Spoon a small amount of raspberry compote into the bottom of each chocolate cup.
- Pipe or spoon the white chocolate mousse over the raspberry layer, filling each cup to the top.
- Smooth the tops and refrigerate for at least 2 hours to allow the mousse to set.
Step 5: Garnish & Serve
- Before serving, top each mousse cup with fresh raspberries, white chocolate shavings, and mint leaves.
- Serve chilled and enjoy this romantic Valentine’s Day treat!
Notes
Recipe Notes:
- Make-Ahead Option: These mousse cups can be prepared up to 24 hours in advance and stored in the refrigerator until ready to serve.
- Dairy-Free Alternative: Substitute heavy cream with full-fat coconut milk and use dairy-free white chocolate.
- Sweetness Level: Adjust the powdered sugar according to taste, especially if using sweeter white chocolate.
- Presentation Tip: Garnish with fresh raspberries, white chocolate shavings, or a drizzle of raspberry sauce for an elegant touch.
- Serving Suggestion: Best served chilled, paired with shortbread cookies or chocolate wafers.
✔ Allow time for chilling so the mousse holds its shape when served.
✔ For extra decadence, drizzle melted dark chocolate over the top before serving.
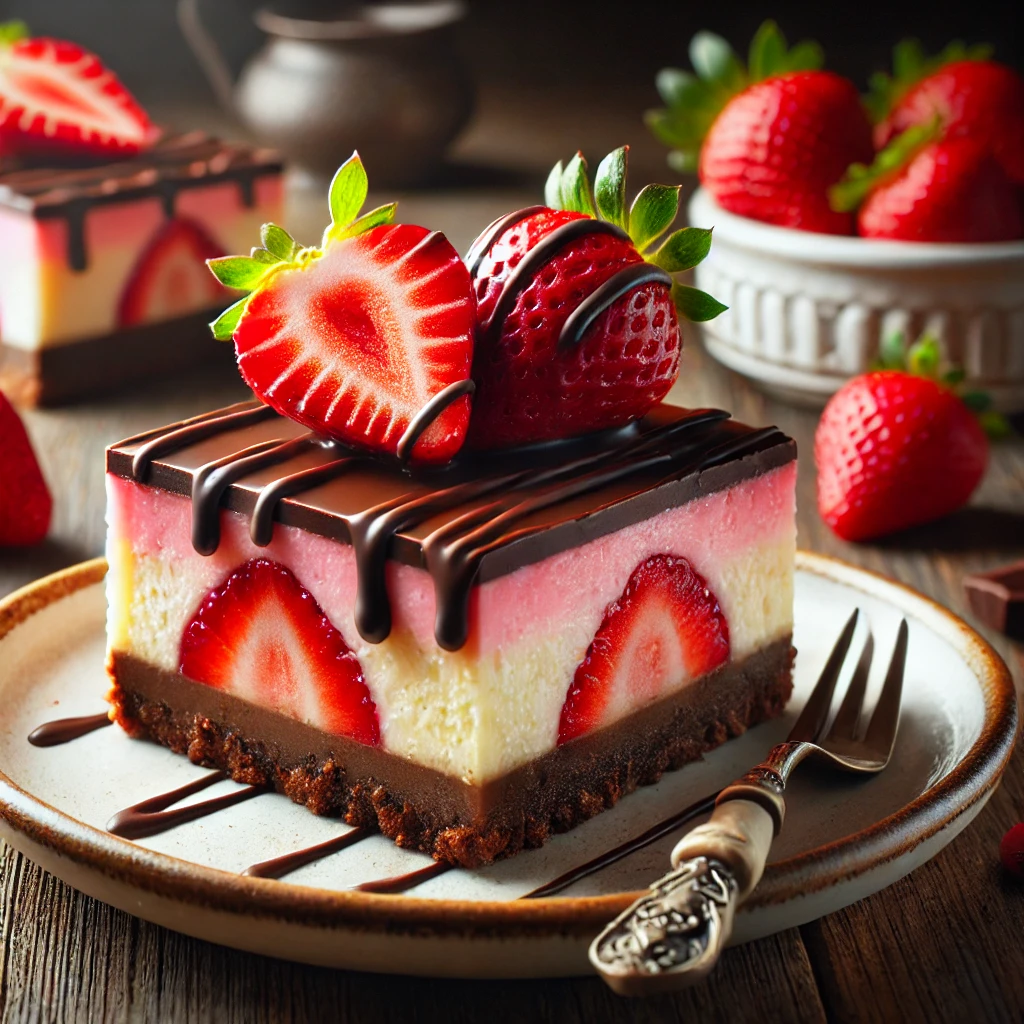
Chocolate Covered Strawberry Cheesecake Bars
Indulge in these Chocolate Covered Strawberry Cheesecake Bars, a dreamy dessert that combines rich, creamy cheesecake with a luscious strawberry swirl and a smooth chocolate coating. Perfect for Valentine’s Day, these bars are a delightful blend of flavors and textures that will impress your loved ones. Whether you’re making them for a romantic dinner, a special celebration, or just to satisfy a sweet tooth, this easy-to-make recipe will have everyone coming back for more!
Why You’ll Love These Cheesecake Bars
These chocolate-covered strawberry cheesecake bars are more than just a dessert—they’re a Valentine’s Day showstopper! Here’s why you’ll love them:
✔ Perfectly Balanced Flavors – The creamy cheesecake, fresh strawberries, and rich chocolate blend harmoniously.
✔ Easy to Make – While they look fancy, the steps are simple and beginner-friendly.
✔ Make-Ahead Friendly – These bars can be prepared in advance, making them great for parties and special occasions.
✔ Portable & Shareable – Unlike traditional cheesecake, these bars are easy to slice and serve.
Ingredients You’ll Need
Before getting started, gather these simple ingredients for each layer:
Crust:
- 1 ½ cups graham cracker crumbs
- ¼ cup granulated sugar
- ½ cup unsalted butter, melted
Cheesecake Filling:
- 16 oz cream cheese, softened
- ½ cup granulated sugar
- 2 large eggs
- 1 tsp vanilla extract
- ½ cup sour cream
Strawberry Swirl:
- ¾ cup fresh strawberries, pureed
- 2 tbsp sugar
- 1 tsp cornstarch mixed with 1 tbsp water
Chocolate Coating:
- 1 ½ cups semi-sweet chocolate chips
- 2 tbsp coconut oil or butter
Step-by-Step Instructions
Step 1: Prepare the Crust
- Preheat the oven to 325°F (163°C) and line an 8×8-inch baking pan with parchment paper.
- In a bowl, mix graham cracker crumbs, sugar, and melted butter until the mixture resembles wet sand.
- Press the crust firmly into the pan, creating an even layer. Bake for 10 minutes, then set aside.
Step 2: Make the Cheesecake Filling
- In a large bowl, beat cream cheese and sugar until smooth.
- Add eggs, one at a time, mixing after each addition. Stir in vanilla extract and sour cream until combined.
Step 3: Create the Strawberry Swirl
- In a small saucepan over medium heat, cook strawberry puree and sugar until bubbling.
- Stir in the cornstarch mixture and simmer until thickened.
- Let cool slightly before swirling into the cheesecake batter.
Step 4: Assemble & Bake
- Pour the cheesecake filling over the cooled crust.
- Drop spoonfuls of the strawberry mixture on top, then use a knife to swirl it in.
- Bake for 35-40 minutes until the center is set but slightly jiggly.
- Cool completely, then refrigerate for at least 4 hours (preferably overnight).
Step 5: Coat with Chocolate
- Melt chocolate chips and coconut oil until smooth.
- Slice the chilled cheesecake into bars, then dip each bar into the melted chocolate or drizzle on top.
- Let the chocolate set before serving.
Variations & Substitutions
- Gluten-Free Option: Use gluten-free graham crackers for the crust.
- Dairy-Free Alternative: Substitute dairy-free cream cheese and coconut cream.
- Extra Chocolate: Stir mini chocolate chips into the cheesecake batter for a richer taste.
- Mixed Berry Swirl: Try a combination of raspberries and strawberries for a tangy twist.
Serving Suggestions
These cheesecake bars are perfect for any celebration, but here’s how to make them extra special:
- Valentine’s Day Dessert: Pair with a glass of sparkling wine and fresh strawberries.
- Party Favorite: Serve on a dessert platter with truffles and chocolate-covered fruit.
- Casual Treat: Enjoy with a hot cup of coffee or tea.
For an added touch, dust with powdered sugar or garnish with whipped cream and fresh berries before serving!
Storage & Make-Ahead Tips
- Refrigerate: Store leftovers in an airtight container for up to 5 days.
- Freeze: Wrap bars tightly and freeze for up to 2 months. Thaw overnight in the refrigerator.
- Make-Ahead: Prepare the cheesecake the day before and coat with chocolate just before serving for the best texture.
These Chocolate Covered Strawberry Cheesecake Bars are irresistibly rich, creamy, and chocolatey, making them the ultimate Valentine’s Day dessert. Whether you’re making them for a romantic evening or just indulging in a little self-care, these bars are guaranteed to satisfy your sweet tooth!
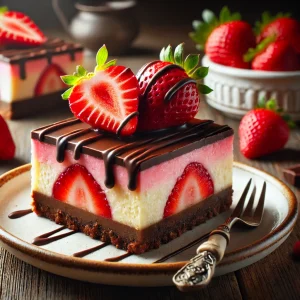
Chocolate Covered Strawberry Cheesecake Bars
Ingredients
Crust:
- 1 ½ cups graham cracker crumbs about 10 full graham crackers
- 5 tbsp unsalted butter melted
- ¼ cup granulated sugar
Cheesecake Filling:
- 16 oz cream cheese softened
- ½ cup granulated sugar
- 2 large eggs
- 1 tsp vanilla extract
- ½ cup sour cream
- ½ cup strawberry puree fresh or frozen strawberries, blended
Topping:
- 1 cup dark chocolate chips
- 1 tbsp coconut oil
- Fresh strawberries for garnish
- Optional: Pink or red sprinkles for a festive touch
Instructions
- Preheat your oven to 325°F (160°C) and line an 8×8-inch baking pan with parchment paper.
- In a medium bowl, combine graham cracker crumbs, melted butter, and sugar. Mix until the texture resembles wet sand.
- Press the mixture firmly into the bottom of the prepared pan, ensuring it’s evenly distributed.
- Bake for 8-10 minutes until lightly golden. Set aside to cool.
- In a large bowl, beat the cream cheese and sugar with a hand mixer until smooth and creamy.
- Add the eggs one at a time, mixing well after each addition.
- Mix in the vanilla extract, sour cream, and strawberry puree until fully incorporated.
- Pour the filling over the cooled crust and spread evenly.
- Bake in the preheated oven for 35-40 minutes, or until the center is set and the edges are slightly golden.
- Remove from the oven and let cool to room temperature. Then refrigerate for at least 4 hours or overnight for best results.
- Melt the chocolate chips and coconut oil together in a microwave-safe bowl in 20-second increments, stirring until smooth.
- Pour the melted chocolate over the chilled cheesecake, spreading it evenly with a spatula.
- Garnish with fresh strawberries and sprinkles while the chocolate is still soft.
- Once the chocolate has set, use a sharp knife to cut the cheesecake into bars. Clean the knife between slices for neat edges.
- Serve chilled and enjoy the creamy, chocolatey, and fruity perfection!
Notes
Recipe Notes
- Strawberry Puree Tip: If using frozen strawberries, thaw them completely and drain excess liquid before blending.
- Make-Ahead: These bars can be prepared up to 2 days in advance. Store in an airtight container in the fridge.
- Substitutions: Swap graham cracker crumbs for Oreo crumbs for a chocolatey crust.
- Decoration Tip: Drizzle extra melted white chocolate on top for an elegant touch.
