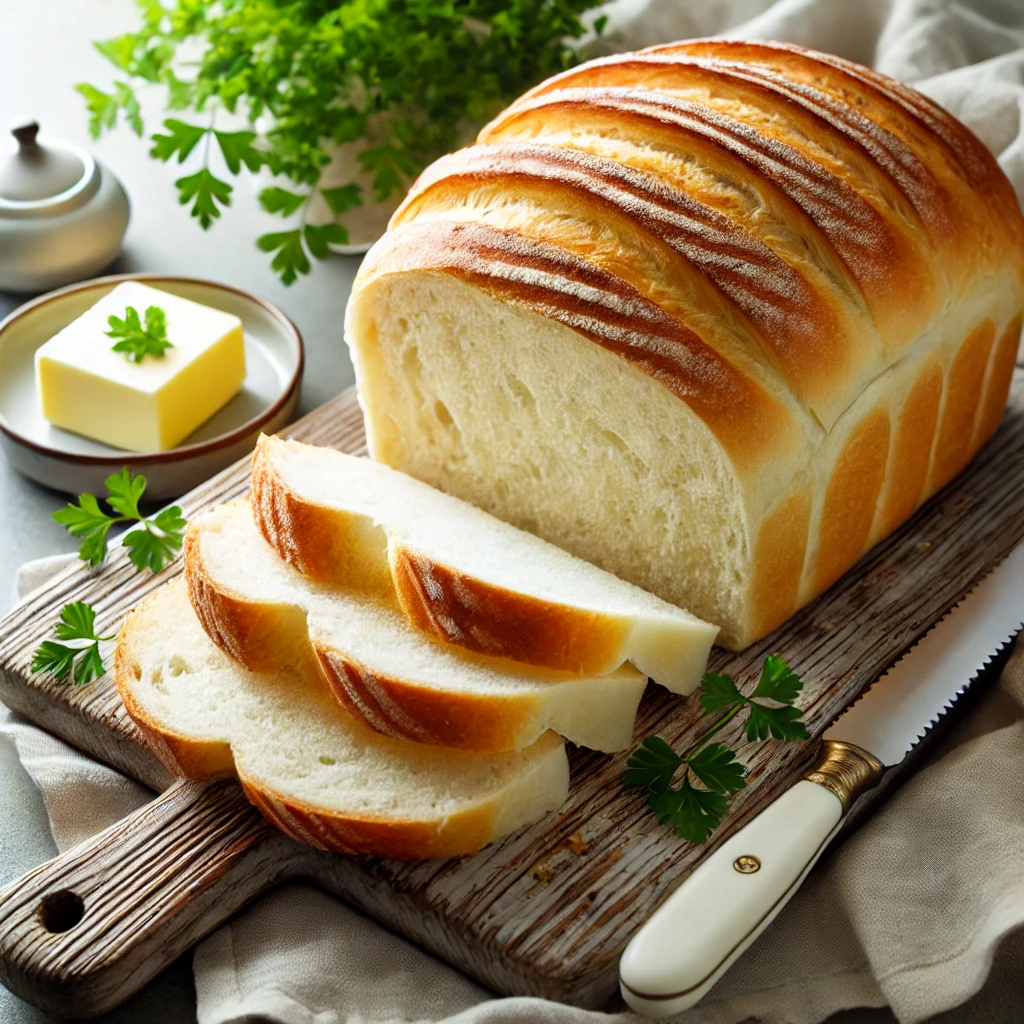
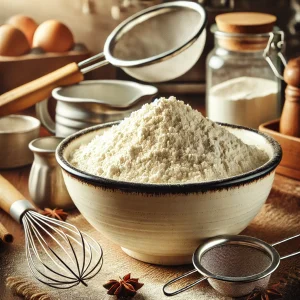
Homemade White Bread Recipe
There’s No Place Like Home for Fresh-Baked Bread
Making homemade white bread is not just about the final product—it’s about the process. From the moment you mix the ingredients to the smell wafting through your kitchen, this recipe brings warmth and comfort to your home. Whether you’re making bread for your family, friends, or just yourself, this recipe is straightforward, beginner-friendly, and utterly satisfying.
What Makes This Bread So Good?
- Soft and Fluffy Texture: Achieved by the perfect balance of ingredients and two rises, this bread is tender yet holds its shape.
- Versatile Use: Whether you want sandwiches, toast, or garlic bread, this loaf is the perfect base.
- Simple Ingredients: Made from pantry staples, this recipe is affordable and accessible.
- No Preservatives: Unlike store-bought bread, you know exactly what goes into this loaf.
- Beginner-Friendly: Clear instructions and forgiving dough make this an excellent recipe for novice bakers.
Customization Ideas
This basic bread recipe is the perfect canvas for customization. Here are some ways to make it your own:
- Whole Wheat Bread: Substitute up to 50% of the all-purpose flour with whole wheat flour for a heartier loaf.
- Sweet Bread: Add 1/2 cup of raisins and a teaspoon of cinnamon to the dough for a delicious breakfast option.
- Herb Bread: Mix 1–2 teaspoons of dried rosemary, thyme, or Italian seasoning into the flour for a fragrant and savory twist.
- Cheese Bread: Knead in 1 cup of shredded cheddar or Parmesan cheese for a cheesy loaf.
- Garlic Bread: Add 2 teaspoons of garlic powder to the dough, and brush the crust with melted garlic butter before baking.
- Seeded Loaf: Sprinkle sunflower seeds, sesame seeds, or poppy seeds on top before baking for added crunch and flavor.
Troubleshooting Section
Even experienced bakers encounter challenges. Here’s how to troubleshoot common issues:
- Bread Didn’t Rise:
- Ensure your yeast is fresh and active. If the yeast mixture doesn’t bubble, the yeast may be expired.
- Keep the dough in a warm, draft-free place for rising.
- Dough is Too Sticky:
- Add flour 1 tablespoon at a time until the dough is soft but no longer sticky. Avoid adding too much flour, as it can make the bread dense.
- Bread is Dense:
- Make sure the dough rises fully during both proofing stages. Dense bread often results from under-rising.
- Knead the dough thoroughly to develop the gluten structure.
- Crust is Too Hard:
- Brush the crust with melted butter immediately after baking for a softer crust.
- Bread is Too Dry:
- Ensure you measure the flour correctly; too much flour can dry out the bread.
- Store the bread in an airtight container or bag to maintain freshness.
FAQs
- Can I make this bread without a stand mixer?
- Absolutely! This recipe is easy to knead by hand. It just requires a bit of elbow grease—knead for 8–10 minutes until smooth and elastic.
- How do I know when the dough is kneaded enough?
- The dough should be smooth and elastic. A good test is the “windowpane test”: stretch a small piece of dough between your fingers. If it forms a thin, translucent sheet without tearing, it’s ready.
- Can I freeze this bread?
- Yes! Freeze the baked and cooled loaves in airtight bags for up to 3 months. Thaw at room temperature and reheat if desired.
- Can I double this recipe?
- Yes, this recipe can easily be doubled. Just ensure your mixing bowl and oven have enough space.
- Can I use bread flour instead of all-purpose flour?
- Yes, bread flour works great and can create a chewier texture due to its higher protein content.
Why You’ll Love Making Homemade Bread
Making bread at home connects you to an age-old tradition. There’s a certain magic in seeing simple ingredients—flour, water, yeast, and sugar—transform into something extraordinary. This recipe gives you the confidence to bake like a pro, even if it’s your first attempt.
From the soft texture to the golden crust, every slice tells a story of comfort, care, and homemade love. Share it with your family, or keep it all for yourself—either way, this bread will become a staple in your kitchen.
Additional Tips for Storing Homemade Bread
Proper storage helps keep your homemade bread fresh and soft for as long as possible. Here are a few tips to ensure your loaves stay delicious:
- Room Temperature:
- Store at room temperature in an airtight container or bread box for up to 3 days. Make sure the bread is completely cooled before sealing it to prevent moisture buildup.
- Plastic Bag:
- A plastic bag can help keep the crust soft. Just make sure the bag is airtight, and it will preserve the bread for a couple of days.
- Freezing Bread:
- Freeze for longer storage: Once the bread has cooled completely, slice it into pieces and store in a freezer-safe bag. For whole loaves, wrap them tightly in plastic wrap or foil, then place in a freezer bag. Bread can be frozen for up to 3 months.
- Thawing: Thaw frozen bread at room temperature. If you’re in a hurry, you can microwave slices for 10-20 seconds or warm the whole loaf in the oven at 350°F for about 10-15 minutes.
- Refreshing Stale Bread:
- If your bread starts to get stale, you can revive it by lightly sprinkling it with water and placing it in a 350°F oven for 5-10 minutes. The moisture will help refresh the crust and texture.
Creative Ways to Serve Your Homemade White Bread
Homemade white bread is versatile and can be enjoyed in a variety of ways beyond the standard sandwich. Here are some creative ideas for serving your delicious loaf:
- Toast with Toppings:
- Slice your bread and toast it with a layer of butter, jam, or honey. You can also top it with avocado, cream cheese, or a sprinkle of cinnamon and sugar for a quick snack or breakfast.
- French Toast:
- Use day-old bread to make French toast. Dip slices in a mixture of eggs, milk, cinnamon, and a pinch of salt, then fry in butter until golden brown. Top with syrup, powdered sugar, or fresh berries.
- Bread Pudding:
- Transform leftover bread into a comforting dessert with a bread pudding. Cube the bread, soak it in a mixture of eggs, milk, sugar, and vanilla, then bake with a dash of cinnamon and nutmeg.
- Grilled Cheese Sandwich:
- Make the perfect grilled cheese sandwich with your homemade bread. The thick, soft slices work great for holding melty cheese and a crispy, golden crust.
- Croutons:
- Cut your bread into cubes, toss with olive oil, garlic, and herbs, and bake at 350°F for 15 minutes to make croutons. Perfect for adding to salads or soups.
- Garlic Bread:
- Spread your bread with garlic butter (butter mixed with garlic, parsley, and a pinch of salt), then bake at 375°F for 10-15 minutes until golden brown for the best homemade garlic bread.
- Bread for Dipping:
- Serve thick slices of your homemade bread with olive oil and balsamic vinegar for dipping or alongside a hearty soup or stew.
Final Thoughts
This homemade white bread recipe is more than just a basic loaf—it’s a versatile and comforting addition to any meal. Whether you’re enjoying it fresh out of the oven with butter or using it to create mouthwatering sandwiches and snacks, the possibilities are endless. The soft, fluffy texture and delicious flavor make this bread a must-have in your kitchen.
By customizing it with herbs, seeds, or even cheese, you can create a version of this bread that’s uniquely yours. And with simple storage techniques, you can keep your homemade loaves fresh for days or even freeze them for later enjoyment.
Bake, slice, and enjoy the wonderful, timeless pleasure of homemade bread!

Homemade White Bread Recipe
Ingredients
- 2 ¼ tsp 1 packet rapid yeast
- ¼ cup sugar
- 1 ¼ tsp salt
- ¼ cup unsalted butter or shortening (melted)
- 6 ½-7 ½ cups all-purpose flour (adjust as needed for a soft dough)
Instructions
- In a large mixing bowl, whisk together 6 cups of flour, sugar, and salt. Reserve additional flour for kneading.
- In a large mixing bowl, whisk together 6 cups of flour, sugar, salt, and the rapid yeast (2 1/4 tsp). Mixing the yeast directly into the dry ingredients ensures even distribution.
- Add the 2 cups lukewarm water and melted butter (or shortening) to the dry ingredients. Mix until a shaggy dough forms.
- Knead on a floured surface for 8–10 minutes (or use a stand mixer with a dough hook for 6–8 minutes), adding reserved flour as needed. The dough should be soft and slightly tacky but not sticky.
- Place the dough in a greased bowl, cover, and let rise in a warm place until doubled in size (about 1 hour).
- Punch down the dough, shape into loaves or rolls, and place in greased pans. Cover and let rise again until doubled (about 30–45 minutes).
- Bake at 375°F for 25–30 minutes for loaves or 18–20 minutes for rolls, or until golden brown and the internal temperature reaches 190°F.
Notes
Recipe Notes:
-
Measuring Flour:
- For best results, spoon the flour into your measuring cup and level it off with a knife. Avoid scooping directly from the bag, as this can pack the flour and result in a dense loaf.
-
Water Temperature:
- Ensure the water is lukewarm (100–110°F). Water that’s too hot can kill the yeast, while cold water will slow the rising process.
-
Kneading the Dough:
- Knead the dough until smooth and elastic. If kneading by hand, aim for 8–10 minutes; with a stand mixer, 6–8 minutes with a dough hook works well.
-
Proofing Environment:
- Let the dough rise in a warm, draft-free place. If your kitchen is cool, you can create a proofing environment by placing the bowl in an oven with the light on (but the oven off).
-
Adjusting Flour:
- Start with 6 cups of flour and add more, 1/4 cup at a time, as needed. The dough should be soft and slightly tacky but not sticky.
-
Shaping the Loaves:
- When shaping the dough for the second rise, ensure there are no air pockets by pressing gently and rolling tightly. This helps the loaf bake evenly.
-
Testing for Doneness:
- The bread is done when the crust is golden brown, and the loaf sounds hollow when tapped on the bottom. You can also check with an instant-read thermometer; the internal temperature should be 190°F.
-
Soft Crust Option:
- Brush the hot bread with melted butter immediately after baking for a softer crust.
-
Storing Bread:
- Cool completely before storing to prevent condensation. Wrap tightly in plastic wrap or store in an airtight container.
-
Make-Ahead Tip:
- The dough can be prepared ahead of time, shaped into loaves, and refrigerated overnight. Let the dough come to room temperature before baking the next day.

Vanilla Custard Cream Donuts
There’s nothing quite like biting into a soft, fluffy donut filled with creamy, homemade vanilla custard. This recipe brings the bakery experience right to your kitchen with step-by-step instructions that make it easy to create these delicious treats. Perfect for breakfast, dessert, or a special indulgence, these Vanilla Custard Cream Donuts are sure to impress!
Whether you’re a seasoned baker or a beginner, this recipe is approachable and rewarding. The combination of the pillowy dough and rich custard filling is a match made in heaven, guaranteed to impress anyone who takes a bite.
Why You’ll Love This Recipe
- Bakery-Quality Results: These donuts are soft, airy, and filled with a luscious custard that tastes like it came straight from a professional bakery.
- Simple Ingredients: No fancy ingredients required – just pantry staples you likely already have at home.
- Versatile Treat: Perfect for breakfast, dessert, or even as a thoughtful gift for friends and family.
What You’ll Learn
In this recipe, we’ll cover everything you need to know to make perfect Vanilla Custard Cream Donuts. You’ll learn:
- How to prepare and knead an enriched donut dough.
- Tips for frying donuts to golden perfection.
- How to make a smooth and creamy vanilla custard filling from scratch.
- Tricks for assembling and filling your donuts like a pro.
Step-by-Step Guide
Making the Dough
The dough is the foundation of these donuts. It’s enriched with milk, butter, and egg, giving it a soft and tender texture. Kneading the dough thoroughly is essential for achieving the perfect consistency. Whether you knead by hand or use a stand mixer, make sure to work the dough until it’s smooth and elastic.
After kneading, the dough needs time to rise and develop flavor. Be patient – good things come to those who wait! Once the dough has doubled in size, roll it out and cut your donut shapes. A second rise ensures that the donuts puff up beautifully when fried.
Frying the Donuts
Frying can seem intimidating, but it’s simpler than you think. Keep your oil at a steady 160°C (320°F) for even cooking. Fry the donuts until they’re golden brown on both sides, and drain them on paper towels to remove excess oil.
Making the Vanilla Custard
The custard filling is what sets these donuts apart. It’s made with simple ingredients like milk, eggs, sugar, and cornstarch. Constant whisking over low heat ensures a creamy texture without lumps. The addition of vanilla extract gives the custard a rich, aromatic flavor that complements the donuts perfectly.
Assembling the Donuts
Once the donuts have cooled, it’s time to fill them with the custard. A piping bag fitted with a small round tip makes this process easy. Simply insert the tip into the side of each donut and squeeze gently until filled. Dust with powdered sugar or drizzle with icing for an extra touch of sweetness.
Tips for Success
- Use Fresh Yeast: Make sure your dry yeast is fresh for the best rise.
- Don’t Overheat the Oil: Keep an eye on the temperature to avoid burning the donuts.
- Custard Consistency: Whisk constantly while cooking the custard to prevent lumps and ensure a smooth texture.
- Serve Fresh: Donuts are best enjoyed the same day they’re made, but you can store them in an airtight container and reheat briefly before serving.
Why Make Donuts at Home?
Making donuts at home is more than just creating a delicious treat – it’s about the experience. There’s something magical about watching your dough rise, frying up golden donuts, and filling them with custard you made yourself. Plus, homemade donuts allow you to control the ingredients and customize them to your liking.
Perfect for Any Occasion
Whether you’re treating your family to a weekend brunch, celebrating a special occasion, or simply indulging your sweet tooth, these Vanilla Custard Cream Donuts are always a hit. Their bakery-quality taste and texture will leave everyone asking for seconds – and the recipe!
With this recipe in your arsenal, you’re ready to bring the magic of bakery-style donuts into your home. Enjoy the process, savor the results, and don’t forget to share your creations!

Vanilla Custard Cream Donuts – Soft, Fluffy, and Bakery-Style
Ingredients
For the Dough:
- 280 g (2 cups + 3 tbsp) all-purpose flour
- 40 g (3 tbsp) sugar
- ½ tsp salt
- ¼ tsp nutmeg
- 1 large egg
- 120 g (½ cup) whole milk, warmed
- 40 g (⅓ stick) melted butter
- 7 g (1 packet) dry yeast
For the Custard Filling:
- 660 g (2⅔ cups) whole milk
- 3 large eggs, whisked
- 180 g (¾ cup + 2 tbsp) sugar
- 5 tbsp cornstarch
- 2 tsp vanilla extract
- Pinch of salt
Instructions
Making the Dough
- Combine Dry Ingredients: In a large mixing bowl, whisk together the all-purpose flour, nutmeg, sugar, and salt.
- Prepare Wet Ingredients: Warm the milk and mix it with the egg, melted butter, and dry yeast. Let sit for 5 minutes to activate the yeast.
- Mix Dough: Gradually combine the dry ingredients with the wet mixture. Stir until a dough forms.
- Knead the Dough: Transfer the dough to a floured work surface and knead by hand for 10 minutes until smooth and elastic. Alternatively, use a stand mixer on high speed for 3 minutes.
- First Rise: Place the dough in a greased bowl, cover with a kitchen towel, and allow it to rise in a warm area for 2 hours or until doubled in size.
- Shape Donuts: Roll out the dough to 1/2-inch thickness. Use a round cutter to cut out donut shapes. Arrange on a baking tray lined with parchment paper.
- Second Rise: Cover and let the donuts rise again for 30 minutes.
- Fry Donuts: Heat oil in a deep pan to 160°C (320°F). Fry the donuts in batches until golden brown on both sides, about 1-2 minutes per side. Drain on paper towels.
Making the Custard
- Mix Ingredients: In a medium saucepan, whisk together cornstarch, sugar, and milk until smooth.
- Add Eggs: Gradually whisk in the beaten eggs.
- Cook Custard: Place the saucepan over low-medium heat and whisk constantly until the mixture thickens to a creamy consistency.
- Flavor Custard: Remove from heat and stir in vanilla extract and a pinch of salt. Let cool completely before filling donuts.
Assembling the Donuts
- Fill the Donuts: Use a piping bag fitted with a small round tip to pipe the cooled custard into the donuts. Insert the tip into the side of each donut and squeeze gently until filled.
- Serve and Enjoy: Dust the filled donuts with powdered sugar or drizzle with icing for an extra touch. Serve fresh for the best flavor.
Notes
Tips
- Best Served Fresh: These donuts taste best freshly made. If making ahead, store cooled donuts in an airtight container and microwave for 30 seconds before serving for a freshly made feel.
- Rolling Tip: Roll dough evenly to ensure uniform donut size for consistent cooking.
- Oil Temperature: Maintain the oil temperature at 160°C (320°F) to ensure the donuts cook evenly without becoming greasy.
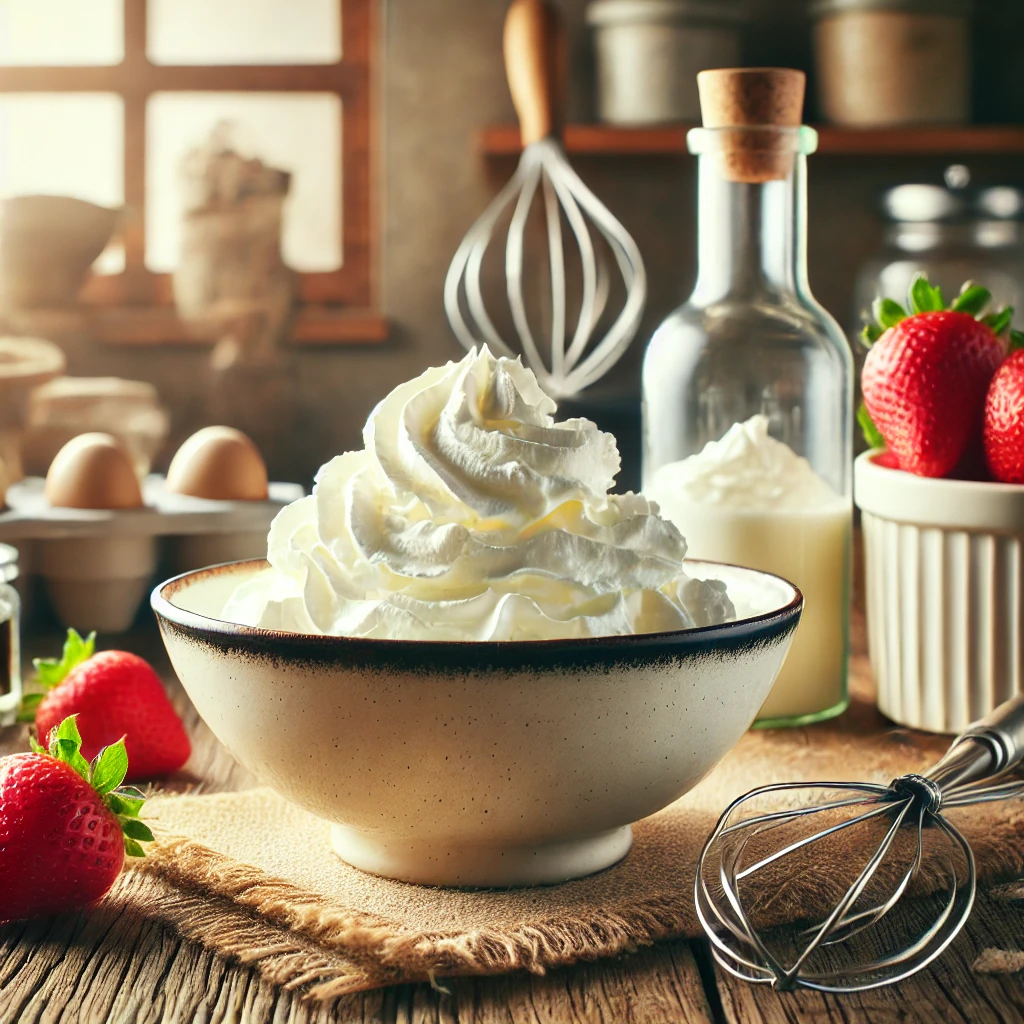
Homemade Whipped Cream Recipe
Homemade whipped cream is one of those recipes that feels magical every time you make it. With just a few simple ingredients, you can transform heavy cream into a luscious, fluffy topping that elevates any dessert. Store-bought whipped cream has its place, but there’s nothing quite like the fresh, creamy taste of the homemade version. It’s free of unnecessary preservatives and allows you to customize the sweetness and flavor to suit your preferences.
Whether you’re topping off a slice of pie, garnishing a steaming mug of hot chocolate, or adding a light and airy layer to shortcakes, homemade whipped cream is the perfect finishing touch. This guide will walk you through the process step by step and provide tips and tricks to ensure perfect results every time.
Why Make Homemade Whipped Cream?
- Better Taste: Fresh whipped cream has a natural, creamy flavor that’s far superior to the canned or tubbed varieties.
- Customizable Sweetness: You control how sweet it is, allowing you to pair it perfectly with any dish.
- Simple Ingredients: Made with just three ingredients—heavy cream, powdered sugar, and vanilla extract—it’s as simple as it gets.
- Quick and Easy: Ready in just 5 minutes, homemade whipped cream is faster than a trip to the store.
The Secret to Perfect Whipped Cream
The key to perfect whipped cream lies in keeping everything cold. Chilling your bowl and beaters before you begin helps the cream whip faster and prevents it from becoming too warm, which can lead to a runny texture. Heavy whipping cream is the ideal choice because its higher fat content ensures the best volume and texture.
Step-by-Step Guide to Making Whipped Cream
1. Chill Your Equipment
Start by placing your mixing bowl and beaters in the freezer for 10-15 minutes. This step may seem minor, but it makes a big difference in achieving a light and fluffy texture.
2. Add Ingredients
Pour one cup of cold heavy whipping cream into the chilled bowl. Add two tablespoons of powdered sugar for sweetness and one teaspoon of vanilla extract for flavor. You can adjust these amounts to suit your taste or skip the sugar and vanilla entirely for an unsweetened version.
3. Whip It Up
Using a hand mixer, stand mixer, or whisk, start beating the cream on medium speed. As it begins to thicken, increase the speed to medium-high. Be patient—this process usually takes 2-3 minutes.
4. Check for Peaks
Watch for soft peaks, which hold their shape but collapse back into the bowl when the whisk is lifted. If you need a firmer whipped cream for piping or filling, continue beating until stiff peaks form. These will hold their shape and not collapse.
5. Serve and Enjoy
Once whipped to your desired consistency, your whipped cream is ready to use. Serve it immediately or store it in the refrigerator for up to 24 hours in an airtight container.
Tips for Success
- Don’t Overwhip: Be careful not to whip the cream too long, as it can quickly turn into butter. If you accidentally overwhip, you can salvage it by adding a splash of cream and gently folding it in by hand.
- Use High-Quality Ingredients: Since whipped cream is so simple, the quality of your ingredients really shines. Use fresh heavy cream and pure vanilla extract for the best results.
- Experiment with Flavors: Get creative by adding a dash of cinnamon, a hint of almond extract, or even a spoonful of cocoa powder for a chocolate twist.
Creative Ways to Use Whipped Cream
Homemade whipped cream isn’t just for topping desserts. Here are some creative ways to use it:
- On Beverages: Dollop it on hot chocolate, coffee, or milkshakes for a decadent treat.
- As a Dip: Pair it with fresh fruit like strawberries, peaches, or apple slices.
- In Desserts: Use it as a filling for cream puffs, layered cakes, or trifles.
- For Breakfast: Spread it on pancakes or waffles with a drizzle of maple syrup.
Frequently Asked Questions
Can I make whipped cream ahead of time?
Yes, you can make whipped cream a day in advance. Store it in an airtight container in the fridge and give it a gentle whisk before serving.
Can I use granulated sugar instead of powdered sugar?
Powdered sugar is preferred because it dissolves more easily, but granulated sugar can be used in a pinch. Just whip a little longer to ensure it’s fully dissolved.
Can I freeze whipped cream?
Yes, you can freeze dollops of whipped cream on a baking sheet. Once frozen, transfer them to a freezer bag. They’re great for topping hot drinks or desserts straight from the freezer.
Why This Recipe Belongs in Your Repertoire
Homemade whipped cream is a game-changer. It’s quick, easy, and endlessly versatile, making it an essential recipe for any home baker or dessert lover. Whether you’re preparing an elegant dinner party or simply treating yourself to a cozy evening at home, this recipe is a surefire way to elevate your dishes with minimal effort. Once you try it, you’ll never go back to store-bought!
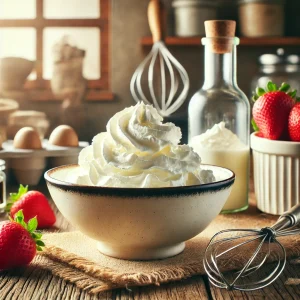
How to Make Homemade Whipped Cream | Quick and Easy Recipe
Ingredients
- 1 cup heavy whipping cream (cold)
- 2 tbsp powdered sugar (optional for sweetness)
- 1 tsp vanilla extract (optional for flavor)
Instructions
- Chill Your Tools:Place your mixing bowl and beaters or whisk attachment in the freezer for 10-15 minutes. Cold tools make the whipping process easier and more effective.
- Pour the Cream:Remove the tools from the freezer and pour the cold heavy whipping cream into the chilled bowl.
- Add Sweeteners and Flavor (Optional):If desired, add powdered sugar and vanilla extract for sweetness and flavor. You can skip this step for an unsweetened version.
- Whip the Cream:Using a hand mixer, stand mixer, or whisk, beat the cream on medium-high speed. Start slow to prevent splashing, then increase speed as it thickens.
- Look for Soft Peaks:After about 2-3 minutes, check for soft peaks. These will gently hold their shape but will collapse back into the bowl when lifted.
- Whip to Stiff Peaks (Optional):For a firmer texture, continue whipping for another 1-2 minutes until stiff peaks form. Be careful not to overwhip, as this will turn the cream into butter.
- Serve Immediately:Use immediately to top cakes, pies, hot chocolate, or fresh fruit. You can also refrigerate for up to 24 hours in an airtight container.
Notes
Notes:
- Custom Sweetness: Adjust the powdered sugar based on your desired level of sweetness.
- Flavor Variations: Swap vanilla extract for almond extract, lemon zest, or cocoa powder for unique flavors.
- Storage Tip: If storing, re-whisk gently before serving to refresh the texture.
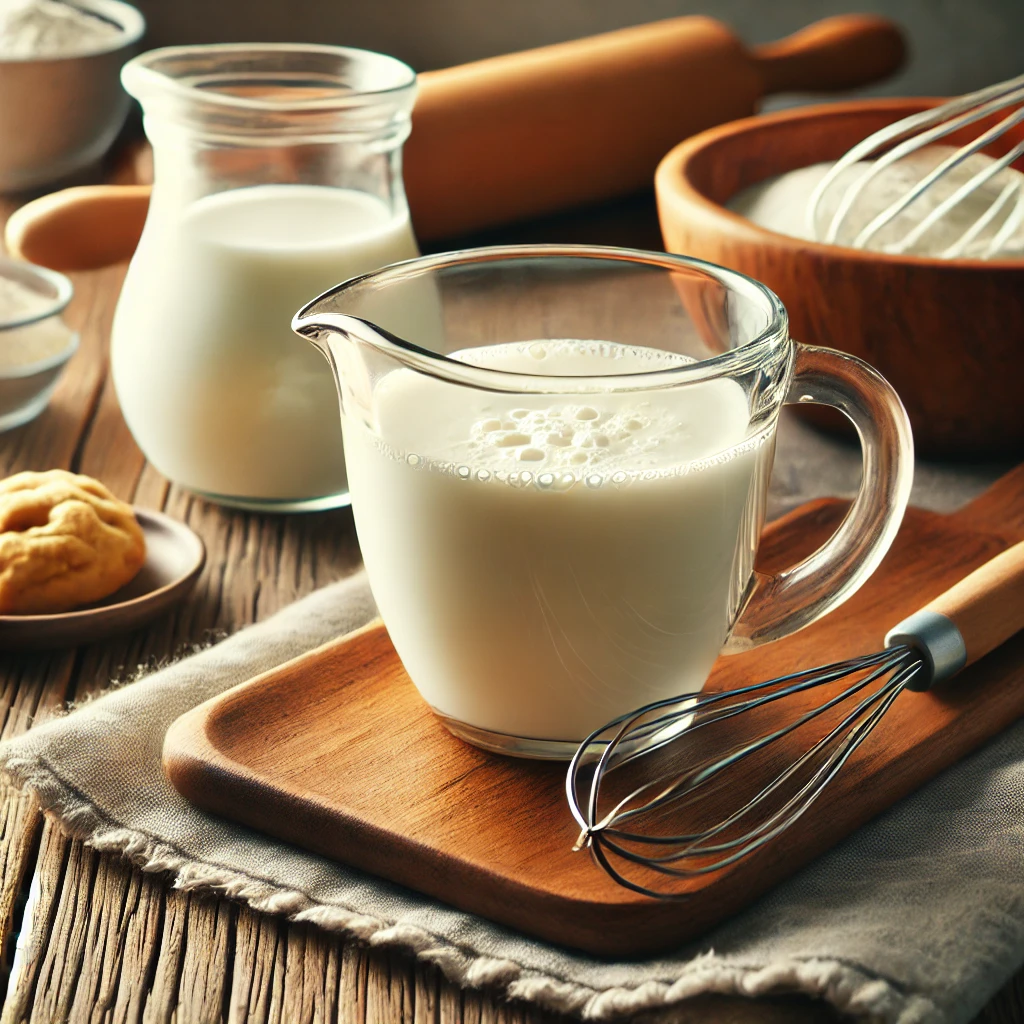
Homemade Buttermilk Recipe
Ever find yourself in the middle of baking only to realize you’re out of buttermilk? Don’t worry! With just two simple ingredients, you can make your own homemade buttermilk in minutes. This quick and easy recipe is a lifesaver for pancakes, biscuits, cakes, and more. Not only is it convenient, but it also tastes just like the store-bought version. Say goodbye to last-minute grocery runs and hello to homemade goodness!
Making homemade buttermilk is one of the easiest kitchen hacks that every baker should know. It’s a game-changer when you’re in the middle of whipping up something delicious and realize you don’t have store-bought buttermilk on hand. This recipe is not only quick but also incredibly versatile. Whether you’re making fluffy pancakes, tender biscuits, or a moist chocolate cake, this homemade version works perfectly.
The beauty of this recipe is its simplicity. With just milk and an acid—like white vinegar or lemon juice—you can achieve that tangy flavor and creamy consistency that buttermilk is known for. Plus, it’s adaptable! You can use whole milk for a richer buttermilk or opt for a lower-fat version if that’s what you have on hand. Even plant-based milks like almond or soy can work if you need a dairy-free option.
Pro Tips:
- If you’re using plant-based milk, choose unsweetened and unflavored varieties for the best results.
- Fresh lemon juice tends to have a milder flavor than vinegar, making it a great choice for sweeter baked goods.
- For recipes requiring larger quantities, simply scale the measurements while maintaining the same milk-to-acid ratio.
When to Use Homemade Buttermilk:
Homemade buttermilk is perfect for any recipe that calls for store-bought buttermilk. Its slightly acidic nature reacts with leavening agents like baking soda, giving your baked goods a tender crumb and extra lift. Try it in recipes like pancakes, waffles, muffins, or even fried chicken for that unbeatable tangy flavor.
FAQs
Q: Can I use this homemade buttermilk for savory recipes?
A: Absolutely! It works just as well in savory dishes like marinades and dressings as it does in baked goods.
Q: What if I don’t have vinegar or lemon juice?
A: You can substitute with cream of tartar (1 ¾ teaspoon for every 1 cup of milk) or plain yogurt (diluted with milk).
Q: Does this work with non-dairy milk?
A: Yes! Almond milk, soy milk, or oat milk can be used. Make sure to select unsweetened and unflavored varieties.
This homemade buttermilk recipe is a must-have for any baking enthusiast. Simple, quick, and foolproof, it ensures you never have to skip a recipe again!
Easy Homemade Buttermilk Recipe
Ingredients
- 1 cup whole milk or milk of choice
- 1 tbsp white vinegar or fresh lemon juice
Instructions
- Prepare the Acid: Add 1 tablespoon of white vinegar or lemon juice to a measuring cup.
- Add the Milk: Pour milk into the measuring cup until it reaches the 1-cup mark.
- Mix and Wait: Stir the mixture well and let it sit at room temperature for 5–10 minutes. You'll notice the milk will begin to curdle and thicken slightly, creating that classic buttermilk texture.
- Use Immediately or Store: Once the buttermilk is ready, use it in your recipe as needed. If you’re not using it right away, store it in the refrigerator for up to 3 days.
Notes
Recipe Notes for Homemade Buttermilk:
-
Milk Choice:
- Whole milk works best for a rich and creamy buttermilk texture.
- You can also use low-fat milk, but the result may be slightly thinner.
-
Acidic Ingredient Alternatives:
- If you don’t have white vinegar, substitute with lemon juice or even apple cider vinegar for a mild flavor.
- For a slightly tangy variation, plain yogurt or sour cream can be thinned with milk and used as a substitute.
-
Mixing Tips:
- Stir thoroughly to ensure the acid and milk combine evenly.
- Let the mixture sit undisturbed for 5-10 minutes to allow it to curdle properly.
-
Storage:
- Homemade buttermilk should be used immediately for the best results.
- If needed, it can be stored in the refrigerator for up to 3 days in an airtight container, but fresh is always better.
-
Scaling the Recipe:
- For larger quantities, maintain the ratio of 1 cup milk to 1 tablespoon of acidic ingredient.
- Adjust as needed for your baking or cooking needs.
-
Uses:
- Perfect for pancakes, biscuits, cakes, and marinades.
- Adds a tangy flavor and tender texture to baked goods.
-
Pro Tip:
- Shake the mixture lightly before using if it has been sitting for a while to redistribute the curdled bits evenly.
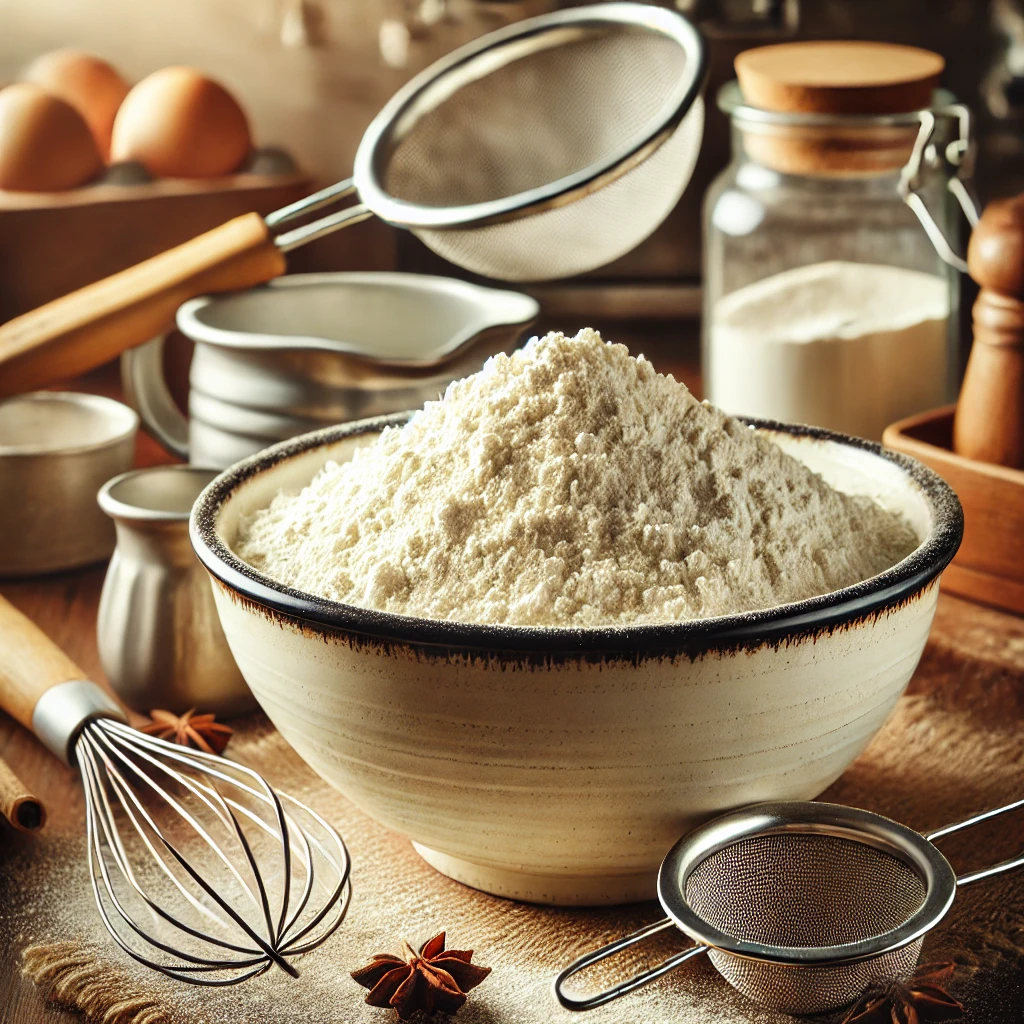
Homemade Cake Flour Recipe
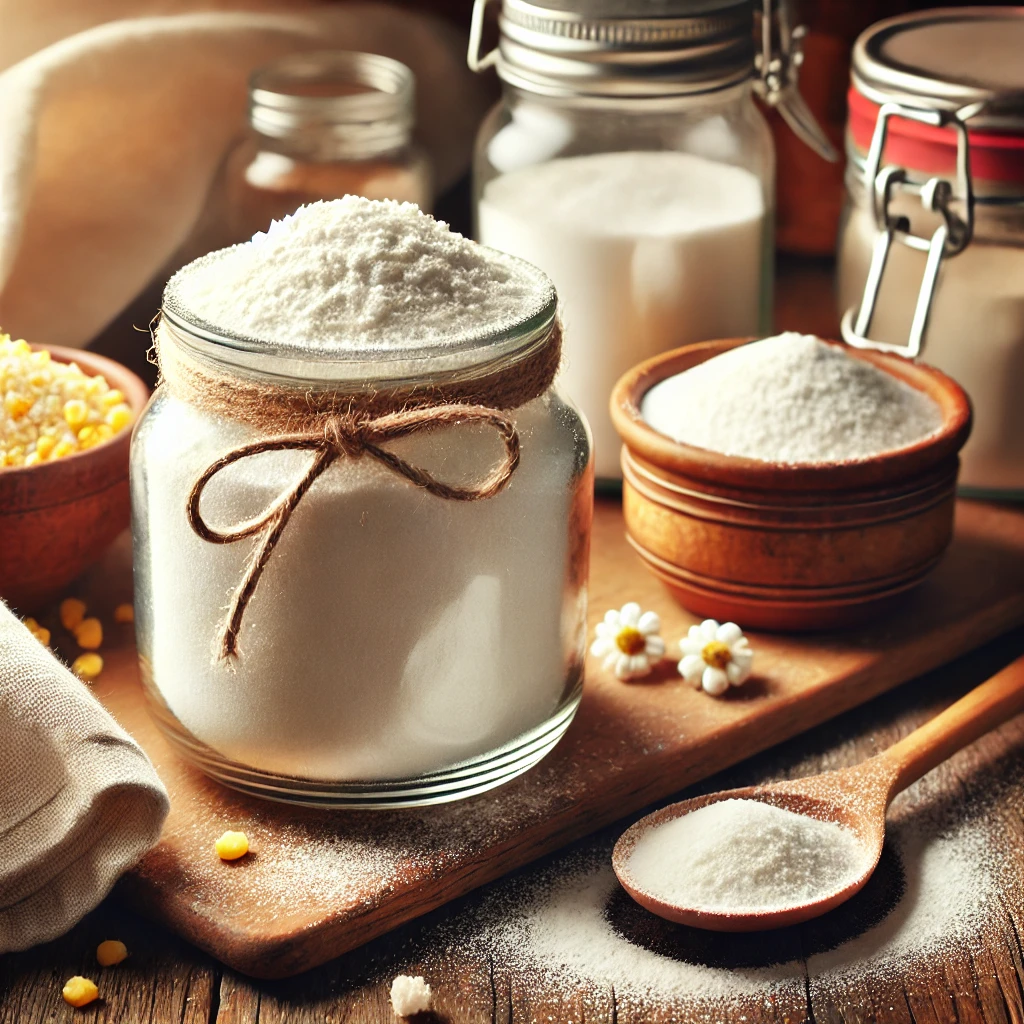
Cake flour is the secret ingredient behind soft, fluffy, and delicate cakes. It’s perfect for light sponges, tender cupcakes, and airy baked goods. But what if you don’t have cake flour on hand? Don’t worry! This homemade cake flour recipe is a quick, cost-effective alternative that works like a charm. With just two ingredients, you can make your own cake flour at home and achieve bakery-quality results every time.
Why Make Homemade Cake Flour?
Cake flour is lower in protein than all-purpose flour, giving your baked goods a softer crumb. While store-bought cake flour is readily available, making it at home can save you a trip to the store, reduce costs, and ensure you have a fresh batch whenever you need it. Plus, it’s a fun and rewarding process for any home baker!
The Science Behind Cake Flour
Cake flour has about 6-8% protein, compared to all-purpose flour’s 10-12%. Lower protein levels mean less gluten formation, resulting in tender, melt-in-your-mouth textures. By replacing a small amount of all-purpose flour with cornstarch, you mimic the properties of commercial cake flour.
Homemade Cake Flour Recipe
Ingredients
- 1 cup all-purpose flour
- 2 tbsp cornstarch
Instructions
- Measure the Flour: Start with 1 cup of all-purpose flour.
- Remove Excess Flour: Scoop out 2 tablespoons of flour and return it to your flour bag.
- Add Cornstarch: Replace the 2 tablespoons of flour with 2 tablespoons of cornstarch.
- Sift Thoroughly: Sift the mixture together at least 4-5 times to evenly distribute the cornstarch and aerate the flour. This step is essential for a light, airy texture.
- Use Immediately or Store: Use the homemade cake flour in your recipe or store it in an airtight container for up to 3 months.
Notes
Pro Tips for Success
- Sifting is Key: Sifting ensures the cornstarch and flour combine evenly, preventing lumps in your baked goods.
- Batch Prep: Make a larger batch of homemade cake flour and store it for future use.
- Avoid Overmixing: When using cake flour in recipes, mix just until combined to keep your baked goods tender.
DIY Powdered Sugar Recipe
Discover how to make your own powdered sugar at home with just two simple ingredients. This easy DIY recipe is perfect for baking emergencies or when you need a quick solution. Learn the step-by-step process to create perfectly smooth powdered sugar, saving money and ensuring you always have this essential baking ingredient on hand.
Why Make DIY Powdered Sugar?
Homemade powdered sugar is an excellent solution when you run out unexpectedly or want to avoid store-bought varieties with added preservatives. It’s also a cost-effective way to ensure you always have fresh powdered sugar for your baking needs.
Tips for Success:
- Choose the Right Sugar: Regular granulated sugar works best. Avoid coarse sugars as they may not blend finely.
- High-Speed Blender: For the smoothest texture, a high-speed blender is ideal, though a food processor works in a pinch.
- Storage Tip: Always use an airtight container to prevent moisture from clumping the powdered sugar.
- Flavor Boost: Add a small amount of vanilla powder or cinnamon for a unique twist.
FAQs:
- Can I skip the cornstarch?
Yes! The cornstarch is optional, but it helps prevent clumping, especially for long-term storage. - Can I use a different type of sugar?
Yes, you can use raw sugar or coconut sugar for a unique flavor, though the texture may vary slightly. - What if I don’t have a blender?
Use a spice grinder in small batches, though it may take longer. - How much powdered sugar does this make?
1 cup of granulated sugar yields approximately 1 cup of powdered sugar.
This easy DIY recipe ensures you never have to worry about running out of powdered sugar again. With just granulated sugar and cornstarch, you can whip up a batch in minutes and elevate your baking game effortlessly. Whether it’s for frosting, glazes, or dusting desserts, homemade powdered sugar is a must-have for every baker.
DIY Powdered Sugar
Ingredients
- 1 cup granulated sugar
- 1 tbsp cornstarch (optional for anti-caking)
Instructions
- Set Up Your Blender or Food Processor: Use a high-speed blender or food processor. Ensure it's clean and dry for the best results.
- Combine Ingredients: Add the granulated sugar to the blender or food processor. If you’re using cornstarch, add it now. Cornstarch helps prevent clumping and creates a silky texture, especially if you’re storing the powdered sugar.
- Blend Until Fine: Blend on high speed for 1-2 minutes or until the sugar has transformed into a fine, powdery consistency. Pause occasionally to scrape down the sides to ensure even blending.
- Check Consistency: To test, rub a small amount of the sugar between your fingers. It should feel light and powdery. If it feels grainy, blend for an additional 30 seconds.
- Store Properly: Transfer your powdered sugar to an airtight container. Store in a cool, dry place for up to a month. Label the container for convenience.
Notes
Tips for Success:
- Choose the Right Sugar: Regular granulated sugar works best. Avoid coarse sugars as they may not blend finely.
- High-Speed Blender: For the smoothest texture, a high-speed blender is ideal, though a food processor works in a pinch.
- Storage Tip: Always use an airtight container to prevent moisture from clumping the powdered sugar.
- Flavor Boost: Add a small amount of vanilla powder or cinnamon for a unique twist.
Homemade Brown Sugar Recipe
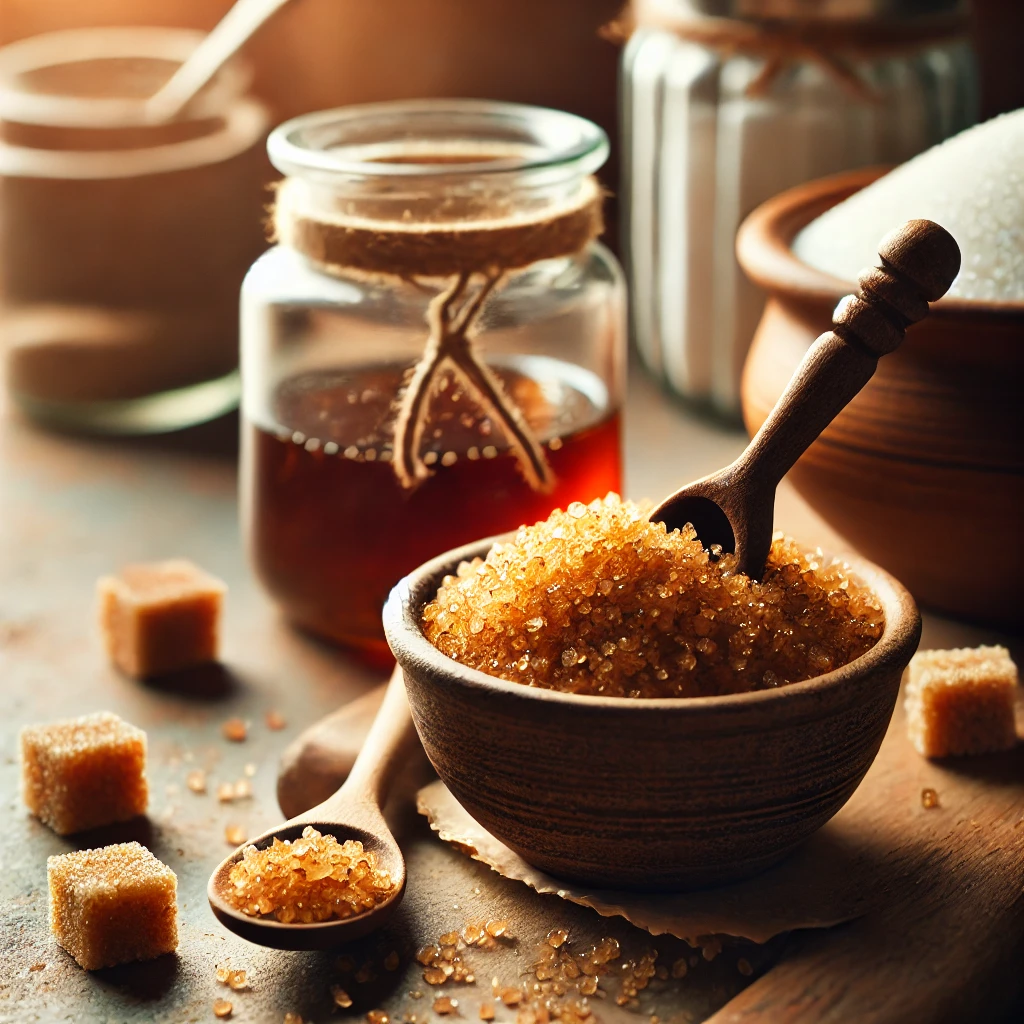
Learn how to make Homemade Brown Sugar using just two simple ingredients: white sugar and molasses. This quick, cost-effective recipe ensures you always have fresh brown sugar on hand, perfect for baking cookies, cakes, or adding rich flavor to your favorite recipes. Making brown sugar at home is budget-friendly, easy, and tastes even better than store-bought. Say goodbye to running out of brown sugar mid-bake and hello to a reliable pantry staple.
Why Make Homemade Brown Sugar?
Homemade brown sugar is incredibly simple to make, requiring only two ingredients and a few minutes of your time. Whether you forgot to pick up brown sugar at the store or want to make it fresh and free of preservatives, this recipe is a game-changer. Plus, you can customize the depth of flavor to your liking.
Store-bought brown sugar can sometimes harden or lose its freshness quickly. With this recipe, you can create small or large batches as needed and avoid waste. You’ll be amazed at how easy and rewarding it is to make your own!
What You’ll Need
To make homemade brown sugar, all you need are two ingredients:
- White Sugar – Acts as the base for brown sugar. It’s versatile, budget-friendly, and easy to source.
- Molasses – Adds the distinct, rich flavor and moisture that gives brown sugar its signature texture and taste.
Tips for Perfect Homemade Brown Sugar
- Fresh Molasses: Use unsulphured molasses (like Grandma’s Molasses) for a sweet and rich flavor. Avoid blackstrap molasses as it’s too bitter.
- Texture Control: If the mixture clumps, run it through a food processor or break it up with a fork.
- Adjusting Flavor: Add more molasses for deeper, darker brown sugar. Start with less and increase as needed.
- Storage Tip: To prevent homemade brown sugar from hardening, place a small piece of bread or a terra-cotta sugar saver in the container.
How to Use Homemade Brown Sugar
Homemade brown sugar can be used in any recipe that calls for store-bought brown sugar:
- Baking: Cookies, cakes, muffins, and pies.
- Cooking: Add to sauces, glazes, or savory dishes.
- Beverages: Sweeten coffee, tea, or cocktails for a molasses twist.
FAQs
1. Can I use dark brown sugar instead of light brown sugar in recipes?
Yes, but dark brown sugar will have a richer flavor and a deeper molasses taste.
2. What if I don’t have molasses?
You can substitute honey or maple syrup, but the flavor won’t be identical. Molasses is key for that classic brown sugar taste.
3. How long does homemade brown sugar last?
Stored properly, it can last up to 6 months. Keep it in an airtight container to maintain freshness.
4. Can I make a larger batch?
Absolutely! Just scale up the ratio of 1 tablespoon molasses per 1 cup of sugar.
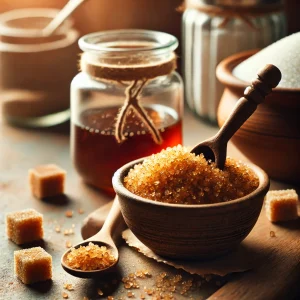
Homemade Brown Sugar
Ingredients
- 1 cup white granulated sugar
- 1 tbsp molasses (for light brown sugar)
- 2 tbsp molasses (for dark brown sugar)
Instructions
- Combine Ingredients:Place the white sugar in a medium-sized mixing bowl.Add molasses (1 tablespoon for light brown sugar, 2 tablespoons for dark brown sugar).
- Mix Well:Use a fork or hand mixer to combine the sugar and molasses thoroughly. Continue mixing until the molasses is fully incorporated and the sugar looks uniform in color and texture.You can also rub the sugar and molasses together with your fingers for even distribution.
- Check Consistency:The mixture should feel slightly damp and crumbly. Adjust molasses amounts to achieve the desired depth of color and flavor.
- Store:Transfer the homemade brown sugar to an airtight container.Store at room temperature in a cool, dry place.
Notes
Tips for Perfect Homemade Brown Sugar
- Fresh Molasses: Use unsulphured molasses (like Grandma’s Molasses) for a sweet and rich flavor. Avoid blackstrap molasses as it’s too bitter.
- Texture Control: If the mixture clumps, run it through a food processor or break it up with a fork.
- Adjusting Flavor: Add more molasses for deeper, darker brown sugar. Start with less and increase as needed.
- Storage Tip: To prevent homemade brown sugar from hardening, place a small piece of bread or a terra-cotta sugar saver in the container.

Homemade Vanilla Extract Recipe
Learn how to make your very own homemade vanilla extract with just two simple ingredients! This DIY vanilla extract is more flavorful and aromatic than store-bought versions, and it’s perfect for baking cookies, cakes, and desserts. Plus, it makes a thoughtful homemade gift for bakers.
If you’ve ever baked with store-bought vanilla extract, you might be surprised to learn how easy (and fun) it is to make your own at home. Homemade vanilla extract not only tastes better but is also free from artificial additives. Whether you’re a passionate baker or someone looking for the perfect DIY gift idea, this simple recipe will become a favorite in your kitchen. With just two ingredients – vanilla beans and alcohol – you can create a rich, aromatic extract that elevates your baked goods to new levels.
Why Make Homemade Vanilla Extract?
You might be wondering, “Why go through the trouble of making vanilla extract at home?” Well, here’s why:
- Flavor, Flavor, Flavor: Homemade vanilla extract is incredibly flavorful compared to most store-bought varieties. You control the ingredients and steeping time, ensuring a rich, robust vanilla flavor every time.
- Cost-Effective: While pure vanilla extract can be pricey at the store, making your own in bulk will save you money in the long run.
- Customization: Want a subtle bourbon kick? Prefer rum? You can choose the alcohol that best suits your taste and baking needs.
- Healthier Alternative: No artificial colors, flavors, or preservatives – just pure vanilla goodness.
- Perfect Gift Idea: Homemade vanilla extract in pretty bottles makes a thoughtful and personal gift for bakers, friends, or family.
Ingredients Breakdown
To make the perfect vanilla extract, here’s what you’ll need:
- Vanilla Beans: Use 5-6 Grade B vanilla beans per 1 cup of alcohol. Grade B beans are less moist and perfect for extracting flavor. If you only have Grade A beans, they’ll still work beautifully.
- Alcohol: Vodka is the go-to choice because it’s neutral and allows the vanilla flavor to shine. You can also experiment with bourbon, rum, or brandy for a deeper, more complex flavor.
Step-by-Step Instructions
Making homemade vanilla extract is as easy as it gets. Follow these simple steps, and you’ll be amazed at the results:
- Split the Vanilla Beans:
Use a sharp knife to carefully split the vanilla beans lengthwise, exposing the tiny black seeds inside. Don’t cut all the way through – leave about an inch intact at the top. This allows for maximum infusion without separating the bean entirely. - Add the Beans to a Jar:
Place the split vanilla beans into a clean glass jar with a tight-fitting lid. A mason jar or swing-top bottle works great. - Pour in the Alcohol:
Pour 1 cup of vodka (or your preferred alcohol) over the beans, making sure they are fully submerged. If the beans are too tall for the jar, you can trim them slightly to fit. - Seal and Shake:
Tightly seal the jar and give it a good shake to distribute the alcohol and beans evenly. - Steep the Beans:
Place the jar in a cool, dark place, like a pantry or cupboard. Let the beans steep for at least 6-8 weeks, shaking the jar gently once a week. The longer it sits, the richer the flavor – many bakers let it steep for 3-6 months for premium results. - Use and Store:
Once the vanilla extract is ready, it will turn a deep amber color and smell beautifully fragrant. You can leave the beans in the jar for continued flavor infusion or strain them out. Store your vanilla extract at room temperature, and it will keep for up to 2 years (or longer!).
Tips for Success
- Refill the Jar: As you use your extract, top it off with more vodka. The vanilla beans will continue to infuse the liquid for months.
- Double the Recipe: If you bake frequently, make a larger batch. Just double the number of beans and alcohol proportionately.
- Non-Alcoholic Option: Use food-grade glycerin as a substitute for alcohol, though the flavor will differ slightly, and infusion time will be longer.
- Vanilla Sugar Bonus: Once you’re done with the vanilla beans, rinse, dry, and place them in a jar of sugar to create vanilla sugar for coffee, tea, or baked goods.
Common Questions About Homemade Vanilla Extract
1. How long does homemade vanilla extract last?
Vanilla extract can last up to 2 years or more if stored properly in a cool, dark place.
2. Can I use any alcohol?
Yes! Vodka is the most neutral option, but bourbon, rum, or brandy can add unique flavor notes to your extract.
3. How many beans do I need per cup of alcohol?
The general rule is 5-6 vanilla beans per cup of alcohol.
4. Can I speed up the process?
Unfortunately, no. Good vanilla extract requires time to develop its deep flavor. But trust me – it’s worth the wait!
5. Why is homemade vanilla extract better than store-bought?
Store-bought vanilla often contains additives and artificial flavoring. Homemade vanilla extract is pure, natural, and far more aromatic.
Ways to Use Homemade Vanilla Extract
- Add it to cookies, cakes, muffins, and brownies for rich vanilla flavor.
- Stir a splash into your morning coffee for a hint of warmth.
- Use it to make homemade whipped cream, ice cream, or vanilla custard.
- Drizzle a bit over fruit for an extra touch of sweetness.
- Use it in savory recipes that call for a hint of sweetness, like glazes or sauces.
Gift It – Perfect for Any Occasion
Homemade vanilla extract makes a fantastic gift for the holidays, birthdays, or housewarmings. Here’s how to make it extra special:
- Pour the extract into small glass bottles with a cork or screw top.
- Add a personalized label and tie a ribbon around the neck.
- Include a handwritten note with ideas for using the extract.
Making homemade vanilla extract is a simple, rewarding process that every baker should try. It’s a versatile ingredient that adds rich, aromatic flavor to all your favorite baked goods. With just vanilla beans and alcohol, you’ll have a homemade pantry staple that’s healthier, tastier, and budget-friendly. Plus, it’s a heartfelt gift that’s sure to impress friends and family.
Once you make your own vanilla extract, you’ll never go back to store-bought again. Start your batch today – and enjoy the sweet rewards for years to come!

Homemade Vanilla Extract Recipe
Ingredients
- 5-6 vanilla beans (Grade B preferred for extracts)
- 1 cup vodka (or bourbon/rum for a different flavor profile)
Instructions
- Prepare the Vanilla Beans:Split the vanilla beans lengthwise using a sharp knife, leaving about 1 inch uncut at the top. This exposes the seeds inside while keeping the bean mostly intact.
- Place Beans in a Jar:Place the split vanilla beans into a clean glass jar with a tight-fitting lid. A small mason jar or glass bottle works best.
- Add the Alcohol:Pour the vodka (or bourbon/rum) over the vanilla beans, ensuring they are completely submerged. If the beans are too tall, trim them down to fit or use more alcohol.
- Seal and Store:Tightly seal the jar and shake it gently. Store it in a cool, dark place (like a pantry or cabinet).
- Infusion Time:Let the vanilla beans steep for at least 6-8 weeks, shaking the jar gently once a week. For the best flavor, let it sit for 3-6 months.
- Use and Enjoy:Once ready, the extract will darken to a deep amber color. You can use it as-is or strain out the vanilla beans and seeds for a smoother extract.
Notes
Notes and Tips:
- Alcohol Alternatives: While vodka is traditional and neutral, bourbon or rum adds a richer, unique flavor to your vanilla extract.
- Vanilla Bean Quality: Use Grade B beans, as they are ideal for extract-making. Grade A beans are oilier and better for baking or cooking.
- Storage: Store homemade vanilla extract in a cool, dark place for up to 2 years. The flavor will continue to deepen over time.
- Refilling the Jar: You can top off the jar with more alcohol after using some extract. This will extend its life and flavor.
- Gifting Idea: Pour the extract into small decorative bottles, add a ribbon, and include a handwritten label for a thoughtful homemade gift.
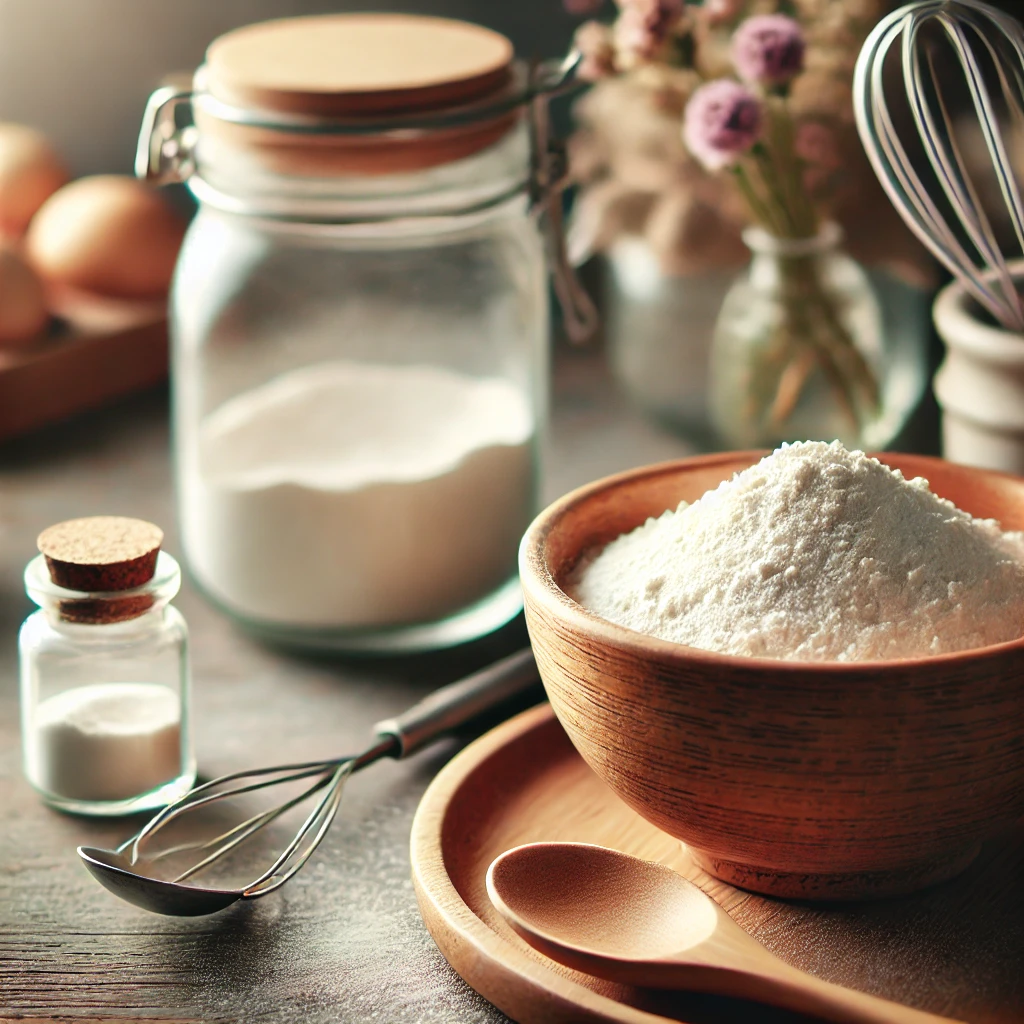
Homemade Baking Powder
Running out of baking powder when you’re halfway through a recipe can be frustrating! But don’t worry—this homemade baking powder recipe has your back. With just three simple pantry staples, you can whip up a fresh, effective substitute in minutes. Plus, it’s aluminum-free and perfect for baking!
Homemade baking powder is not only cost-effective but also ensures you always have a backup for those last-minute baking needs.
Why Make Baking Powder at Home?
- Fresh and Reliable: Homemade baking powder is free from aluminum or additives often found in store-bought versions.
- Quick and Easy: Takes just 2 minutes to make.
- Cost-Effective: Uses inexpensive ingredients you probably already have in your kitchen.
- Perfect Backup: A lifesaver when you run out unexpectedly!
Ingredients You’ll Need
- 2 teaspoons cream of tartar
- 1 teaspoon baking soda
- 1 teaspoon cornstarch (optional for longer storage)
Instructions
- Mix the Ingredients: In a small bowl, whisk together 2 teaspoons cream of tartar and 1 teaspoon baking soda until well combined.
- Optional Step for Storage: If you’re making a larger batch or plan to store it, add 1 teaspoon of cornstarch. This absorbs moisture and keeps the baking powder from clumping.
- Store: Transfer to an airtight container or small jar. Keep in a cool, dry place.
How to Use Homemade Baking Powder
Use your DIY baking powder in a 1:1 ratio in any recipe that calls for baking powder. For example, if a recipe calls for 1 tablespoon of baking powder, replace it with 1 tablespoon of homemade baking powder.
Tips for Success
- Freshness Matters: Always check that your baking soda is still active for the best results.
- Why Cornstarch? Cornstarch helps prevent clumping but isn’t necessary if you’re using it immediately.
- Scale Up for Later: Make a larger batch to store for future recipes (triple or quadruple the ingredients).
FAQs
Q: How long can I store homemade baking powder?
A: If stored in an airtight container in a cool, dry place, it can last for up to 6 months.
Q: Is homemade baking powder aluminum-free?
A: Yes! This DIY version is naturally aluminum-free.
Q: Can I use homemade baking powder in all recipes?
A: Absolutely! It works perfectly in any recipe that calls for baking powder.
Q: What can I use as a substitute for cream of tartar?
A: If you don’t have cream of tartar, you can use 2 teaspoons of lemon juice or white vinegar mixed with 1 teaspoon baking soda. However, this won’t store well and should be used immediately.
Having this homemade baking powder recipe in your back pocket is a game-changer for bakers! It’s simple, effective, and made with ingredients you probably already have at home. No more running to the store at the last minute—your baking adventures just got easier!
Ready to bake? Try it out in your favorite cakes, cookies, or muffins today.
Homemade Baking Powder
Ingredients
- 2 tsp cream of tartar
- 1 tsp baking soda
- 1 tsp cornstarch (optional for longer storage)
Instructions
- Mix the Ingredients: In a small bowl, whisk together 2 teaspoons cream of tartar and 1 teaspoon baking soda until well combined.
- Optional Step for Storage: If you’re making a larger batch or plan to store it, add 1 teaspoon of cornstarch. This absorbs moisture and keeps the baking powder from clumping.
- Store: Transfer to an airtight container or small jar. Keep in a cool, dry place.
Notes
How to Use Homemade Baking Powder
Use your DIY baking powder in a 1:1 ratio in any recipe that calls for baking powder. For example, if a recipe calls for 1 tablespoon of baking powder, replace it with 1 tablespoon of homemade baking powder.Tips for Success
- Freshness Matters: Always check that your baking soda is still active for the best results.
- Why Cornstarch? Cornstarch helps prevent clumping but isn’t necessary if you’re using it immediately.
- Scale Up for Later: Make a larger batch to store for future recipes (triple or quadruple the ingredients).
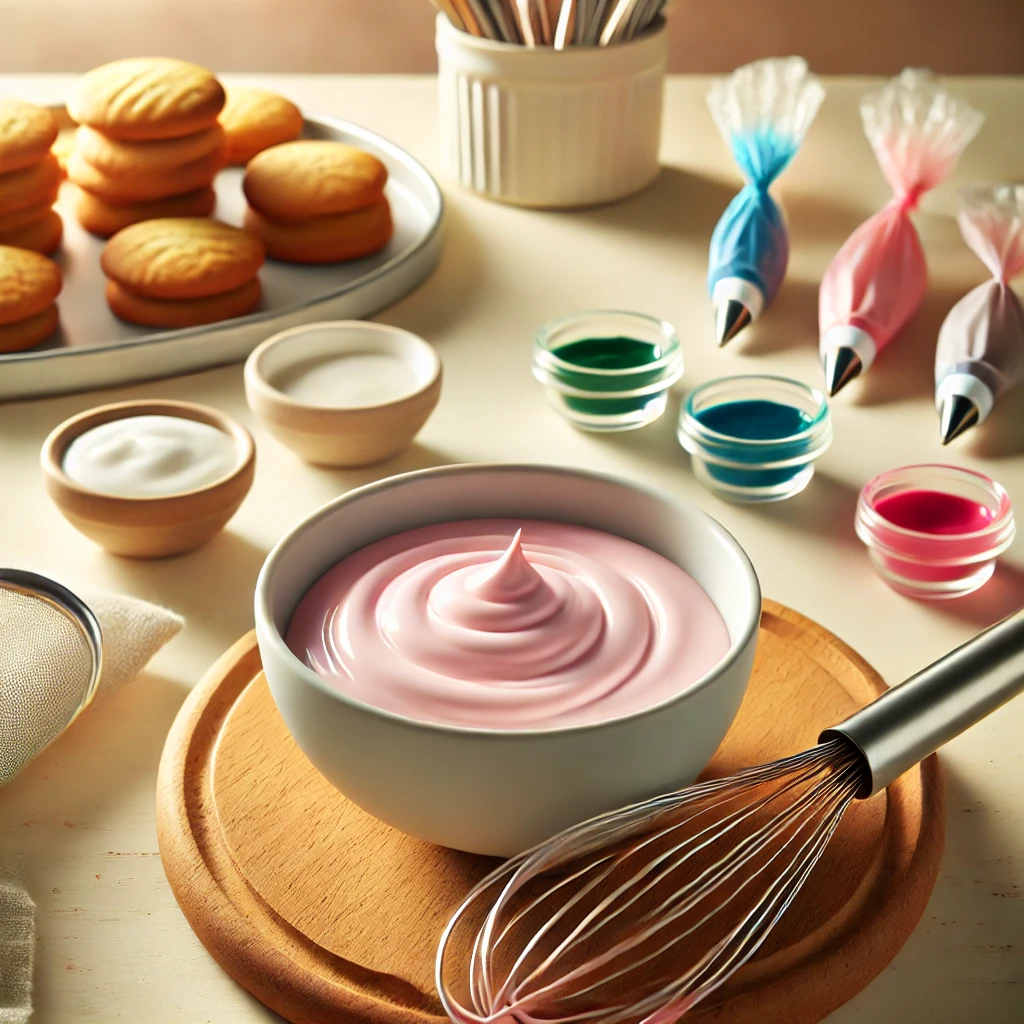
Royal Icing Recipe
Make perfect royal icing for cookies, cakes, and gingerbread houses with this easy recipe using egg whites, powdered sugar, and vanilla.
Royal icing is a baker’s dream when it comes to decorating sugar cookies, gingerbread houses, or cakes with intricate designs and vibrant colors. This versatile icing hardens beautifully to a smooth, glossy finish, making it the go-to option for bakers who love detailed decorations. Whether you’re creating stunning cookie art for the holidays, piping elegant accents on a cake, or crafting charming gingerbread displays, this royal icing recipe is your secret weapon to take your baking to the next level.
In this post, I’ll guide you through making royal icing step-by-step, share expert tips on achieving the perfect consistency, and provide ideas for how you can customize it with colors and flavors.
What is Royal Icing?
Royal icing is a type of icing made primarily from egg whites (or meringue powder) and powdered sugar. It has a thick, smooth texture that hardens as it dries, making it ideal for decorating cookies, cakes, and other baked goods. Unlike traditional frostings, royal icing maintains its shape once piped, giving you crisp, clean designs.
The beauty of royal icing lies in its versatility. You can adjust its consistency to suit your decorating needs, from stiff icing for intricate piping to a thinner consistency for flooding cookie surfaces. Plus, it’s simple to make with only a few ingredients!
Ingredients You’ll Need
This recipe requires only a handful of pantry staples:
- 2 egg whites: These act as the binding and hardening agent. If you prefer not to use fresh egg whites, substitute with 2 tablespoons of meringue powder mixed with 4 tablespoons of water.
- 3 cups powdered sugar (sifted): Sifting the sugar ensures your icing is smooth and free of lumps.
- 1 teaspoon vanilla extract: This adds a touch of flavor and enhances the icing’s sweetness.
- Food coloring (optional): Perfect for adding vibrant colors to your designs. Use gel food coloring for the best results as it won’t thin out the icing.
Step-by-Step Instructions
Step 1: Beat the Egg Whites
Start by placing 2 egg whites in a clean, grease-free mixing bowl. Using a stand mixer or hand mixer on medium speed, beat the egg whites until they become frothy. This takes about 1-2 minutes. Frothy egg whites are essential for giving the icing its light, airy texture.
Tip: Ensure your bowl and beaters are completely clean and dry. Any trace of grease can prevent the egg whites from whipping properly.
Step 2: Add Vanilla Extract
Once the egg whites are frothy, add 1 teaspoon of vanilla extract. Mix until the vanilla is fully incorporated. Vanilla not only enhances the flavor but also complements any baked treats you’re decorating.
Step 3: Gradually Add the Powdered Sugar
With the mixer on low speed, gradually add the 3 cups of sifted powdered sugar one spoonful at a time. This prevents the sugar from flying out of the bowl and ensures it mixes evenly with the egg whites.
After all the sugar is added, increase the mixer to medium speed. Mix for 2-3 minutes, stopping occasionally to scrape down the sides of the bowl.
Goal: Your icing should be smooth, thick, and glossy with no visible lumps.
Step 4: Adjust Consistency
The consistency of your royal icing is crucial, depending on how you plan to use it:
- Stiff Consistency: Perfect for piping details, flowers, and intricate designs. It should hold its shape when piped.
- Medium Consistency: Ideal for outlining cookies or creating a border.
- Flooding Consistency: Thin the icing with a teaspoon of water at a time until it flows like honey. This is ideal for filling in larger areas of cookies.
Tip: Use a spoon to test your consistency. If it holds a peak, it’s stiff. If it settles smoothly after 10 seconds, it’s perfect for flooding.
Step 5: Add Food Coloring (Optional)
If you’re adding food coloring, divide the icing into smaller bowls and add gel food coloring a drop at a time. Mix until your desired color is achieved. Gel colors are best because they don’t alter the icing’s consistency.
Tips for Perfect Royal Icing
- Work Quickly: Royal icing begins to dry out when exposed to air. Always cover your bowl with a damp towel or plastic wrap when not in use.
- Piping Bags: Use piping bags with fine tips for precision. Alternatively, sandwich bags with a small corner cut off work for quick decorating.
- Practice on Paper: Before decorating your cookies or cakes, practice your designs on parchment paper.
- Storage: Store unused royal icing in an airtight container, pressing plastic wrap directly onto the surface to prevent crusting. It will last for 2-3 days at room temperature.
Decorating Ideas Using Royal Icing
- Outline and Flood Cookies: Start by outlining your cookies with stiff icing, then flood the center with thinner icing for a smooth, professional finish.
- Add Details: Once the first layer dries, use a piping bag to add details like polka dots, stripes, or snowflakes.
- Layered Colors: Create multi-colored designs by layering different shades. Wait for each layer to dry before adding the next.
- Create Flowers or Ribbons: Stiff royal icing is perfect for piping delicate flowers, bows, and other intricate accents on cakes and cupcakes.
Why This Recipe is a Game-Changer
This royal icing recipe is a must-have for any home baker. It’s reliable, versatile, and gives your baked goods that professional finish you’ve always admired. Plus, it’s easy to customize with different colors and consistencies, making it perfect for any holiday, birthday, or special occasion.
Whether you’re a beginner trying your hand at cookie decorating or a seasoned baker creating stunning cake designs, this royal icing recipe will become your go-to for creating edible works of art.
Frequently Asked Questions
Q: Can I substitute the egg whites?
A: Yes! Use 2 tablespoons of meringue powder mixed with 4 tablespoons of water as an alternative.
Q: How long does royal icing take to dry?
A: It typically takes 6-8 hours for the icing to dry completely at room temperature. For faster results, place the cookies in front of a fan.
Q: Can royal icing be frozen?
A: While royal icing doesn’t freeze well, you can store it at room temperature for up to 3 days in an airtight container.
Q: Why is my icing too runny?
A: Add a little more sifted powdered sugar, one tablespoon at a time, until the desired consistency is reached.
Final Thoughts
Royal icing is the perfect finishing touch for your cookies, cakes, and baked goods. It’s easy to whip up, incredibly versatile, and gives your treats that polished, professional look. With this recipe and tips, you’ll be decorating like a pro in no time!
Happy decorating, and don’t forget to have fun—your kitchen is your canvas! 🍪🎨
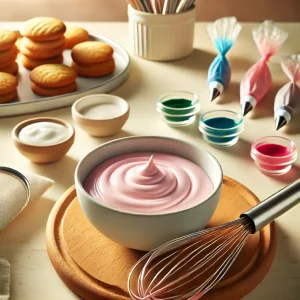
Royal Icing Recipe
Ingredients
- 2 egg whites
- 3 cups powdered sugar (sifted)
- 1 tsp vanilla extract
- Food coloring (optional)
Instructions
- Start by placing 2 egg whites in a clean, grease-free mixing bowl. Using a stand mixer or hand mixer on medium speed, beat the egg whites until they become frothy. This takes about 1-2 minutes. Frothy egg whites are essential for giving the icing its light, airy texture.Tip: Ensure your bowl and beaters are completely clean and dry. Any trace of grease can prevent the egg whites from whipping properly.
- Once the egg whites are frothy, add 1 teaspoon of vanilla extract. Mix until the vanilla is fully incorporated. Vanilla not only enhances the flavor but also complements any baked treats you’re decorating.
- With the mixer on low speed, gradually add the 3 cups of sifted powdered sugar one spoonful at a time. This prevents the sugar from flying out of the bowl and ensures it mixes evenly with the egg whites.After all the sugar is added, increase the mixer to medium speed. Mix for 2-3 minutes, stopping occasionally to scrape down the sides of the bowl.Goal: Your icing should be smooth, thick, and glossy with no visible lumps.
- The consistency of your royal icing is crucial, depending on how you plan to use it:Tip: Use a spoon to test your consistency. If it holds a peak, it’s stiff. If it settles smoothly after 10 seconds, it’s perfect for flooding.Stiff Consistency: Perfect for piping details, flowers, and intricate designs. It should hold its shape when piped.Medium Consistency: Ideal for outlining cookies or creating a border.Flooding Consistency: Thin the icing with a teaspoon of water at a time until it flows like honey. This is ideal for filling in larger areas of cookies.
- If you’re adding food coloring, divide the icing into smaller bowls and add gel food coloring a drop at a time. Mix until your desired color is achieved. Gel colors are best because they don’t alter the icing’s consistency.
Notes
Tips for Perfect Royal Icing
- Work Quickly: Royal icing begins to dry out when exposed to air. Always cover your bowl with a damp towel or plastic wrap when not in use.
- Piping Bags: Use piping bags with fine tips for precision. Alternatively, sandwich bags with a small corner cut off work for quick decorating.
- Practice on Paper: Before decorating your cookies or cakes, practice your designs on parchment paper.
- Storage: Store unused royal icing in an airtight container, pressing plastic wrap directly onto the surface to prevent crusting. It will last for 2-3 days at room temperature.
Decorating Ideas Using Royal Icing
- Outline and Flood Cookies: Start by outlining your cookies with stiff icing, then flood the center with thinner icing for a smooth, professional finish.
- Add Details: Once the first layer dries, use a piping bag to add details like polka dots, stripes, or snowflakes.
- Layered Colors: Create multi-colored designs by layering different shades. Wait for each layer to dry before adding the next.
- Create Flowers or Ribbons: Stiff royal icing is perfect for piping delicate flowers, bows, and other intricate accents on cakes and cupcakes.
