Chicken Pot Pie Recipe
Warm, creamy, and filled with tender chicken and hearty vegetables, this Chicken Pot Pie recipe is the ultimate comfort food. Enveloped in a flaky, golden crust, it’s perfect for cozy family dinners or prepping ahead for busy weeknights. With its comforting flavors and satisfying texture, this dish is sure to become a family favorite.
Why You’ll Love This Recipe
This Chicken Pot Pie is the epitome of classic comfort food. It features a creamy, savory filling packed with tender chicken and hearty vegetables, all wrapped in a buttery, flaky crust. Furthermore, its versatility allows you to customize it with your favorite veggies or swap in turkey for a delightful variation. For busy schedules, this recipe can be prepped ahead and stored in the fridge or freezer for later use. As a one-dish meal, it’s a complete and satisfying dinner that requires no additional sides.
Serving Suggestions
To make your meal complete, consider these serving suggestions:
- Pair it with a light green salad or steamed green beans for a balanced meal.
- Serve alongside garlic bread or fluffy buttermilk biscuits for added indulgence.
- Enjoy it with a warm bowl of soup for an extra cozy dining experience.
Variations & Substitutions
You can easily adapt this recipe to suit your preferences or dietary needs:
- Low-Carb Option: Replace the pie crust with a mashed cauliflower topping or opt for a biscuit crust.
- Turkey Pot Pie: Substitute cooked turkey for the chicken to give the dish a post-holiday twist.
- Dairy-Free Alternative: Use coconut milk or almond milk in place of dairy for a creamy, plant-based filling.
- Extra Veggies: Add mushrooms, bell peppers, or spinach for additional flavor and nutrients.
FAQs for Chicken Pot Pie
Here are answers to common questions to ensure your Chicken Pot Pie turns out perfect every time:
1. Can I use store-bought pie crust for this recipe?
Absolutely! Store-bought pie crust is a great time-saver, but making the crust from scratch adds a flaky, homemade touch.
2. Can I make this recipe gluten-free?
Yes! Swap all-purpose flour for a gluten-free flour blend, and use a gluten-free pie crust for the same delicious result.
3. Can I freeze chicken pot pie?
Certainly! Assemble and freeze it unbaked, tightly wrapped, for up to 3 months. Then bake from frozen, adding 10-15 minutes to the baking time. If baked, let it cool completely before freezing and reheat in the oven when ready to enjoy.
4. What vegetables can I use in this recipe?
A mix of peas, carrots, green beans, and corn works wonderfully. Additionally, feel free to include mushrooms, zucchini, or your favorite seasonal vegetables.
5. Can I make this recipe dairy-free?
Yes! Simply swap out butter for a plant-based alternative and use almond or coconut milk for the filling.
6. How do I reheat chicken pot pie?
To reheat, place it in the oven at 350°F (175°C) for 20-25 minutes. Cover with foil to prevent the crust from over-browning.
7. Can I use leftover chicken or turkey?
Definitely! Leftover rotisserie chicken or turkey makes this recipe even easier.
8. Can I make mini pot pies?
Yes, divide the filling and crust into ramekins or muffin tins for individual servings. Reduce the baking time to about 20-25 minutes.
9. What’s the best way to avoid a soggy crust?
Brush the bottom crust with a beaten egg white before adding the filling. This creates a barrier to keep the crust crisp.
10. How long can leftovers be stored?
Store leftover chicken pot pie in an airtight container in the refrigerator for up to 3 days. Reheat in the oven for best results.
Tips for Perfect Results
To ensure success, follow these tips:
- Use chilled butter when making the crust for optimal flakiness.
- Taste and adjust the seasoning in the filling before assembling.
- Let the pot pie cool for 5-10 minutes after baking to allow the filling to set.
By following this recipe and making your own Chicken Pot Pie, you’ll enjoy a hearty and comforting meal that’s perfect for any occasion. Whether it’s a family dinner or a cozy weeknight treat, this dish is sure to bring warmth and happiness to your table.

Chicken Pot Pie Recipe
Ingredients
For the Filling:
- 2 cups cooked chicken shredded or diced
- 2 tbsp butter
- 1 small onion diced
- 2 cloves garlic minced
- 1 cup diced carrots
- 1 cup frozen peas
- 1 cup corn fresh, frozen, or canned
- ¼ cup all-purpose flour
- 1 ½ cups chicken broth
- ¾ cup whole milk or heavy cream
- ½ tsp salt
- ½ tsp black pepper
- ½ tsp dried thyme
- ½ tsp dried parsley
For the Crust:
- 1 package 1 sheet store-bought puff pastry or pie crust
- 1 egg beaten (for egg wash)
Instructions
- Preheat your oven to 375°F (190°C) and grease a 9-inch pie dish or a 9×13-inch baking dish.
- In a large skillet, melt butter over medium heat. Add onions and garlic, cooking until fragrant. Stir in carrots, peas, and corn, cooking for another 2-3 minutes.
- Sprinkle the flour over the vegetables, stirring continuously for 1 minute. Slowly add chicken broth, stirring until thickened. Stir in milk or heavy cream, seasonings, and cooked chicken. Simmer for 2-3 minutes until creamy and thick.
- Pour the chicken filling into the prepared dish and spread it evenly. Roll out the pie crust or puff pastry and place it over the filling, tucking in the edges.
- Brush the top with egg wash and cut small slits in the pastry to allow steam to escape.
- Bake for 35-40 minutes, or until the crust is golden brown and the filling is bubbling.
- Let the pot pie rest for 5 minutes before slicing. Enjoy with a fresh salad or roasted vegetables.
Notes
Recipe Notes
- Make-Ahead Option: Assemble the pot pie up to 24 hours in advance and refrigerate before baking.
- Storage: Store leftovers in an airtight container in the fridge for 3-4 days.
- Freezing Instructions: Freeze the unbaked pot pie for up to 3 months. Thaw overnight before baking.
- Reheating: Warm in the oven at 350°F for 15 minutes, or microwave individual portions for 1-2 minutes.
- Gluten-Free Option: Use gluten-free flour and a gluten-free pie crust.

Creamy Chicken and Broccoli Rice Casserole
This Chicken and Broccoli Rice Casserole is a comforting and creamy one-dish meal loaded with tender chicken, nutritious broccoli, and perfectly seasoned rice. A family favorite, this casserole is perfect for meal prep, freezer-friendly, and a great way to get kids to eat their veggies!
Why You’ll Love This Recipe
This easy chicken and broccoli rice casserole is a go-to for busy nights because it’s simple to make, loaded with creamy, cheesy goodness, and requires just one baking dish!
Storage & Make-Ahead Tips
✔ Refrigerate: Store leftovers in an airtight container for up to 4 days.
✔ Freeze: Assemble the casserole but do not bake. Cover tightly with foil and freeze for up to 3 months. When ready to bake, thaw overnight in the fridge and bake as directed.
✔ Reheat: Warm individual portions in the microwave for 1-2 minutes or reheat in the oven at 350°F (175°C) until heated through.
Customization Ideas & Substitutes
- Make It Healthier – Use Greek yogurt instead of sour cream and brown rice for added fiber.
- Swap the Cheese – Try mozzarella, gouda, or pepper jack for a different flavor.
- Vegetarian Option – Replace the chicken with chickpeas or mushrooms.
- Low-Carb Version – Use riced cauliflower instead of regular rice.
What to Serve with Chicken and Broccoli Rice Casserole
- Garlic Bread – A crispy side to soak up all the creamy goodness.
- Side Salad – A simple green salad with balsamic vinaigrette balances the richness.
- Steamed Vegetables – Serve with extra roasted or steamed veggies.
Recipe Notes
- Best Rice to Use – Long-grain white rice, jasmine rice, or brown rice all work great.
- Broccoli Tip – If using frozen broccoli, thaw and drain well before adding to prevent excess moisture.
- Dairy-Free Version – Use a dairy-free cheese alternative and coconut milk instead of regular milk.
Frequently Asked Questions (FAQ)
1. Can I Use Uncooked Rice?
Yes, but you’ll need to add an additional 1 ½ cups of broth and bake covered for an extra 15-20 minutes.
2. Can I Use Rotisserie Chicken?
Absolutely! Rotisserie chicken is a great time-saver and adds extra flavor.
3. How Do I Keep the Casserole from Drying Out?
Make sure to not overbake it, and add a splash of milk when reheating to restore creaminess.
4. Can I Make This Casserole Without Cream of Chicken Soup?
Yes! Use a homemade substitute by mixing 2 tbsp butter, 2 tbsp flour, ½ cup broth, and ½ cup milk cooked until thickened.

Chicken and Broccoli Rice Casserole
Ingredients
For the Casserole:
- 2 cups cooked rice white or brown
- 2 cups cooked chicken shredded or cubed
- 2 cups broccoli florets fresh or frozen
- 1 cup shredded cheddar cheese
- 1 can 10.5 oz cream of chicken soup (or homemade substitute)
- ½ cup sour cream or Greek yogurt
- ½ cup milk
- 1 tsp garlic powder
- ½ tsp onion powder
- ½ tsp salt
- ¼ tsp black pepper
- ½ tsp paprika
For the Topping:
- ½ cup panko breadcrumbs or crushed crackers
- 2 tbsp melted butter
- ¼ cup Parmesan cheese
Instructions
Step 1: Preheat and Prepare
- Preheat your oven to 375°F (190°C). Grease a 9×13-inch baking dish with cooking spray or butter.
Step 2: Cook the Ingredients
- If using uncooked chicken, cook and shred or cube it before adding to the dish.
- Steam or microwave the broccoli until slightly tender.
- Cook the rice according to package instructions.
Step 3: Mix the Casserole
- In a large mixing bowl, combine the cooked rice, shredded chicken, broccoli, cheddar cheese, cream of chicken soup, sour cream, milk, and seasonings. Stir until well incorporated.
Step 4: Assemble the Casserole
- Transfer the mixture into the prepared baking dish and spread evenly.
Step 5: Make the Topping
- In a small bowl, mix the panko breadcrumbs, melted butter, and Parmesan cheese. Sprinkle the topping evenly over the casserole.
Step 6: Bake the Casserole
- Bake uncovered for 30-35 minutes, or until the top is golden brown and the casserole is bubbling around the edges.
Step 7: Serve and Enjoy!
- Let the casserole cool for 5 minutes before serving. Enjoy on its own or with a side salad or garlic bread.
Notes
Recipe Notes
- Best Rice to Use – Long-grain white rice, jasmine rice, or brown rice all work great.
- Broccoli Tip – If using frozen broccoli, thaw and drain well before adding to prevent excess moisture.
- Dairy-Free Version – Use a dairy-free cheese alternative and coconut milk instead of regular milk.

Cheesy Beef and Potato Casserole
This Cheesy Beef and Potato Casserole is the perfect hearty meal for busy nights. Made with layers of seasoned ground beef, tender potatoes, and a creamy, cheesy sauce, this dish is pure comfort food. It’s easy to make ahead, freezer-friendly, and always a family favorite.
Why You’ll Love This Recipe
This Cheesy Beef and Potato Casserole is a hearty and filling dish, combining tender potatoes, seasoned beef, and gooey melted cheese for the ultimate comfort meal. Everything bakes together in one pan, making cleanup effortless—perfect for busy weeknights! Plus, this recipe is easy to customize, allowing you to swap out ingredients for a healthier twist or add extra flavors to suit your taste. Best of all, it’s make-ahead and freezer-friendly, so you can prepare it in advance and simply reheat it for a stress-free dinner.
How to Serve This Casserole
This cheesy beef and potato casserole pairs well with:
🥦 Steamed or roasted vegetables (broccoli, green beans, or carrots)
🥗 A fresh garden salad with vinaigrette
🥖 A warm slice of crusty bread
🔄 Topping Variations
- Crunchy Crust: Sprinkle crushed Ritz crackers or cornflakes on top before baking.
- Extra Cheesy: Add an extra ½ cup of cheese on top for extra melty goodness.
- Herb Infused: Sprinkle dried thyme or rosemary into the beef mixture for more depth of flavor.
📌 FAQ – Cheesy Beef & Potato Casserole
Q: Can I use frozen potatoes?
Yes! You can use frozen hash browns or thinly sliced frozen potatoes. Just thaw them before layering.
Q: How do I make this casserole gluten-free?
Use a gluten-free cream of mushroom soup and swap out the panko breadcrumbs for crushed gluten-free crackers.
Q: Can I cook this in a slow cooker?
Yes! Layer everything in a slow cooker and cook on low for 5-6 hours or high for 3-4 hours.
Q: Can I use sweet potatoes instead?
Absolutely! Sweet potatoes will add a slightly sweet flavor that pairs well with the savory beef.

Cheesy Beef and Potato Casserole
Ingredients
For the Beef Layer:
- 1 lb ground beef
- 1 small onion diced
- 2 cloves garlic minced
- 1 tsp salt
- ½ tsp black pepper
- 1 tsp smoked paprika
- ½ tsp dried oregano
- 1 tbsp Worcestershire sauce
- 1 can 10.5 oz cream of mushroom soup (or homemade substitute)
- ½ cup beef broth
For the Potato Layer:
- 4 medium potatoes thinly sliced
- 1 ½ cups shredded cheddar cheese
- ½ cup shredded mozzarella cheese
- ½ cup heavy cream or whole milk
- ½ tsp garlic powder
- ½ tsp onion powder
- ½ tsp salt
Topping:
- ½ cup panko breadcrumbs optional for a crispy topping
- 2 tbsp melted butter
- 2 tbsp chopped fresh parsley optional
Instructions
1️⃣ Preheat & Prep
- Preheat the oven to 375°F (190°C). Grease a 9×13-inch baking dish with butter or cooking spray.
2️⃣ Cook the Beef Mixture
- In a large skillet over medium heat, cook the ground beef, breaking it apart as it browns. Add diced onions and garlic and sauté until softened. Stir in salt, pepper, paprika, and oregano. Pour in Worcestershire sauce, cream of mushroom soup, and beef broth. Simmer for 3-5 minutes until well combined. Remove from heat.
3️⃣ Prepare the Potatoes
- Wash and peel the potatoes, then slice them thinly (about ⅛-inch thick). In a bowl, toss them with heavy cream, garlic powder, onion powder, and salt.
4️⃣ Layer the Casserole
- Spread half of the sliced potatoes in the prepared baking dish.
- Add half of the cooked beef mixture over the potatoes.
- Sprinkle with half of the cheddar and mozzarella cheese.
- Repeat the layers with the remaining potatoes, beef, and cheese.
5️⃣ Add the Topping
- For a crispy top, mix panko breadcrumbs with melted butter and sprinkle over the casserole.
6️⃣ Bake
- Cover the dish with aluminum foil and bake for 40 minutes. Remove foil and bake for an additional 10 minutes or until the cheese is bubbly and the potatoes are tender.
7️⃣ Serve & Enjoy
- Let the casserole rest for 5-10 minutes before slicing. Garnish with fresh parsley and serve warm.
Notes
Recipe Notes
- For a Healthier Version: Swap out ground beef for ground turkey or chicken. Use low-fat cheese and replace heavy cream with milk.
- Cheese Variations: Try using pepper jack for a little heat or Swiss cheese for a rich, nutty flavor.
- Make-Ahead Tip: Assemble the casserole up to a day in advance and refrigerate before baking.
- Storage: Store leftovers in an airtight container in the refrigerator for up to 4 days. Freeze for up to 2 months.

Cheesy Chicken and Rice Casserole
Comforting, creamy, and easy to make, this Cheesy Chicken and Rice Casserole is the perfect weeknight meal. With tender chicken, fluffy rice, and a rich, cheesy sauce, this dish is a family favorite that can be made ahead of time and even frozen for later. It’s the ultimate one-pan meal that makes dinnertime easy and delicious!
This casserole is a one-pan wonder, making cleanup a breeze with no extra dishes required. It’s also perfect for meal prep or freezing, allowing you to prepare ahead and enjoy a stress-free meal later. With its rich, cheesy goodness and hearty ingredients, this dish brings warmth and comfort to every bite. Plus, it’s a family-friendly favorite—even picky eaters will love it!
How to Serve
This casserole is a complete meal on its own, but it also pairs beautifully with:
- A fresh green salad
- Roasted vegetables
- Dinner rolls or garlic bread
🔄 Make Ahead & Storage Tips
✔ Make-Ahead: Assemble the casserole, cover, and refrigerate up to 24 hours before baking.
✔ Freezing Instructions: Prepare the casserole and freeze before baking for up to 3 months. When ready, thaw overnight in the fridge and bake as directed.
✔ Leftovers: Store in an airtight container in the refrigerator for up to 4 days. Reheat in the microwave or oven at 350°F until warm.
📌 Recipe Notes
- Rice Variations: You can use brown rice, but increase the baking time by 10-15 minutes as it takes longer to cook.
- Cheese Options: Swap cheddar for mozzarella, Monterey Jack, or Pepper Jack for a spicy kick!
- Gluten-Free Option: Use a gluten-free cream of chicken soup and breadcrumbs.
- Extra Veggies: Stir in broccoli, peas, or bell peppers for added nutrients.
🌟 Topping Variations
Want to switch things up? Try these different toppings:
- Crushed Ritz crackers for a buttery crunch
- French fried onions for extra crispiness
- Parmesan cheese for a nutty flavor
Frequently Asked Questions (FAQ)
1. Can I use rotisserie chicken?
Yes! Rotisserie chicken is a great shortcut for this recipe. Simply shred the meat and use as directed.
2. Can I make this casserole in a slow cooker?
Absolutely! Mix everything and cook on LOW for 4 hours or HIGH for 2 hours, then top with cheese before serving.
3. Can I add vegetables?
Yes! You can mix in broccoli, carrots, peas, or spinach before baking.
4. What if I don’t have cream of chicken soup?
You can substitute with cream of mushroom or cream of celery soup, or make a homemade version using butter, flour, chicken broth, and milk.
5. How do I make this dairy-free?
Use dairy-free cheese, coconut milk, and a dairy-free sour cream substitute.

Cheesy Chicken and Rice Casserole
Ingredients
For the Casserole
- 2 cups cooked shredded chicken rotisserie or leftover chicken works great
- 1 ½ cups uncooked white rice
- 3 cups chicken broth or water
- 1 can 10.5 oz cream of chicken soup (or homemade)
- 1 cup sour cream or plain Greek yogurt for a healthier swap
- 1 teaspoon garlic powder
- 1 teaspoon onion powder
- ½ teaspoon paprika
- ½ teaspoon black pepper
- ½ teaspoon salt
- 2 cups shredded cheddar cheese divided
For the Topping (Optional)
- ½ cup panko breadcrumbs or crushed crackers
- 2 tablespoons melted butter
- 1 tablespoon chopped fresh parsley for garnish
Instructions
Step 1: Preheat the Oven
- Preheat your oven to 375°F (190°C). Lightly grease a 9×13-inch baking dish with nonstick spray or butter.
Step 2: Prepare the Rice
- In a large bowl, combine the uncooked rice and chicken broth. Let it sit for a few minutes while you prepare the rest of the ingredients to allow the rice to absorb some liquid.
Step 3: Mix the Casserole
- To the bowl with rice, add:
- Shredded chicken
- Cream of chicken soup
- Sour cream
- Garlic powder, onion powder, paprika, salt, and black pepper
- 1 ½ cups of the shredded cheese (save the rest for topping)
- Stir everything together until well mixed.
Step 4: Assemble & Bake
- Pour the mixture into the greased baking dish, spreading it out evenly.
- Cover tightly with foil and bake for 30 minutes.
- Remove the foil, sprinkle the remaining ½ cup shredded cheese over the top, and return to the oven for 10 more minutes, or until bubbly and golden brown.
Step 5: Add the Crunchy Topping (Optional)
- If using breadcrumbs, mix panko with melted butter, then sprinkle on top of the casserole before baking for an extra 5 minutes.
Step 6: Serve & Enjoy
- Let the casserole sit for 5 minutes before serving. Garnish with fresh parsley and enjoy!
Notes
📌 Recipe Notes
- Rice Variations: You can use brown rice, but increase the baking time by 10-15 minutes as it takes longer to cook.
- Cheese Options: Swap cheddar for mozzarella, Monterey Jack, or Pepper Jack for a spicy kick!
- Gluten-Free Option: Use a gluten-free cream of chicken soup and breadcrumbs.
- Extra Veggies: Stir in broccoli, peas, or bell peppers for added nutrients.

Apple Hand Pies Recipe
Nothing beats the warm, comforting flavors of homemade apple hand pies—flaky, buttery crust filled with tender cinnamon-spiced apples and baked to golden perfection. These little pies are the perfect snack, dessert, or even breakfast treat, and they’re easy to make using simple ingredients. Whether you’re making them for a cozy fall afternoon or prepping a batch for the holidays, these apple hand pies will quickly become a family favorite.
Why You’ll Love This Recipe
This homemade apple hand pie recipe is one you’ll want to make again and again. These little pies are perfectly portable, making them an easy grab-and-go snack or dessert. They feature a flaky, buttery crust made with real butter, giving them that crisp yet tender bite that makes every bite irresistible. The best part? They use simple, everyday ingredients—nothing fancy, just pantry staples and fresh apples. Plus, they’re easily customizable, so you can swap out flavors, add fun toppings, or use natural sweeteners for a healthier twist. Whether you’re enjoying them for breakfast, as an afternoon treat, or sharing them at a holiday gathering, these apple hand pies are guaranteed to bring warmth and comfort to any occasion!
How to Store Apple Hand Pies
Keeping your apple hand pies fresh is easy with a few simple storage tips. At room temperature, you can store them in an airtight container for up to two days, making them a perfect grab-and-go treat. If you need to keep them longer, place them in the refrigerator for up to five days. When ready to enjoy, simply warm them up in the oven for that freshly baked taste. For long-term storage, freeze unbaked pies for up to three months and bake them straight from frozen, adding an extra 3-5 minutes to the baking time. This way, you can always have a batch of warm, flaky apple pies ready whenever you need them!
Topping Variations
You can easily customize these apple hand pies with different toppings to enhance their flavor and texture. For a classic, sweet finish, dust them with powdered sugar after baking. If you prefer a glazed topping, mix powdered sugar with a little milk to create a simple icing and drizzle it over the warm pies. For a richer, more textured topping, sprinkle a crumb mixture of brown sugar and cinnamon before baking to add an extra layer of sweetness. If you love a bit of crunch, try adding finely chopped pecans or walnuts to the filling for a nutty twist.
How to Make a Healthier Version
If you’re looking for a healthier take on apple hand pies, there are a few easy swaps you can make. Instead of using all-purpose flour, try replacing half with whole wheat flour for added fiber and nutrients. You can also reduce the sugar by using less maple syrup or choosing a natural sweetener like coconut sugar. For a lighter baking method, skip the oven and use an air fryer at 350°F for 12-15 minutes, which gives you the same crispy texture with less oil and a shorter cooking time.
How to Serve Apple Hand Pies
These mini apple pies are perfect for so many occasions! Enjoy them as a breakfast treat with a hot cup of coffee or tea for a cozy start to the day. As a snack or dessert, serve them warm with a scoop of vanilla ice cream or a dollop of Greek yogurt for a delicious contrast of flavors. They also make a great holiday party favorite, whether you’re sharing them for Thanksgiving, Christmas, or any seasonal gathering. However you serve them, these little pies are sure to bring warmth and joy to any occasion!
Frequently Asked Questions (FAQ)
1. Can I make apple hand pies ahead of time?
Yes! You can assemble them ahead and store them unbaked in the fridge for up to 24 hours, then bake when ready.
2. Can I use store-bought pie dough?
Absolutely! If short on time, store-bought dough works just as well.
3. What are the best apples for hand pies?
Granny Smith, Honeycrisp, or Fuji apples work best as they hold their shape and offer the right balance of sweetness and tartness.
4. Can I fry apple hand pies instead of baking them?
Yes! Heat oil to 350°F and fry for 3-4 minutes per side until golden brown. Drain on paper towels before serving.
5. Can I make these gluten-free?
Yes! Swap the all-purpose flour for a 1:1 gluten-free flour blend for best results.

Apple Hand Pies Recipe
Ingredients
For the Dough:
- 2 ½ cups all-purpose flour spooned and leveled
- 1 tsp salt
- 1 tsp granulated sugar optional, for sweet pies
- 1 cup unsalted butter cold and cubed
- 6-8 tbsp ice water
For the Apple Filling:
- 2 large apples peeled and diced
- 2 tbsp maple syrup or honey substitute
- 1 tsp cinnamon
- ¼ tsp nutmeg
- 1 tsp vanilla extract
- 1 tbsp cornstarch or arrowroot powder for thickening
- 1 tbsp water
For the Topping:
- 1 egg for egg wash
- 2 tbsp rolled oats optional
- ½ tsp cinnamon for sprinkling
Instructions
Step 1: Make the Dough
- In a large mixing bowl, whisk together the flour, salt, and sugar (if using). Add the cold, cubed butter and use a pastry cutter or your hands to blend it into the flour until the mixture resembles coarse crumbs.
- Gradually add ice water, one tablespoon at a time, mixing with a fork until the dough starts to come together. Be careful not to overwork it. Form the dough into a ball, wrap it in plastic wrap, and chill in the refrigerator for at least 30 minutes.
Step 2: Prepare the Apple Filling
- While the dough chills, prepare the filling. In a saucepan over medium heat, combine the diced apples, maple syrup, cinnamon, nutmeg, and vanilla extract. Stir well and let the apples cook for 5-7 minutes, until they soften slightly.
- In a small bowl, mix the cornstarch and water to create a slurry, then add it to the apples. Stir continuously for another 1-2 minutes, until the mixture thickens. Remove from heat and let cool completely.
Step 3: Roll Out and Cut the Dough
- Preheat your oven to 375°F (190°C) and line a baking sheet with parchment paper.
- On a lightly floured surface, roll out the chilled dough to about ¼-inch thickness. Use a 3-4 inch round cutter (or the rim of a glass) to cut out circles. Re-roll any scraps to get as many circles as possible.
Step 4: Fill and Seal the Pies
- Place about 1-2 tablespoons of the cooled apple filling in the center of half of the dough circles. Place another dough circle on top and gently press the edges together to seal.
- Use a fork to crimp the edges, ensuring they’re sealed tightly. Cut a small slit on top of each hand pie to allow steam to escape.
Step 5: Add Toppings and Bake
- In a small bowl, whisk the egg and brush a light coating over the tops of the pies for a golden finish. Sprinkle with a mix of rolled oats and cinnamon for extra texture and flavor.
- Place the pies on the prepared baking sheet and bake for 18-22 minutes, or until golden brown and crispy.
Step 6: Serve and Enjoy
- Let the apple hand pies cool for 5-10 minutes before serving. Enjoy them warm on their own, or serve with vanilla ice cream, whipped cream, or a drizzle of caramel sauce.
Notes
Recipe Notes
- Dough Chilling is Key: Letting the dough chill in the refrigerator for at least 30 minutes helps create a flaky, buttery crust. If you have extra time, chilling for an hour will give even better results.
- Don’t Overfill: Adding too much filling can cause the pies to burst open while baking. Stick to 1-2 tablespoons per pie for the perfect balance.
- Sealing the Edges: Make sure to crimp the edges well using a fork to prevent any filling from leaking out during baking. You can also lightly brush the edges with water before sealing to help them stick.
- Baking Tip: If you want extra golden, crispy hand pies, brush them with egg wash (1 beaten egg + 1 tablespoon water) before baking.
- Serving Suggestion: These pies taste amazing warm or at room temperature, and they pair beautifully with vanilla ice cream, whipped cream, or a drizzle of caramel sauce.
- Make-Ahead Option: You can assemble the hand pies a day in advance and store them unbaked in the fridge. When ready, bake them straight from the fridge for a fresh, homemade treat.
- Freezing Instructions: To freeze, place unbaked pies on a baking sheet, freeze until firm, then transfer them to an airtight container or freezer bag. Bake directly from frozen, adding 3-5 extra minutes to the baking time.
This homemade apple hand pie recipe is one you’ll want to make again and again. These little pies are perfectly portable, making them an easy grab-and-go snack or dessert. They feature a flaky, buttery crust made with real butter, giving them that crisp yet tender bite that makes every bite irresistible. The best part? They use simple, everyday ingredients—nothing fancy, just pantry staples and fresh apples. Plus, they’re easily customizable, so you can swap out flavors, add fun toppings, or use natural sweeteners for a healthier twist. Whether you’re enjoying them for breakfast, as an afternoon treat, or sharing them at a holiday gathering, these apple hand pies are guaranteed to bring warmth and comfort to any occasion!

Easy Homemade Stromboli Recipe
Stromboli is a delicious Italian-American dish that combines soft, homemade dough with savory fillings, baked to golden perfection. This easy homemade stromboli recipe is versatile, customizable, and perfect for family dinners, gatherings, or meal prepping. Whether you fill it with classic pepperoni and cheese or opt for a veggie-packed version, this recipe guarantees a warm, satisfying bite every time. Plus, it’s easier to make than you might think!
Why You’ll Love This Stromboli Recipe
Homemade stromboli is a game-changer for anyone looking for a simple yet impressive meal. Unlike store-bought versions, making it from scratch lets you control the ingredients and flavors. The dough is easy to work with, and the filling combinations are endless. Best of all, it bakes up into a crispy, golden crust with a cheesy, flavorful center.
Tips for the Perfect Stromboli
Customize your fillings to suit your taste. Swap pepperoni for ham, add ricotta cheese for creaminess, or throw in extra veggies for a healthier twist. To ensure the dough seals properly, pinch the edges tightly. If you’re making stromboli ahead of time, refrigerate the prepared dough and let it come to room temperature before rolling it out.
Topping Variations
Parmesan cheese adds a rich, nutty flavor when sprinkled on top before baking. For a buttery finish, brush the stromboli with melted garlic butter after it comes out of the oven. Adding dried basil or oregano before baking enhances the Italian flavors.
How to Store and Reheat Stromboli
Refrigerate leftover stromboli in an airtight container for up to 3 days. To reheat, bake at 350°F for about 8-10 minutes to restore crispness. Avoid microwaving, as this can make the crust soft.
If freezing, wrap unbaked stromboli in plastic wrap and foil and store it for up to 3 months. Bake directly from frozen, adding an extra 5-10 minutes to the baking time.
Frequently Asked Questions (FAQ)
Can I use store-bought pizza dough? Yes! If you’re short on time, store-bought dough works great. Simply roll, fill, and bake as directed.
How do I prevent my stromboli from leaking? Be sure to leave a 1-inch border when adding sauce and fillings. Pinching the seams tightly will also help prevent leaks.
Can I make mini strombolis? Absolutely! Divide the dough into smaller portions and roll out individual strombolis. Adjust the baking time to around 12-15 minutes.
What’s the difference between stromboli and calzones? Stromboli is rolled into a log, while calzones are folded in half and sealed like a turnover. Calzones also often include ricotta cheese in the filling.
Homemade stromboli is a fun and delicious way to enjoy pizza-inspired flavors with a twist. Whether you’re making it for a family dinner or a gathering with friends, this recipe is sure to be a hit. Try different fillings, experiment with flavors, and enjoy a warm, cheesy bite every time!

Easy Homemade Stromboli Recipe
Ingredients
For the Dough:
- ¾ cup warm water 100-110°F
- 1 .25-ounce packet active dry yeast
- 1 tablespoon granulated sugar divided
- 2 cups all-purpose flour
- 1 tablespoon olive oil plus more for brushing
- ¾ teaspoon salt
For the Filling:
- ½ cup marinara sauce
- 1 cup shredded mozzarella cheese
- ½ cup cooked and crumbled Italian sausage
- ½ cup pepperoni slices
- ¼ cup sautéed onions and bell peppers
- ¼ cup sliced mushrooms optional
- 1 teaspoon dried Italian seasoning
- 1 egg beaten (for egg wash)
- 1 tablespoon sesame seeds or poppy seeds for topping optional
Instructions
Step 1: Making the Dough
- In a small bowl, combine the warm water, yeast, and ½ tablespoon of sugar. Stir gently and let the mixture sit for 5-10 minutes until it becomes foamy. This step is crucial for activating the yeast and ensuring the dough rises properly.
- In a large mixing bowl, whisk together the flour, salt, and the remaining sugar. Once the yeast mixture is ready, pour it into the dry ingredients along with the olive oil. Stir until the dough starts to come together.
- Transfer the dough to a floured surface and knead for 8-10 minutes until it becomes smooth and elastic. If you’re using a stand mixer, attach the dough hook and mix on medium speed for about 5 minutes. Once kneaded, place the dough in a greased bowl, cover it with a damp cloth, and let it rise in a warm place for about an hour or until doubled in size.
Step 2: Preparing the Filling
- While the dough is rising, prepare the filling ingredients. Cook and crumble the Italian sausage, sauté the onions, bell peppers, and mushrooms (if using), and shred the mozzarella cheese. Having everything ready makes assembling the stromboli quick and easy.
Step 3: Rolling Out the Dough
- Preheat your oven to 375°F and line a baking sheet with parchment paper. Once the dough has risen, punch it down to release any air bubbles. Transfer it to a floured surface and roll it out into a rectangle, roughly 12×10 inches.
Step 4: Assembling the Stromboli
- Spread a thin layer of marinara sauce over the dough, making sure to leave a 1-inch border around the edges. Sprinkle the Italian seasoning evenly over the sauce. Next, layer the cheese, cooked sausage, pepperoni, and sautéed vegetables. Be sure not to overfill the stromboli, as this can make rolling and sealing difficult.
- Starting from one of the long sides, carefully roll up the dough, tucking in the ends as you go to seal in the filling. Place the stromboli seam-side down on the prepared baking sheet.
Step 5: Brushing and Baking
- For a golden and crisp crust, brush the top of the stromboli with the beaten egg. Sprinkle with sesame seeds or poppy seeds for extra texture and flavor. Using a sharp knife, cut 3-4 small slits on top to allow steam to escape while baking.
- Place the stromboli in the oven and bake for 20-25 minutes or until golden brown and fully cooked.
Step 6: Serving and Enjoying
- Once baked, allow the stromboli to cool for about 5 minutes before slicing. This helps retain its structure and prevents the filling from spilling out. Serve warm with extra marinara sauce for dipping.
Notes
Recipe Notes:
- Dough Resting: Allowing the dough to rest in a warm, draft-free area is key for a good rise. If your kitchen is cold, place the dough near a preheated (but off) oven or wrap the bowl in a warm towel.
- Fillings: Feel free to customize the fillings based on your preferences. Vegetarian options like spinach, artichokes, or roasted red peppers work wonderfully. For extra flavor, use a blend of cheeses.
- Freezing: Stromboli can be frozen either unbaked or baked. If unbaked, wrap tightly in plastic and foil, then bake directly from frozen, adding 5-10 minutes to the baking time. For baked stromboli, allow it to cool completely, wrap tightly, and reheat in the oven for the best texture.
- Avoid Leaks: To prevent the filling from leaking, leave a 1-inch border when spreading marinara sauce and fillings. Make sure to seal the edges tightly by pinching or rolling them together.
- Make-Ahead Option: The dough can be prepared a day in advance and stored in the refrigerator. Let it come to room temperature before rolling it out for best results.
- Serving Suggestions: Serve your stromboli with marinara sauce, garlic aioli, or ranch dressing for dipping. Pair it with a fresh salad or roasted vegetables for a complete meal.
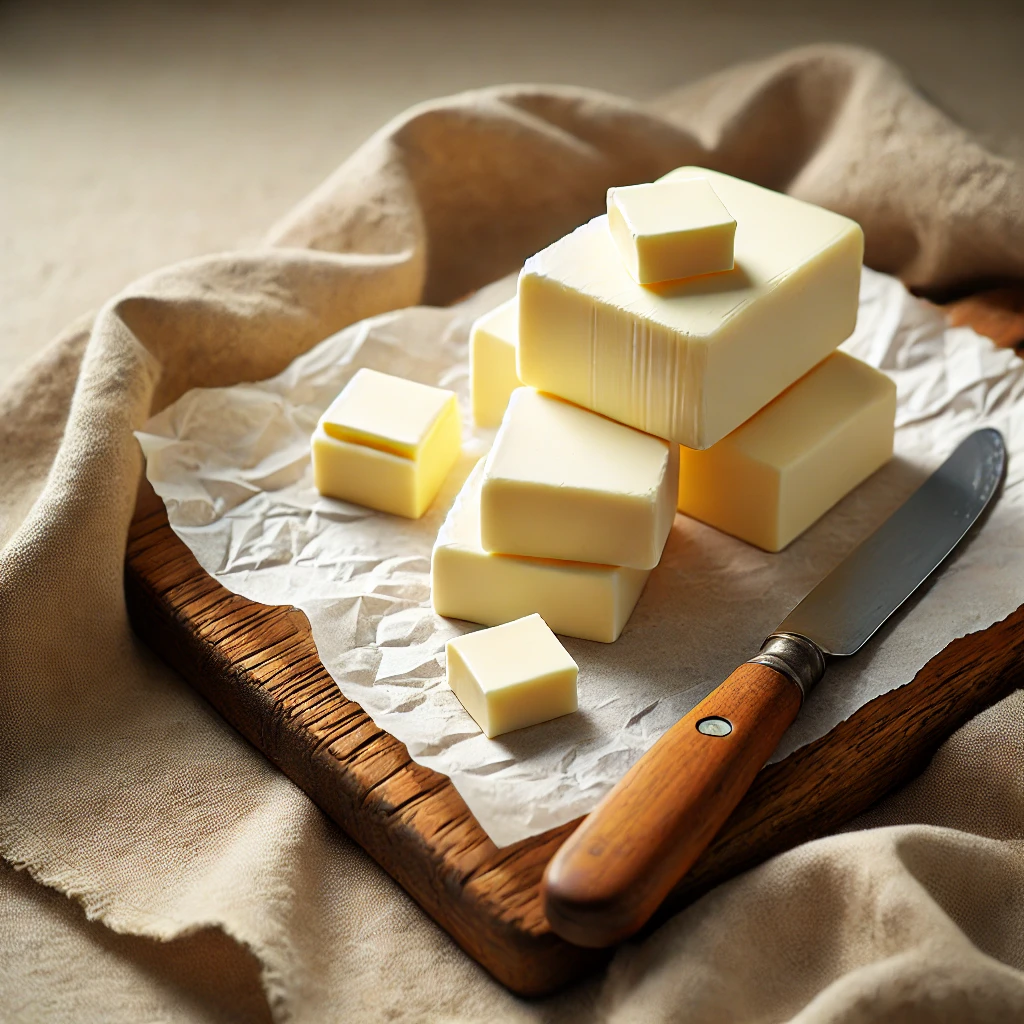
Homemade Butter Recipe
Making butter at home is incredibly simple and satisfying. With just one ingredient—heavy whipping cream—you can create fresh, creamy butter in minutes. Perfect for spreading on bread, using in recipes, or as a topping for your favorite dishes!
There’s nothing quite like the rich, creamy taste of homemade butter. It’s fresher, more flavorful, and free from unnecessary additives. Plus, it’s a fun and rewarding process that takes just minutes! Whether you’re spreading it on bread, using it for baking, or incorporating it into your favorite recipes, homemade butter is a kitchen essential.
Why Make Butter at Home?
Homemade butter is not only a fun project but also a healthier alternative to store-bought butter. Here’s why:
- No Additives: Store-bought butter often contains preservatives or artificial flavors. Homemade butter is 100% natural.
- Customizable: You can make it salted or unsalted, or even add flavors like herbs, garlic, or honey.
- Economical: With just heavy cream, you can make butter and buttermilk at a fraction of the cost of buying them separately.
- Satisfying: The process of making butter is simple and gives you a sense of accomplishment.
What You’ll Need
To make butter at home, you only need a few basic ingredients and tools:
Ingredients:
- 2 cups heavy whipping cream (cold works best)
- Optional: 1/4 tsp salt (for salted butter)
Step-by-Step Instructions
Step 1: Start with the Cream
Pour 2 cups of heavy whipping cream into your mixing bowl. If you’re using a stand mixer, attach the whisk attachment. If using a hand mixer, ensure your bowl is deep enough to avoid splatters.
Step 2: Whip the Cream
Begin mixing the cream on medium speed and gradually increase to high speed. First, you’ll see it transform into whipped cream. Continue whipping, and after about 6-8 minutes, the cream will separate into butter solids and buttermilk.
Step 3: Strain the Buttermilk
Once the cream has separated, pour off the liquid (buttermilk). Save the buttermilk for baking or cooking later.
Step 4: Rinse the Butter
Transfer the butter solids to a fine-mesh sieve or wrap it in cheesecloth. Rinse under cold water, gently pressing to remove any remaining buttermilk. Repeat this step until the water runs clear.
Step 5: Add Salt (Optional)
If you prefer salted butter, mix in 1/4 teaspoon of salt after rinsing. Adjust the salt to your taste.
Step 6: Shape and Store
Shape the butter into a ball or press it into a butter mold for a polished look. Wrap it in parchment paper or store it in an airtight container. Refrigerate for up to 2 weeks, or freeze for longer storage.
Tips for Perfect Homemade Butter
- Use Cold Cream: Cold cream whips more effectively and results in a creamier butter.
- Flavor Variations: Add herbs, garlic, or cinnamon sugar to create your own flavored butter.
- Save the Buttermilk: The leftover buttermilk is perfect for pancakes, biscuits, or even salad dressings.
Serving Ideas for Homemade Butter
Homemade butter is versatile and can elevate any dish. Here are some serving suggestions:
- Spread it on warm bread, biscuits, or rolls.
- Use it to sauté vegetables or sear meat.
- Melt it over popcorn for a rich, buttery snack.
- Incorporate it into your favorite baked goods for a fresh, homemade touch.
Frequently Asked Questions
1. Can I use a food processor instead of a mixer?
Yes! A food processor works well for making butter. Follow the same steps—just blend the cream until it separates into butter solids and buttermilk.
2. How long does homemade butter last?
Homemade butter can be stored in the refrigerator for up to 2 weeks. For longer storage, freeze it in an airtight container for up to 6 months.
3. What if my cream doesn’t separate?
If the cream isn’t separating, make sure it’s cold and that you’re whipping it long enough. Room temperature cream may take less time but won’t whip as effectively.
Variations & Substitutions
- Make it Dairy-Free: Use coconut cream to make a dairy-free butter alternative.
- Sweet Butter: Add a touch of honey or maple syrup for a sweet version.
- Herbed Butter: Mix in finely chopped parsley, rosemary, or chives for a savory twist.
Why You’ll Love This Recipe
Homemade butter is not just a recipe—it’s an experience. You’ll love the simplicity of the process, the richness of the flavor, and the versatility of this classic kitchen staple. Whether you’re making a small batch for breakfast or a large one for a holiday feast, homemade butter is always a good idea.
Homemade Butter Recipe
Ingredients
- 2 cups heavy whipping cream preferably cold
- Optional: 1/4 tsp salt for salted butter
Instructions
Step 1: Prepare Your Equipment
- Use either a stand mixer with a whisk attachment or a hand mixer and a large mixing bowl.
- Ensure the bowl is deep enough to prevent splattering as the cream whips.
Step 2: Whip the Cream
- Pour the heavy whipping cream into the mixing bowl.
- Start whipping on medium speed, gradually increasing to high speed.
- First, the cream will turn into whipped cream (about 2-3 minutes). Keep whipping until it separates into butter and buttermilk (about 6-8 minutes total).
- You’ll see the liquid (buttermilk) separate, leaving clumps of butter solids.
Step 3: Strain and Rinse the Butter
- Once the cream separates, pour off the liquid (buttermilk) and set it aside for later use in baking or pancakes.
- Transfer the butter solids to a fine-mesh sieve or cheesecloth.
- Rinse the butter under cold water, gently pressing it to remove any remaining buttermilk. Repeat until the water runs clear.
Step 4: Add Salt (Optional)
- If you want salted butter, mix in 1/4 tsp of salt after rinsing. Adjust to taste.
Step 5: Shape and Store
- Shape the butter into a ball or press it into a butter mold for a polished look.
- Wrap the butter in parchment paper or store it in an airtight container.
- Refrigerate for up to 2 weeks or freeze for longer storage.
Notes
Recipe Notes
- Yield: 2 cups of heavy cream typically yield ~1 cup of butter and ~1/2 cup of buttermilk.
- Storage Tips:
- Store in an airtight container in the refrigerator for up to 2 weeks.
- For longer storage, wrap in parchment paper or plastic wrap and freeze for up to 6 months.
- Adjustable Salt: Add salt gradually to taste if making salted butter.
- Buttermilk Uses: The leftover buttermilk is perfect for making pancakes, biscuits, or even savory marinades.
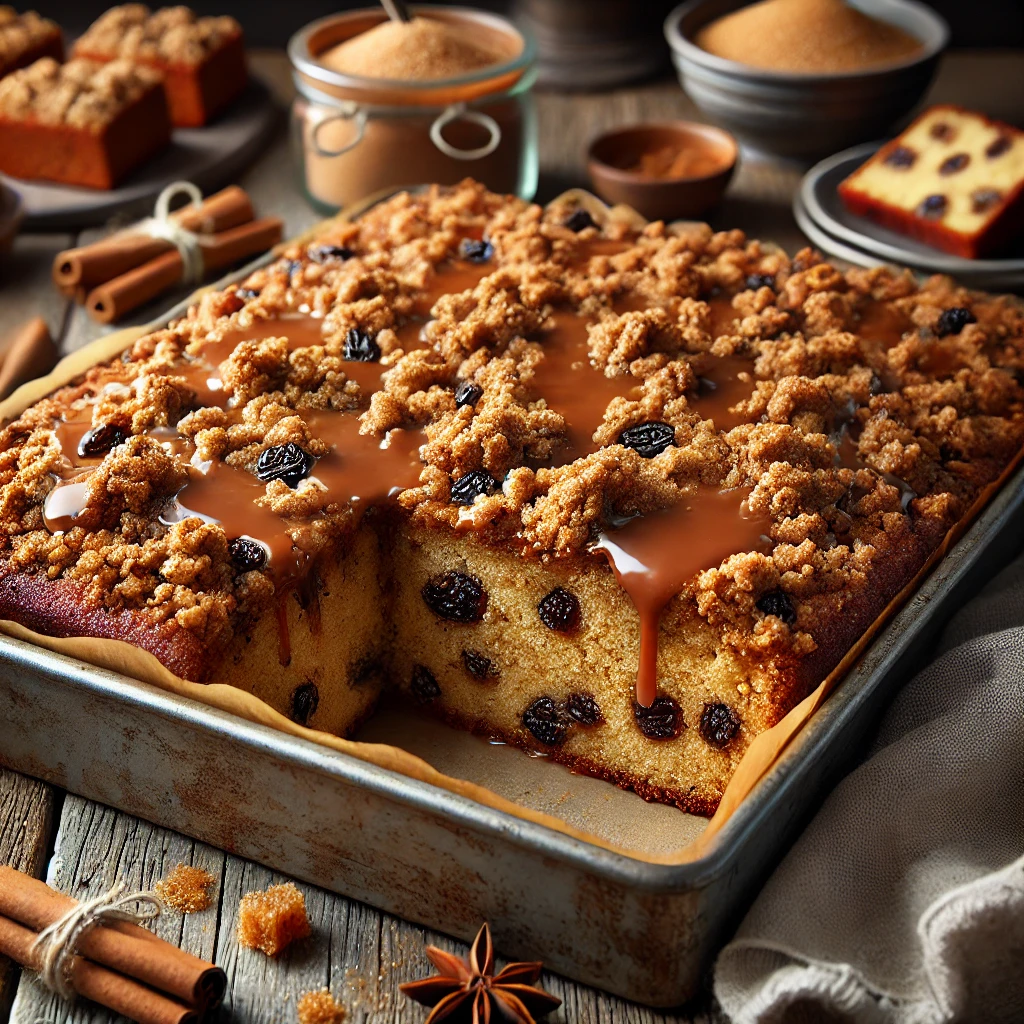
Streusel Spice Cake with Brown Sugar Glaze
The perfect spiced cake with a buttery streusel topping and rich brown sugar glaze!
If you love warm, spiced cakes with a crunchy, buttery streusel topping, then you’re going to love this Streusel Spice Cake with Brown Sugar Glaze! This homemade cake is soft, moist, and bursting with warm cinnamon and ginger, making it perfect for a cozy night in.
The best part? It’s topped with a brown sugar glaze that soaks into the streusel, creating an irresistible combination of textures and flavors. Whether you’re serving this for dessert after a family dinner or enjoying it with a hot cup of coffee, this cake is sure to be a new favorite in your home!
Why You’ll Love This Recipe:
Simple ingredients – Everything you need is likely in your pantry.
Moist and flavorful – The chopped apples, chocolate chips, and raisins add incredible texture and taste.
Perfect for any occasion – Serve it for breakfast, as a snack, or for dessert!
Let’s get baking!
Storage Tips
- Room Temperature: Store covered for 2-3 days.
- Refrigerator: Keep in an airtight container for up to 5 days.
- Freezer: Wrap slices in plastic wrap and freeze for up to 3 months. Thaw at room temperature before serving.
Recipe Variations & Substitutions
- Swap the raisins – Use dried cranberries, chopped dates, or even walnuts.
- Add more spice – Increase the cinnamon and ginger, or add nutmeg for a deeper flavor.
- Use a different glaze – Try a maple glaze instead of brown sugar for a different twist.
FAQs
1. Can I make this cake ahead of time?
Yes! This cake actually tastes even better the next day as the flavors develop. Just store it in an airtight container.
2. Can I make this into muffins?
Absolutely! Pour the batter into muffin tins and bake for 20-25 minutes at 350°F.
3. What if I don’t have molasses for the homemade brown sugar?
You can substitute it with maple syrup or honey. The flavor will be slightly different but still delicious!
Glaze Variations for Streusel Spice Cake
Maple Glaze
For a fall-inspired twist, swap the brown sugar glaze for a maple glaze!
- ½ cup powdered sugar
- 2 tbsp pure maple syrup
- 1 tbsp melted butter
- 1 tsp vanilla extract
- 1-2 tbsp milk (adjust for consistency)
Instructions:
Whisk everything together until smooth and drizzle over the cake while warm.
Vanilla Glaze
A light vanilla glaze pairs beautifully with the cinnamon-spiced streusel.
- 1 cup powdered sugar
- 2 tbsp milk
- 1 tsp vanilla extract
Instructions:
Whisk together until smooth, then pour over the cake for a subtle sweetness.
Cream Cheese Glaze
For a thicker, slightly tangy glaze that complements the spices in the cake.
- 4 oz cream cheese, softened
- ½ cup powdered sugar
- 2 tbsp milk
- ½ tsp vanilla extract
Instructions:
Beat the cream cheese and powdered sugar together, then mix in the milk and vanilla until smooth.
Caramel Glaze
If you love a buttery, deep caramel flavor, try this easy caramel glaze!
- ½ cup brown sugar
- ¼ cup butter
- ¼ cup heavy cream
- ½ tsp vanilla extract
Instructions:
Melt the butter and brown sugar over medium heat, then add the cream and vanilla. Stir until smooth, then pour over the cake while warm.
Chocolate Drizzle
If you want a chocolatey twist, this glaze is so good with the streusel topping.
- ½ cup semi-sweet or dark chocolate chips
- 2 tbsp heavy cream or milk
- 1 tbsp butter
Instructions:
Melt everything together over low heat or in 30-second microwave bursts, stirring until smooth. Drizzle over the cake for a rich, chocolatey finish.
Espresso Glaze
A bold glaze that enhances the warm spice flavors in the cake.
- 1 cup powdered sugar
- 1 tbsp brewed espresso (or strong coffee)
- 1 tbsp milk
- ½ tsp vanilla extract
Instructions:
Whisk everything together until smooth and pour over the cake for a subtle coffee kick.
How to Use These Glazes
- Drizzle over a warm cake for a thinner, more soaked-in effect.
- Let the cake cool completely before glazing for a thicker, more pronounced topping.
- Double the glaze recipe if you love an extra gooey cake!
These variations give you so many options to personalize your cake based on what you’re craving!
This Streusel Spice Cake with Brown Sugar Glaze is the perfect balance of warm, spiced flavors and a buttery crunch. It’s simple, comforting, and made with ingredients you probably already have in your kitchen. Whether you’re baking this for a family gathering or just to treat yourself, I promise—it’s worth it!
If you try this recipe, let me know in the comments below or tag me on social media @homewithjana! I’d love to see how yours turns out.
Streusel Spice Cake with Brown Sugar Glaze
Ingredients
For the Cake:
- 1 tsp cinnamon
- ½ tsp ginger
- 1 tsp vanilla extract
- ½ cup 1 stick butter, softened
- 1 cup brown sugar packed (or make your own with white sugar + molasses!)
- 3 egg yolks
- 2 cups all-purpose flour
- 1 tsp baking powder
- ½ tsp baking soda
- 1 ½ cups raisins
- ½ cup chocolate chips regular, not mini
- ¼ cup fresh apple peeled and finely chopped
For the Streusel Topping:
- ½ cup all-purpose flour
- ⅓ cup brown sugar packed
- 1 tsp cinnamon
- ¼ cup cold butter cubed
- ¼ cup chocolate chips optional, for a chocolatey streusel!
For the Brown Sugar Glaze:
- ½ cup butter
- ½ cup brown sugar
- 2 tbsp milk
- 1 tsp vanilla extract
- 1 cup powdered sugar
Instructions
- Preheat oven to 350°F (175°C). Grease and flour a loaf pan or an 8×8-inch baking pan.
Make the cake batter
- In a large mixing bowl, beat the softened butter and brown sugar together until light and fluffy.
- Add egg yolks and vanilla extract, mixing well.
- In a separate bowl, whisk together the flour, baking powder, baking soda, cinnamon, and ginger.
- Gradually add the dry ingredients to the wet mixture, stirring until just combined.
- Fold in raisins, chocolate chips, and chopped apples until evenly mixed.
Make the streusel topping
- In a small bowl, combine flour, brown sugar, and cinnamon.
- Cut in the cold cubed butter using a fork or your hands until the mixture becomes crumbly.
- Stir in the chocolate chips (if using).
Assemble & Bake
- Pour the cake batter into the prepared pan, spreading it out evenly.
- Sprinkle the streusel topping evenly over the batter.
- Bake for 35-45 minutes, or until a toothpick inserted in the center comes out clean.
- Let the cake cool in the pan for 10 minutes while you prepare the glaze.
Make the Brown Sugar Glaze
- In a saucepan over medium heat, melt the butter and brown sugar together, stirring until the sugar dissolves.
- Add the milk, bring to a gentle simmer, and let it bubble for 1 minute.
- Remove from heat and stir in the vanilla extract.
- Gradually whisk in the powdered sugar until smooth.
Glaze & Serve
- Once the cake is warm (not hot), pour the brown sugar glaze over the top, making sure to coat it evenly.
- Let the cake sit for 30 minutes to allow the glaze to set.
- Slice, serve, and enjoy!
Notes
Storage Tips
- Room Temperature: Store covered for 2-3 days.
- Refrigerator: Keep in an airtight container for up to 5 days.
- Freezer: Wrap slices in plastic wrap and freeze for up to 3 months. Thaw at room temperature before serving.
