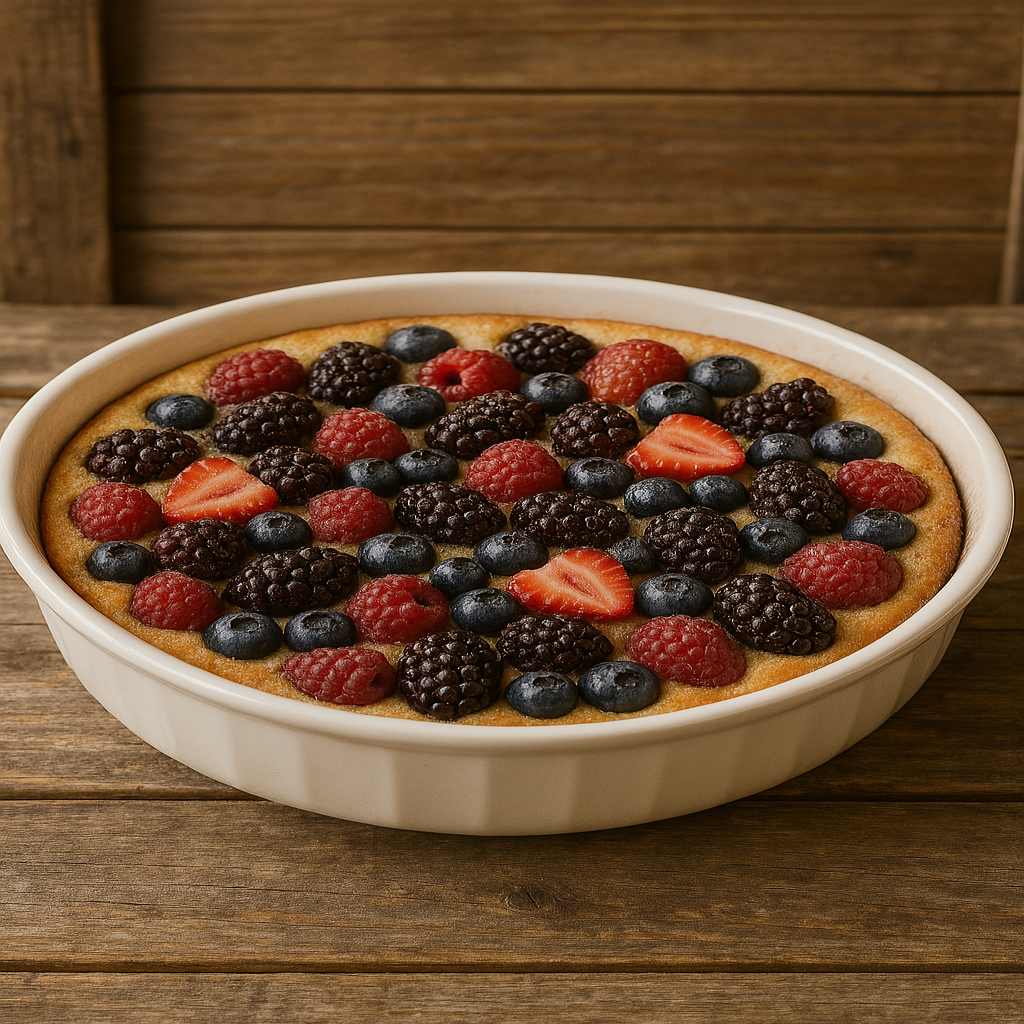
Sugared Berry Cobbler Cake
A sweet and simple berry cobbler cake made with juicy frozen berries and a soft vanilla cake base. It’s buttery, fruity, and perfectly golden—an easy dessert for any day of the week.
Why You’ll Love This Recipe
This Sugared Berry Cobbler Cake is the perfect combination of a fruity cobbler and a soft vanilla cake. You get sweet, juicy berries, warm brown sugar, cozy nutmeg, and a fluffy golden cake—all in one pan. Whether you’re serving it warm with whipped cream or enjoying a slice cold with coffee the next morning, it’s a comforting treat that tastes like home.
This Sugared Berry Cobbler Cake is the kind of dessert that brings back memories of family kitchens, wooden tables, and homegrown love. It’s part cobbler, part cake—with a soft vanilla cake base, warm brown sugar, juicy berries, and just a hint of spice. Whether you’re pulling it from the oven to serve guests, or baking it just for your family on a quiet evening, this is one of those recipes that your family will love.
It’s also incredibly easy to make—perfect for those of us who love homemade baking but don’t always have the energy for fussy steps. Just layer your ingredients, pour in the batter, and let your oven do the magic.
What Makes This Recipe So Special?
The beauty of this dessert is its simplicity. With only a handful of pantry staples, you can create something that tastes like you spent hours in the kitchen. The frozen berries release their juices as they bake, mingling with brown sugar and butter to create a sweet, tangy base that pairs perfectly with the soft vanilla cake. The nutmeg adds a warm, comforting flavor, while the golden crust that forms on top gives it just the right amount of texture.
Plus, this recipe is a wonderful way to use up frozen fruit, which makes it affordable and accessible year-round.
Ingredients You’ll Need
To make this cake, you’ll need two parts: the berry base and the vanilla cake batter.
For the berries, we use a total of 3 cups of frozen mixed berries, split into two layers. Blueberries, raspberries, blackberries, and chopped strawberries all work beautifully here—use what you have on hand. The base also includes brown sugar, melted butter, and a sprinkle of nutmeg, giving that deep, cozy flavor.
For the vanilla cake, you’ll use a classic combo of all-purpose flour, sugar, eggs, butter, milk, vanilla extract, baking powder, and salt. It’s simple, it’s soft, and it bakes up beautifully over the berries.
Step-by-Step Instructions
Start by preheating your oven to 350°F (175°C) and buttering an 8×8-inch or medium cake pan. In the bottom of your pan, layer 1 1/2 cups of frozen berries, drizzle over 2 to 3 tablespoons of melted butter, sprinkle with 1/4 cup of brown sugar, and lightly dust with nutmeg.
Next, prepare your vanilla cake batter. In a large bowl, cream together 1/2 cup softened butter and 1 cup of sugar until light and fluffy. Add in 2 eggs, one at a time, followed by 1 tablespoon of vanilla extract. In a separate bowl, whisk together 1 1/2 cups flour, 2 teaspoons baking powder, and 1/4 teaspoon salt. Add the dry ingredients to the wet, alternating with 1/2 cup milk, and mix until smooth.
Pour the batter gently over the berry layer in your cake pan, spreading evenly. Then top the cake batter with the remaining 1 1/2 cups of frozen berries. Bake in the preheated oven for 40 minutes, or until a toothpick inserted into the center comes out clean and the top is lightly golden.
Let the cake cool slightly before serving. It’s delicious on its own, but even better with whipped cream or vanilla ice cream.
A Cozy Dessert for Any Occasion
What I love about this cobbler cake is how versatile it is. It feels special enough to bring to a potluck or serve at a family gathering, but it’s also the kind of thing you can make on a chilly afternoon just because. You don’t need fresh berries, fancy tools, or hours in the kitchen. Just a simple recipe, a warm oven, and a craving for something homemade.
It’s also a great dessert to share—whether with neighbors, church friends, or just your own family. And leftovers? If you’re lucky enough to have any, they’re just as tasty the next day.
Recipe Tips
- Don’t thaw the berries. Frozen berries go straight into the pan so they release their juices as they bake.
- Want it extra sweet? Add a sprinkle of granulated sugar on top before baking for a little crunch.
- Make it rustic. Serve it right in the pan with big spoons and let everyone scoop their own piece.
Storage & Reheating
Leftovers can be stored in an airtight container in the refrigerator for up to 3 days. You can enjoy them cold or warm them up in the microwave or oven before serving.
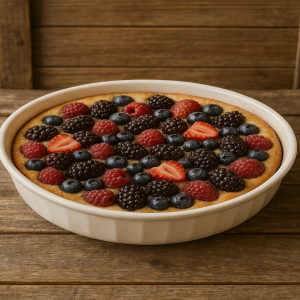
Sugared Berry Cobbler Cake
Ingredients
For the Berry Cobbler Cake:
- 3 cups frozen mixed berries such as blueberries, raspberries, and sliced strawberries, divided
- 1/4 cup brown sugar
- 2 –3 tablespoons melted butter
- 1/4 teaspoon ground nutmeg
For the Vanilla Cake Batter:
- 2 cups all-purpose flour
- 1 cup granulated sugar
- 1 cup unsalted butter softened
- 6 egg whites or 4 whole eggs
- 1 cup milk
- 2 teaspoon vanilla extract
- 4 teaspoons baking powder
- 1/2 teaspoon salt
Instructions
- Preheat your oven to 350°F (175°C). Lightly butter a medium cake pan (around 8×8-inch).
- In the bottom of the buttered pan, layer 1 1/2 cups of frozen berries. Drizzle the melted butter over the berries, then sprinkle with brown sugar and a touch of nutmeg.
- In a large mixing bowl, cream together the softened butter and sugar until light and fluffy. Add in the eggs one at a time, beating after each. Mix in the vanilla extract.
- In a separate bowl, whisk together the flour, baking powder, and salt. Add dry ingredients to the wet, alternating with milk, and mix until a smooth batter forms.
- Pour the vanilla cake batter gently over the berry mixture in the pan, spreading evenly.
- Top the batter with the remaining 1 1/2 cups of frozen berries.
- Bake in the preheated oven for 40 minutes, or until a toothpick inserted in the center comes out clean and the top is golden.
- Let cool slightly before serving. Delicious warm or cold, plain or topped with whipped cream or vanilla ice cream.
Notes
- You can use any combination of frozen berries—blueberries, raspberries, blackberries, and chopped strawberries all work great.
- For a richer flavor, try substituting part of the milk in the cake batter with buttermilk.
- Store leftovers in an airtight container in the fridge for up to 3 days. Reheat gently if desired.
More Top-Rated Cake Recipes:
These are the best-loved and best-reviewed cakes on our site. These are the ones we make most often.
Irish Cream Chocolate Cheesecake
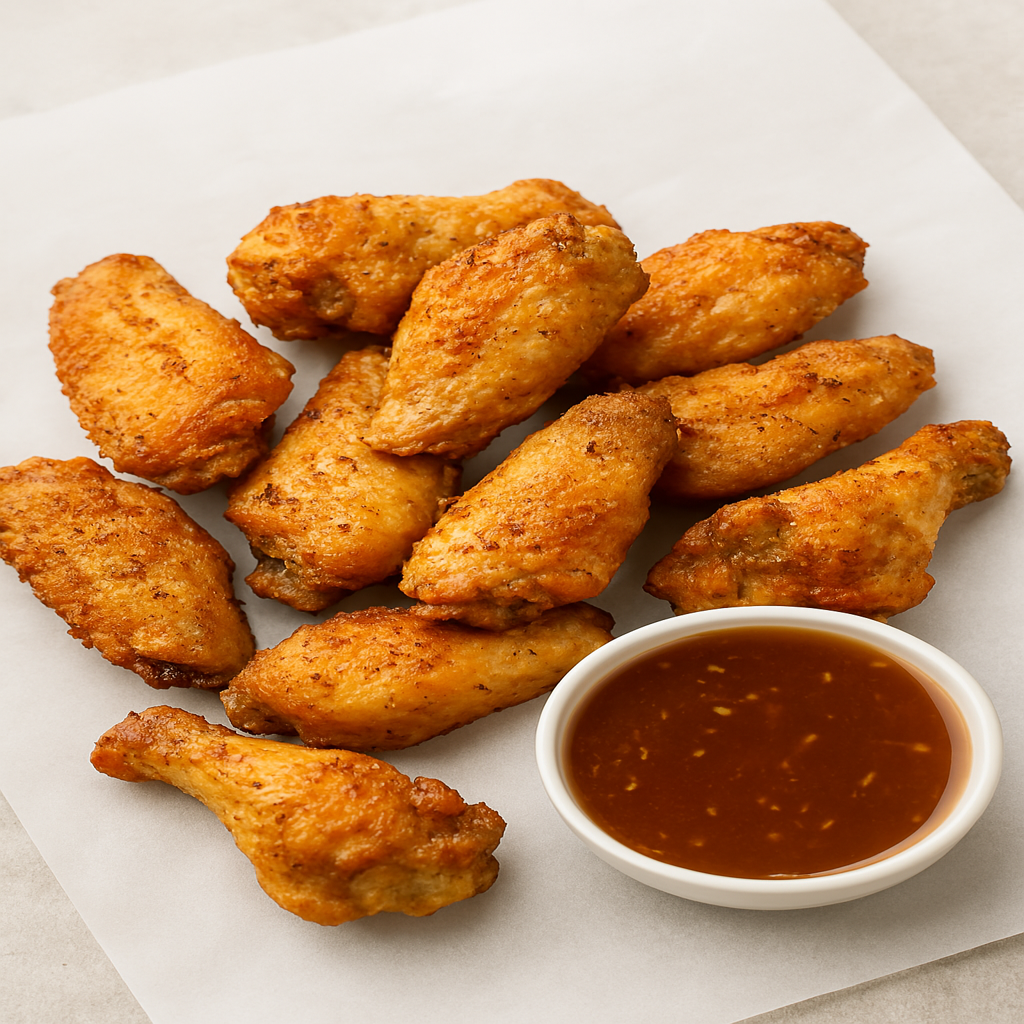
Crispy Baked Chicken Wings
Why You’ll Love This Recipe
There’s something so satisfying about biting into a perfectly crispy chicken wing. The outside is golden and crackly, while the inside stays tender and juicy. What makes this recipe special is that you get all that delicious texture and flavor—without needing to deep fry anything. These crispy baked chicken wings come out of the oven with the perfect crunch, making them great for game day, family dinners, or just a weekend treat.
The Secret to Crispy Wings Without Frying
The trick to getting wings crispy in the oven comes down to two things: baking powder and drying the wings thoroughly. Baking powder helps dry out the skin and promotes browning, while patting the wings dry with paper towels ensures you’re not baking with excess moisture. Add in a hot oven and a wire rack to let the air circulate, and you’re well on your way to crispy wing perfection.
Ingredients You’ll Need
To make these wings, you’ll need about 2 pounds of chicken wings, cut at the joints with the tips removed. The dry rub is simple: a little baking powder, garlic powder, onion powder, paprika, salt, pepper, and just a pinch of cayenne if you like a little heat. You can use smoked paprika for extra depth, or regular paprika for a milder flavor.
If you want to add a sauce, there’s a quick and easy honey garlic glaze included below that’s sweet, savory, and sticky—in all the best ways.
Step-by-Step Instructions
First, preheat your oven to 425°F (220°C). Line a baking sheet with foil or parchment paper and set a wire rack on top. Grease the rack lightly to prevent sticking.
Next, dry the wings thoroughly using paper towels. This step is essential to getting the skin crispy. Then, in a large bowl, toss the wings with the baking powder and seasonings until evenly coated. Arrange them on the rack, skin side up, and bake for 45–50 minutes, flipping them halfway through. They’ll come out crispy and golden.
Optional Honey Garlic Sauce
If you’d like to add a flavorful glaze, this honey garlic sauce is super easy. In a small saucepan over medium heat, combine ¼ cup honey, 2 tablespoons soy sauce, 1 tablespoon butter, and 2 minced garlic cloves. Let it simmer for 3–4 minutes. If you prefer a thicker sauce, you can mix 1 teaspoon cornstarch with 1 tablespoon water, stir it in, and cook for another minute or two. Toss the wings in the warm sauce, or serve it on the side for dipping.
Tips for Success
Want even crispier wings? Let them sit uncovered in the refrigerator for a couple of hours or overnight before baking. This dries the skin further and helps create that irresistible crunch. Don’t skip the wire rack—it’s what lets the hot air circulate and crisps up every side of the wing. And if you have leftovers, reheat them in the oven or air fryer at 375°F to bring back the crispiness.
Serving Ideas
These wings are a hit at parties, family movie nights, or when you’re just craving something flavorful and fun. Pair them with carrot sticks, celery, and your favorite dipping sauce. They also make a great main dish served with coleslaw, cornbread, or oven fries.
Crispy Baked Chicken Wings
Ingredients
For the Wings:
- 2 lbs chicken wings split at joints, tips removed
- 1 tbsp baking powder not baking soda
- 1 tsp salt
- 1 tsp garlic powder
- 1 tsp smoked paprika or regular
- ½ tsp black pepper
- ½ tsp onion powder
- Optional: pinch of cayenne pepper
For the Honey Garlic Sauce (optional):
- ¼ cup honey
- 2 tbsp soy sauce
- 2 cloves garlic minced
- 1 tbsp butter
- 1 tsp cornstarch + 1 tbsp water optional for thickening
Instructions
- Preheat oven to 425°F (220°C). Line a baking sheet with parchment paper or foil and set a metal rack on top. Spray or brush rack lightly with oil.
- Dry the wings very well with paper towels to ensure they crisp up.
- In a large bowl, combine wings with baking powder, salt, garlic powder, paprika, onion powder, pepper, and cayenne (if using). Toss until evenly coated.
- Arrange wings on the rack in a single layer, leaving space between each one.
- Bake for 45–50 minutes, flipping halfway through. The skin should be crisp and golden brown.
🍯 Honey Garlic Sauce (Optional):
- In a small saucepan over medium heat, stir together honey, soy sauce, butter, and garlic. Simmer for 3–4 minutes.
- For a thicker sauce, stir in cornstarch slurry and cook another 1–2 minutes.
- Toss hot wings in the sauce or serve on the side for dipping.
Notes
- Letting wings rest uncovered in the fridge for 1–2 hours before baking can enhance crispiness.
- Feel free to swap the honey garlic for your favorite sauce: buffalo, lemon pepper, or BBQ.
- Reheat leftovers in the oven or air fryer at 375°F to restore crispiness.
📌 Perfect For:
- Game day parties
- Easy weeknight dinners
- Family gatherings
- Appetizer trays or snack nights
Whether you’re cooking for a crowd or just feeding your family, these crispy baked chicken wings are always a win. They’re easy to prepare, full of flavor, and so satisfying. You don’t need a fryer to get that perfect crunch—just a few pantry staples and a hot oven.
So go ahead—save this recipe, print it out, or pin it for later. Your future self will thank you the next time you’re craving wings!
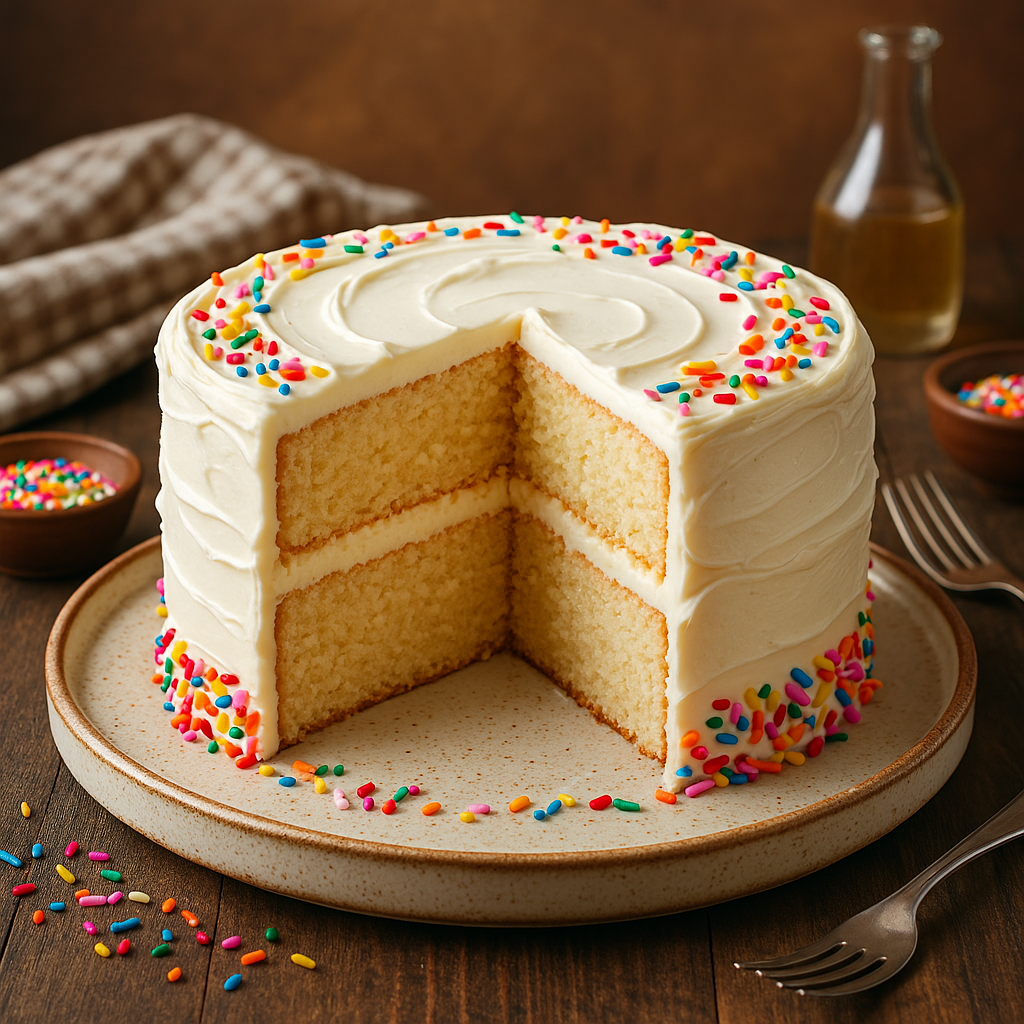
Vanilla Cake Recipe
A light, tender, and buttery vanilla cake that’s bursting with pure vanilla flavor. This is the ultimate made-from-scratch vanilla cake—simple, delicious, and perfect for birthdays, special occasions, or just because.
Why We Love This Cake
This vanilla cake is a classic for good reason. It has a soft crumb, buttery richness, and a pure vanilla flavor that comes through in every bite. Made entirely from scratch using real ingredients like buttermilk, butter, and vanilla extract, it rises beautifully and bakes into perfectly fluffy layers. Whether you’re celebrating something special or just craving something sweet, this cake delivers elegance and comfort all in one.
How to Make Vanilla Cake from Scratch
- To begin, preheat your oven to 350°F (177°C). Lightly grease and flour two 9-inch round cake pans, then gently tap out any excess flour. Set them aside while you prepare the batter.
- In a medium bowl, whisk together the flour, baking powder, and salt until combined. Set this dry mixture aside.
- In a large mixing bowl, using a hand mixer or stand mixer fitted with a paddle attachment, cream together the softened butter and sugar on medium-high speed for about 5 minutes, until the mixture becomes pale, thick, and fluffy. Scrape down the sides of the bowl as needed to ensure everything is well incorporated.
- Add the eggs one at a time, mixing well after each addition. Scrape the bowl again, then mix in the vanilla extract.
- Reduce your mixer speed to medium-low. Add the flour mixture in three parts, alternating with the buttermilk or kefir in two parts. Begin and end with the flour. Mix just until combined and smooth—do not overmix. Scrape down the bowl as needed to ensure the batter is fully incorporated.
How to Bake It
Evenly divide the batter between your two prepared pans and smooth the tops with a spatula for even baking. Bake on the center rack of your oven for 28 to 30 minutes, or until a toothpick inserted in the center comes out clean.
Once baked, allow the cakes to cool in the pans for 10 minutes. Then run a thin spatula or butter knife around the edges to release the cakes from the pans. Carefully invert onto a wire rack and allow them to cool completely before frosting.
How to Frost a Cake
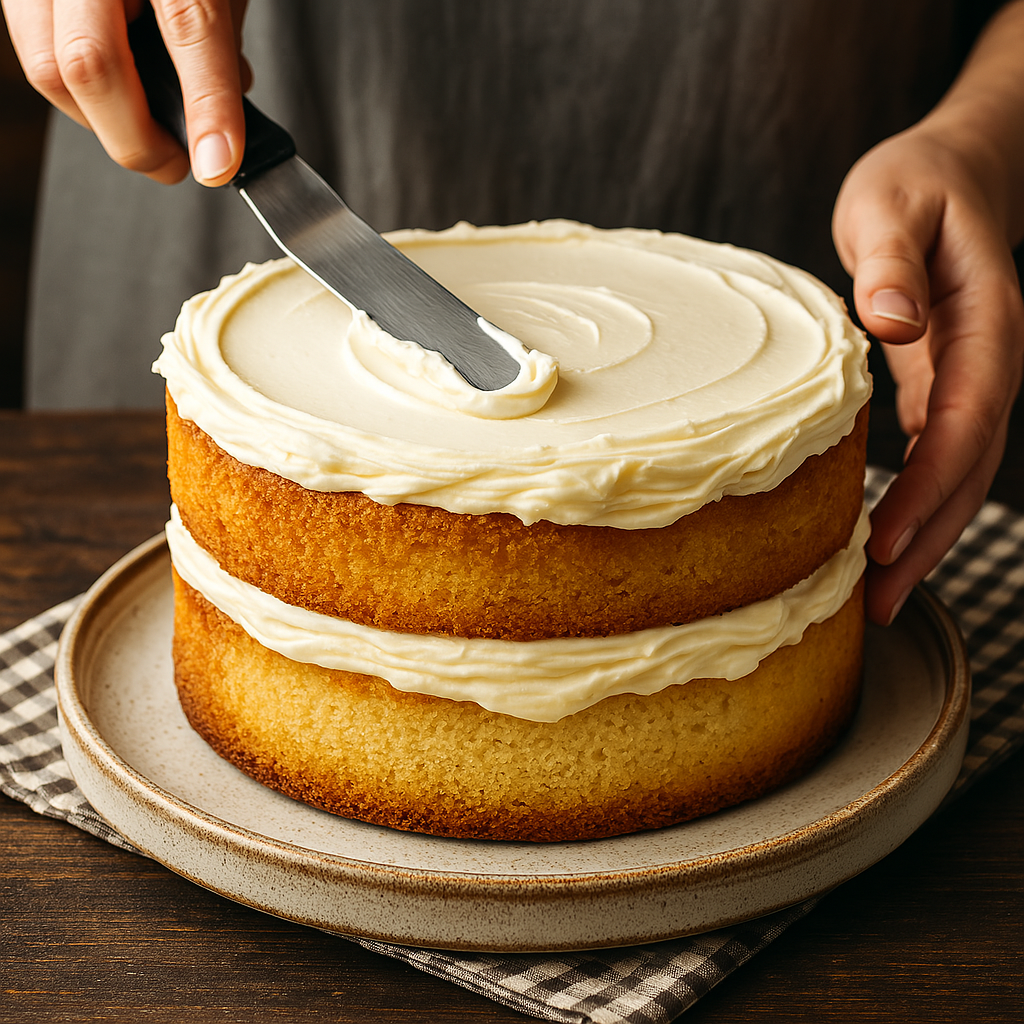
Once your cake layers are completely cool, level them if needed using a serrated knife or cake leveler. Place one layer on your cake stand or plate and spread an even layer of vanilla frosting on top. Add the second layer and frost the top and sides of the cake as desired.
You can keep the finish rustic and homey or go for a smooth, polished look using a bench scraper and offset spatula. Add sprinkles, fruit, or piping for decoration if desired.
Baking Tips for Best Results
- Use room temperature ingredients for even mixing and the best texture.
- Don’t overmix after adding the flour—mix just until everything is combined.
- Use cake strips around the pans for flatter layers if desired.
- Weigh the batter to divide it evenly between pans for uniform layers.
- Check early toward the end of baking—every oven is different!
How to Store Vanilla Cake and Keep It Moist
Once frosted, the cake can be stored in an airtight container at room temperature for up to 3 days. For longer storage, refrigerate for up to 5 days, and bring to room temperature before serving.
To freeze, wrap unfrosted layers tightly in plastic wrap and foil, then freeze for up to 2 months. Thaw overnight in the fridge before frosting.
Vanilla Cake Recipe
Ingredients
- 2 ½ cups all-purpose flour
- 1 tablespoon baking powder
- ½ teaspoon fine salt
- 1 cup unsalted butter softened
- 1 ½ cups granulated sugar
- 4 large eggs at room temperature
- 4 teaspoons pure vanilla extract
- 1 cup buttermilk or plain kefir at room temperature
Instructions
- Preheat your oven to 350°F (177°C). Grease and flour two 9-inch round cake pans, tapping out the excess flour. Set aside.
- In a medium bowl, whisk together the flour, baking powder, and salt until well combined. Set the bowl aside.
- In a large mixing bowl, using a hand mixer or stand mixer, beat the softened butter and sugar together on medium-high speed for about 5 minutes, or until the mixture is pale, thick, and fluffy. Don’t forget to scrape down the sides of the bowl to ensure even mixing.
- Add the eggs one at a time, mixing well after each addition. Scrape down the bowl as needed. Then add in the vanilla extract and beat until combined.
- Lower the mixer speed to medium. Add the dry ingredients in three additions, alternating with the buttermilk in two additions. Start and end with the flour mixture. Mix just until everything is incorporated and smooth. Do not overmix.
- Evenly divide the batter between the two prepared pans. Use a spatula to smooth the tops. Bake in the center of your oven for 28–30 minutes, or until a toothpick inserted into the center comes out clean.
- Let the cakes cool in the pans for 10 minutes. Then carefully run a knife or thin spatula around the edges, and turn the cakes out onto a wire rack. Allow them to cool completely before frosting.
Notes
- You can substitute plain kefir for buttermilk in equal amounts.
- Make sure your butter is softened but not melted for proper creaming.
- For a bakery-style flavor, try adding ½ tsp almond extract along with the vanilla.
- This recipe also works great for cupcakes—bake for about 18–20 minutes instead.
Baked Stuffed Shells
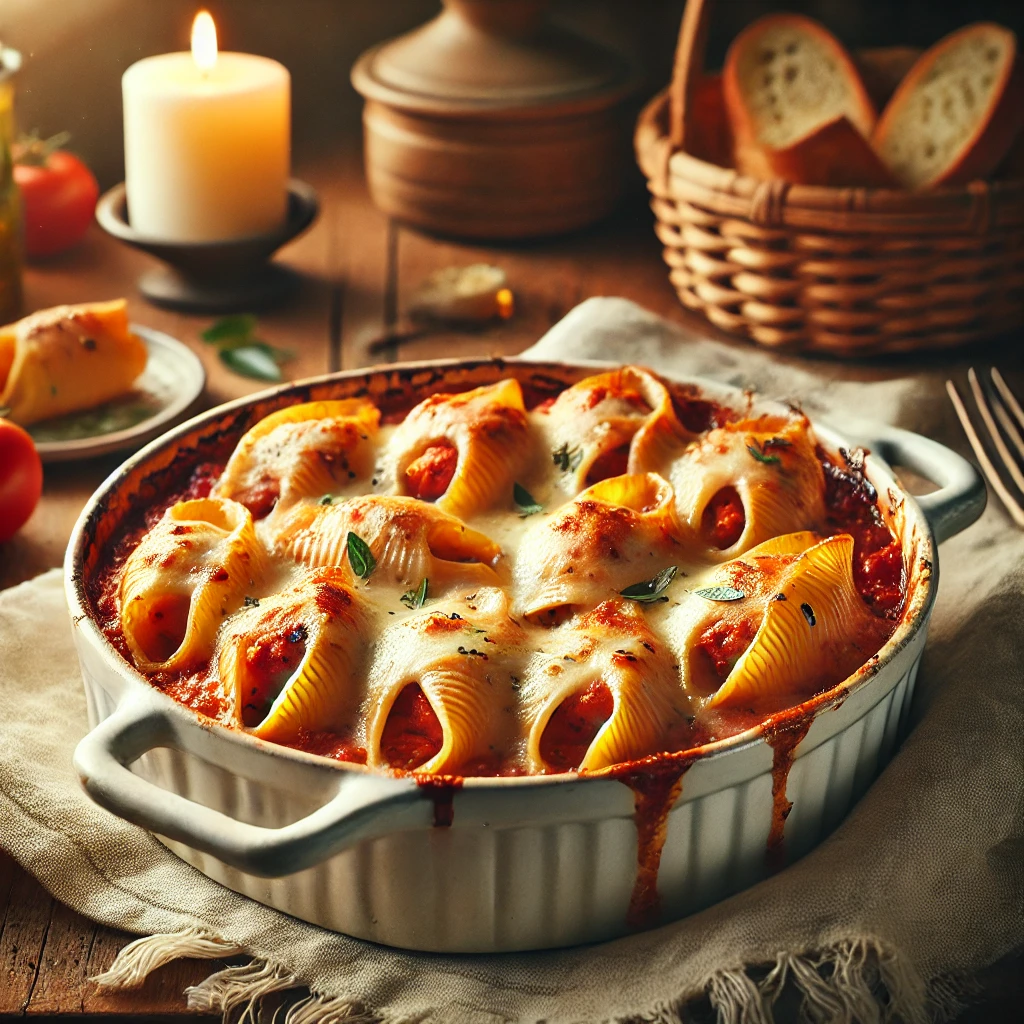
There’s something special about a warm, bubbling dish of baked stuffed shells coming out of the oven. It’s the kind of comfort food that brings everyone to the table with a smile — especially on days when you just need a cozy, no-fuss dinner that feels like home. This recipe is one of my go-to meals when I want to serve something hearty, comforting, and full of love.
🍝 Preparing the Pasta
I start by gently boiling jumbo pasta shells just until they’re al dente. You don’t want them too soft since they’ll continue cooking in the oven later. Once they’re drained, I set them aside to cool just enough to handle while I prepare the filling.
🧀 The Cheesy Filling
While the shells cook, I prepare a simple, flavorful cheese filling. I use a blend of creamy ricotta, shredded mozzarella, grated parmesan, and a few gentle pinches of garlic powder, parsley, and black pepper. It’s the kind of filling that feels rustic and rich — but still light enough that it doesn’t overpower the marinara sauce.
🍅 Assembling the Dish
Once the shells are cooked and drained, I let them cool slightly before spooning the cheesy mixture into each one. I layer a generous amount of marinara sauce in the bottom of a baking dish — you can use homemade or store-bought, whatever fits your day. The stuffed shells are nestled into the sauce, side by side, creating a comforting casserole that’s as pretty as it is satisfying. I spoon a little more sauce over the top, add a handful of mozzarella, and then bake the dish until it’s bubbly and golden around the edges.
🕯️ Cozy Comfort for the Whole Table
What I love most about this meal is that it brings a feeling of togetherness. Tim always looks forward to it, and I enjoy serving it with a warm loaf of bread and a crisp salad or roasted veggies. It’s one of those recipes that feels special without being fussy — the kind of dish that warms both your belly and your heart.
📝 Recipe Notes & Helpful Tips
This recipe is wonderful for making ahead — perfect for busy evenings or when you want dinner ready to go. You can assemble the entire dish and store it in the fridge, covered, for up to 24 hours before baking. You can also freeze the unbaked stuffed shells in a baking dish and simply thaw before cooking later in the week.
If you don’t have ricotta on hand, cottage cheese works beautifully as a substitute. And if your family enjoys a little heat, you can sprinkle in a pinch of red pepper flakes either in the filling or on top before baking.
This is a forgiving, flexible recipe — the kind you can make your own. And to me, that’s what homemaking is all about: using what you have, doing what you can, and adding a little love into every dish.
Baked Stuffed Shells
Ingredients
- 20–25 jumbo pasta shells
- 1 15 oz container ricotta cheese
- 1 ½ cups shredded mozzarella cheese plus extra for topping
- ½ cup grated parmesan cheese
- 1 teaspoon garlic powder
- 1 teaspoon dried parsley or a handful of fresh, chopped
- ½ teaspoon black pepper
- 1 24 oz jar marinara sauce (or homemade)
- Salt to taste
- Optional: Red pepper flakes for a little heat
Instructions
- Preheat your oven to 375°F (190°C).
- Grease a 9×13-inch baking dish or line with a spoonful of marinara to coat the bottom. This helps prevent the shells from sticking and adds moisture.
- Cook the pasta shells.
- Bring a large pot of salted water to a boil. Add the jumbo shells and cook until just al dente (usually 1–2 minutes less than the box recommends). Drain and set aside to cool slightly so they’re easier to handle.
- Prepare the cheese filling.
- In a large bowl, mix together the ricotta, 1 ½ cups mozzarella, parmesan, garlic powder, parsley, black pepper, and a pinch of salt. Stir until creamy and well combined.
- Fill the shells.
- Spoon the cheese filling into each shell, about 1 to 2 tablespoons per shell depending on size. Nestle the filled shells into your baking dish on top of the sauce.
- Add more sauce and cheese.
- Pour the remaining marinara sauce over the top of the stuffed shells, covering them generously. Sprinkle a handful of shredded mozzarella on top for a bubbly, cheesy finish.
- Bake until golden and bubbly.
- Cover loosely with foil and bake for 20 minutes. Remove the foil and bake for another 10–15 minutes, or until the cheese is melted and lightly golden around the edges.
- Let cool slightly and serve.
- Let the dish rest for about 5 minutes before serving. Pair with warm bread, a salad, or roasted vegetables for a cozy and complete dinner.
Notes
💬 I’d Love to Hear from You!
Did you try this stuffed shells recipe? I’d love to hear how it turned out! Leave a comment below and let me know if you served it for a family dinner, a special occasion, or just a cozy night at home.
If this recipe brought a little peace or warmth to your day, I’d be so honored if you’d share it or save it to Pinterest. And don’t forget to subscribe to my blog so you never miss a new cozy recipe or homemaking post.

Easy Homemade Egg Rolls
If you love crispy, golden-brown egg rolls packed with flavorful fillings, then this easy homemade egg roll recipe is for you! Whether you’re serving them as a side dish or an appetizer, these egg rolls have a perfectly crunchy wrapper and a savory, well-seasoned filling that’s just like your favorite takeout—maybe even better!
This recipe is not only simple and delicious but also customizable, so you can make them vegetarian, gluten-free, or even baked instead of fried. Keep reading to learn how to make perfect egg rolls every time, with step-by-step instructions, expert tips, and serving ideas!
Why You’ll Love This Recipe
✔ Better than takeout: Fresh, crispy, and packed with flavor!
✔ Easy to make: Simple ingredients and step-by-step instructions.
✔ Customizable: Choose your favorite protein or make it vegetarian.
✔ Perfect for meal prep: Make ahead and freeze for quick snacks!
The Secret to Crispy Egg Rolls
The crispy wrapper is what makes egg rolls so irresistible. Here are some key tips to get that signature crunch:
- Use fresh egg roll wrappers: Older wrappers can dry out and crack when rolling.
- Seal them tightly: Loose wrappers can let oil in, making them greasy instead of crispy.
- Don’t overcrowd the pan: Frying too many at once drops the oil temperature, making them soggy.
- Drain on a wire rack: Instead of stacking them on paper towels, place them on a wire rack so they stay crisp.
How to Make the Best Egg Roll Filling
A perfect egg roll filling should be well-seasoned, slightly crunchy, and not too wet. Too much moisture can make your wrappers soggy before frying.
Here’s how to get it just right:
- Sauté your filling first to release excess moisture.
- Use finely shredded vegetables for better texture.
- Let the filling cool before rolling so it doesn’t steam the wrapper.
Choosing the Right Protein for Your Egg Rolls
Egg rolls can be made with pork, chicken, shrimp, beef, tofu, or even just vegetables. Here’s how each protein affects the flavor:
- Pork: Traditional and rich, adds a slightly sweet, savory depth.
- Chicken: Light and lean, pairs well with soy sauce and ginger.
- Shrimp: Slightly sweet and fresh, great with cabbage and sesame oil.
- Tofu: Absorbs flavors well, making it a great vegetarian option.
How to Fold Egg Rolls Like a Pro
Rolling egg rolls might seem tricky at first, but with this method, you’ll get perfectly sealed rolls every time!
1️⃣ Place the wrapper: Lay it like a diamond with a corner pointing toward you.
2️⃣ Add filling: Place 2 tbsp of filling near the bottom corner.
3️⃣ Fold the bottom corner up: Cover the filling, then tuck it snugly.
4️⃣ Fold in the sides: Bring in both left and right corners tightly.
5️⃣ Roll up: Roll tightly toward the top.
6️⃣ Seal with egg wash: Brush the top corner with beaten egg and press to seal.
💡 Pro Tip: Keep your extra wrappers covered with a damp towel so they don’t dry out while rolling!
Best Ways to Cook Egg Rolls
1️⃣ Traditional Frying (Crispiest!)
- Heat 2 inches of vegetable oil to 350°F (175°C).
- Fry egg rolls 3-4 minutes until golden brown.
2️⃣ Baking (Healthier Option!)
- Preheat oven to 400°F (200°C).
- Brush egg rolls with oil and bake for 15-18 minutes, flipping halfway.
3️⃣ Air Frying (Best of Both Worlds!)
- Spray egg rolls with oil.
- Air fry at 375°F (190°C) for 8-10 minutes, flipping halfway.
What to Serve with Egg Rolls
Egg rolls are delicious on their own, but they pair perfectly with dipping sauces and other Chinese-inspired dishes!
Dipping Sauce Ideas:
🥢 Sweet chili sauce – Classic and tangy with a hint of heat.
🥢 Soy sauce – Simple and salty for an umami boost.
🥢 Hoisin sauce – Thick, slightly sweet, and great with pork.
🥢 Spicy mustard – For a bold, zesty kick.
Pair With These Dishes:
🍜 Easy Lo Mein Noodles
🍚 Chicken Fried Rice
🥡 Sesame Garlic Green Beans
Storage & Reheating Tips
Egg rolls store beautifully and are great for meal prep!
🧊 Refrigerate: Keep in an airtight container for up to 3 days.
🔥 Reheat: Use an oven or air fryer to maintain crispiness.
❄ Freeze: Freeze uncooked egg rolls for up to 3 months. Fry directly from frozen, adding 1-2 extra minutes.
Frequently Asked Questions
Can I make egg rolls ahead of time?
Yes! Assemble the egg rolls and store them uncooked in the fridge for up to 24 hours or freeze them for later frying.
Why are my egg rolls soggy?
Too much moisture in the filling or frying at low temperature can make them soggy. Always drain excess liquid before rolling and fry at 350°F (175°C).
Can I make these egg rolls vegetarian?
Absolutely! Just leave out the meat and add extra veggies or tofu for a delicious plant-based version.

Easy Homemade Egg Rolls
Ingredients
For the Filling
- 1 tbsp vegetable oil
- ½ lb ground pork or shredded chicken, shrimp, or tofu
- 1 cup shredded cabbage
- ½ cup carrots julienned
- ½ cup bean sprouts optional
- 2 green onions thinly sliced
- 2 cloves garlic minced
- 1 tsp fresh ginger grated
- 2 tbsp soy sauce
- 1 tsp sesame oil
- ½ tsp black pepper
For the Egg Rolls
- 12 egg roll wrappers
- 1 egg beaten (for sealing)
- Vegetable oil for frying
For Dipping Sauces
- Sweet chili sauce
- Soy sauce
- Hoisin sauce
Instructions
Prepare the Filling
- Heat 1 tbsp vegetable oil in a skillet over medium-high heat.
- Add ground pork (or protein of choice) and cook until browned.
- Stir in cabbage, carrots, bean sprouts, green onions, garlic, and ginger. Cook for 3-4 minutes.
- Add soy sauce, sesame oil, and black pepper. Mix well, then remove from heat and let cool.
Assemble the Egg Rolls
- Lay an egg roll wrapper flat, with a corner pointing toward you.
- Place 2 tbsp filling on the lower third of the wrapper.
- Fold the bottom corner over the filling, then fold in the sides.
- Brush the top corner with beaten egg, roll up tightly, and seal.
- Repeat for all wrappers.
Fry the Egg Rolls
- Heat 2 inches of vegetable oil to 350°F (175°C).
- Fry 3-4 egg rolls at a time, turning, until golden brown (3-4 minutes).
- Drain on a paper towel-lined plate.
- Repeat with remaining egg rolls.
Serve & Enjoy
- Serve hot with sweet chili sauce, soy sauce, or hoisin sauce.
- Enjoy your crispy homemade egg rolls!
Notes
- Best Wrapper Choice: Use fresh egg roll wrappers from the refrigerated section of the grocery store. Avoid old or dry wrappers, as they can crack when rolling.
- Prevent Soggy Egg Rolls: Cook the filling beforehand to remove excess moisture, and let it cool before assembling the rolls. Too much moisture makes the wrappers soggy before frying.
- Make-Ahead Option: Assemble the egg rolls up to 24 hours in advance and store them covered in the refrigerator until ready to fry.
-
Freezing Instructions:
- Before Cooking: Arrange uncooked egg rolls in a single layer on a baking sheet and freeze. Once frozen, transfer them to an airtight bag and store for up to 3 months. Fry straight from frozen, adding 1-2 minutes to the cook time.
- After Cooking: Let them cool completely before freezing. Reheat in an air fryer (375°F for 5-7 minutes) or an oven (400°F for 10-12 minutes) to maintain crispiness.
- Oil Temperature for Frying: The ideal frying temperature is 350°F (175°C). If the oil is too hot, the wrappers will burn before the inside is fully cooked. If too cool, the rolls will absorb excess oil and become greasy.
-
Healthier Alternatives:
- Baked Egg Rolls: Brush with oil and bake at 400°F (200°C) for 15-18 minutes, flipping halfway.
- Air Fryer Egg Rolls: Lightly spray with oil and air fry at 375°F (190°C) for 8-10 minutes, turning halfway through.
- Dipping Sauce Ideas: Serve with sweet chili sauce, soy sauce, hoisin sauce, or spicy mustard for extra flavor.
-
Customizations & Variations:
- Vegetarian Egg Rolls: Use tofu or add more vegetables like mushrooms and bell peppers.
- Spicy Version: Add chili flakes or sriracha to the filling for a kick.
- Cheeseburger Egg Rolls: Swap in ground beef, cheddar cheese, and diced pickles for a fun twist!
This easy homemade egg roll recipe delivers everything you love about restaurant-style egg rolls—crispy shells, savory fillings, and that addictive crunch! Whether you’re making them for a party, family dinner, or just a quick snack, these egg rolls will impress every time.
If you love this recipe, don’t forget to share it on Pinterest or Instagram and tag me @homewithjanashow! Let me know in the comments—what’s your favorite way to enjoy egg rolls? 🥢😊
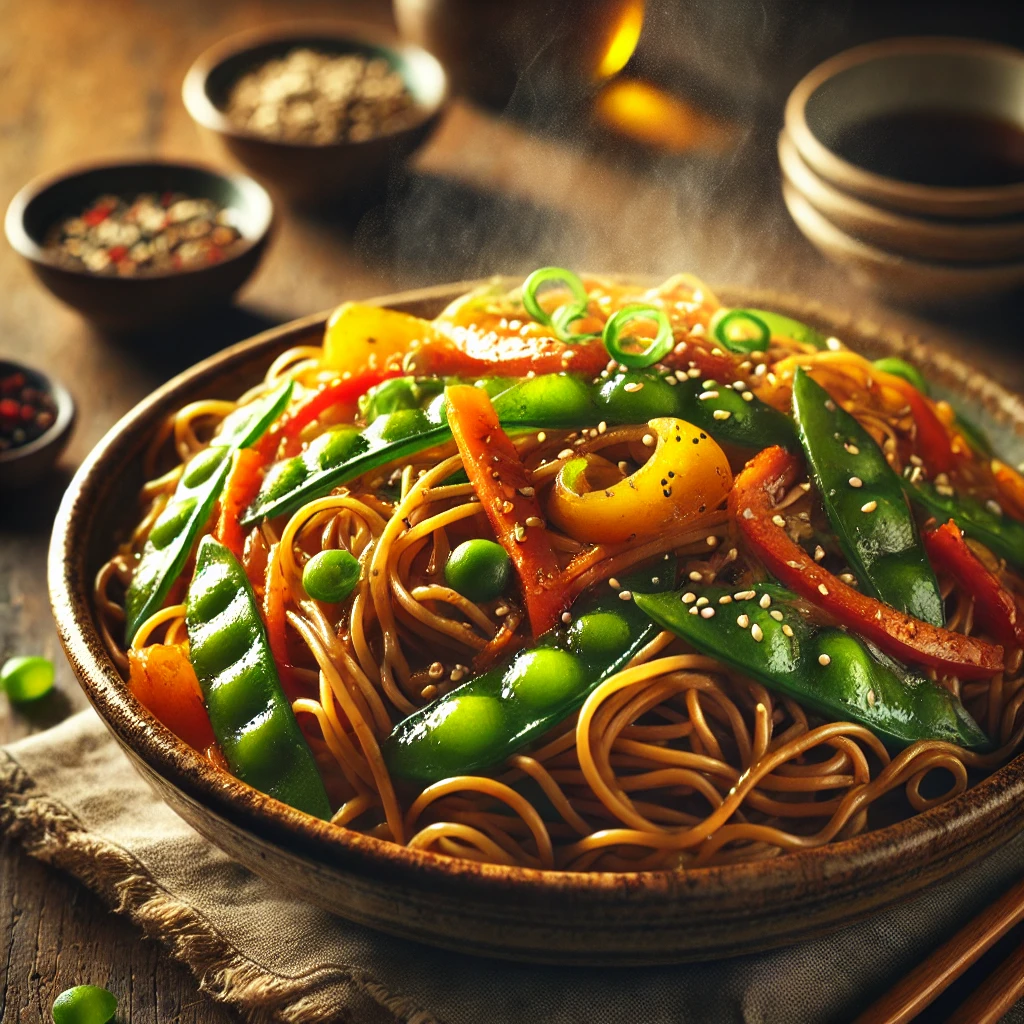
Easy Side Dish Lo Mein
Make this quick and easy side dish lo mein in just 15 minutes! Packed with savory flavors, tender noodles, and crisp vegetables, this homemade lo mein is the perfect companion to stir-fries and Asian-inspired meals.
Why You’ll Love This Lo Mein Recipe
- Quick & Easy: Ready in just 15 minutes with simple pantry ingredients.
- Customizable: Add your favorite vegetables or proteins.
- Restaurant-Style Flavor: A delicious, homemade version of classic lo mein.
- Perfect Side Dish: Complements any stir-fry, dumplings, or grilled meats.
Tips & Variations
- Add Protein: Toss in cooked chicken, shrimp, beef, or tofu for a more filling dish.
- Extra Crunch: Add water chestnuts, shredded cabbage, or bean sprouts.
- Spice It Up: Increase the red pepper flakes or drizzle with sriracha.
- Gluten-Free Option: Use gluten-free tamari instead of soy sauce and swap in rice noodles.
- Make It Vegan: Substitute hoisin sauce for oyster sauce and use plant-based noodles.
Storage & Reheating
- To Store: Keep leftover lo mein in an airtight container in the fridge for up to 3 days.
- To Reheat: Warm in a pan over medium heat with a splash of water or soy sauce to refresh the flavors.
- To Freeze: Not recommended, as the noodles may become mushy.
FAQs About Lo Mein
What’s the Difference Between Lo Mein and Chow Mein?
Lo mein uses soft, boiled noodles, while chow mein is made with crispy, stir-fried noodles.
Can I Use Regular Spaghetti Instead of Lo Mein Noodles?
Yes! Spaghetti or fettuccine noodles work as a great substitute if you don’t have traditional lo mein noodles.
What’s the Best Oil for Lo Mein?
Use sesame oil for authentic flavor, but vegetable or canola oil works too.
Try More Easy Asian-Inspired Recipes
Side Dish Lo Mein
Ingredients
For the Noodles
- 8 oz lo mein noodles or spaghetti as a substitute
- 1 tsp sesame oil prevents sticking
For the Lo Mein Sauce
- 3 tbsp soy sauce low sodium works too
- 1 tbsp oyster sauce or hoisin sauce for vegetarian
- 1 tbsp dark soy sauce optional, adds depth & color
- 1 tbsp brown sugar
- 1 tsp rice vinegar
- 1 tsp sesame oil
- ½ tsp ground ginger
- 1 clove garlic minced
- ½ tsp red pepper flakes optional for spice
For the Vegetables
- 1 tbsp vegetable oil
- ½ cup carrots julienned
- ½ cup bell peppers thinly sliced
- ½ cup snap peas or broccoli florets
- ¼ cup green onions sliced
- ½ cup mushrooms sliced (optional)
Instructions
- Bring a pot of water to a boil and cook the lo mein noodles according to the package instructions.
- Drain and toss with 1 tsp sesame oil to prevent sticking. Set aside.
- In a small bowl, whisk together soy sauce, oyster sauce, dark soy sauce (if using), brown sugar, rice vinegar, sesame oil, ginger, garlic, and red pepper flakes.
- Set aside for later.
- Heat 1 tbsp vegetable oil in a large skillet or wok over medium-high heat.
- Add the carrots, bell peppers, snap peas, and mushrooms. Stir-fry for 2-3 minutes until slightly softened but still crisp.
- Stir in the green onions and cook for another 30 seconds.
- Add the cooked noodles to the pan and toss to combine with the vegetables.
- Pour the prepared lo mein sauce over the noodles and mix well, ensuring everything is evenly coated.
- Cook for 1-2 minutes, letting the flavors absorb.
- Remove from heat and garnish with extra green onions or sesame seeds if desired.
- Serve as a side dish alongside stir-fries, dumplings, or grilled meats.
Notes
- Noodle Substitutes: If you can’t find lo mein noodles, use spaghetti, fettuccine, or ramen noodles as an alternative.
- Vegetarian/Vegan Option: Substitute hoisin sauce for oyster sauce and use plant-based noodles.
- Gluten-Free Version: Use gluten-free tamari instead of soy sauce and swap for rice noodles or zucchini noodles.
- Storage & Reheating:
- Store leftovers in an airtight container in the fridge for up to 3 days.
- Reheat in a pan over medium heat with a splash of water or soy sauce to refresh the flavor.
- Freezing is not recommended as the noodles can become mushy.
- Add Protein: Turn it into a meal by adding cooked chicken, shrimp, beef, or tofu.
Did you try this Side Dish Lo Mein? Let me know in the comments below! If you loved it, don’t forget to share this recipe on Pinterest or Instagram and tag me @HomewithJanaShow!
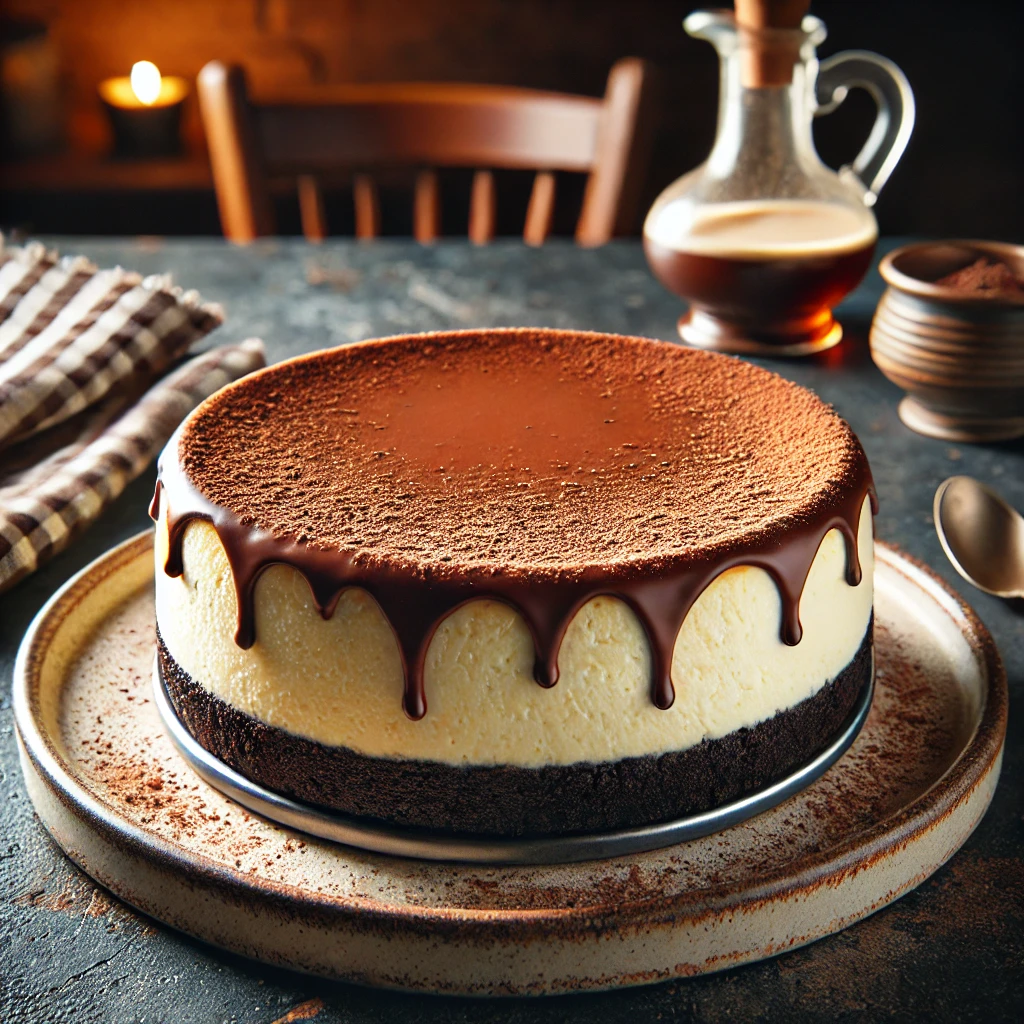
Irish Cream Chocolate Cheesecake
A rich, creamy chocolate cheesecake infused with Irish cream liqueur, perfect for celebrating St. Patrick’s Day or any March gathering!
Why You’ll Love This Recipe
✔ Perfect for St. Patrick’s Day! 🍀
✔ Rich, creamy, & chocolatey 🍫
✔ Infused with Irish cream liqueur ☕
✔ Make-ahead friendly & freezer-friendly
Storage & Make-Ahead Tips
Storing:
- Keep covered in the fridge for up to 5 days.
- Freeze for up to 3 months (without ganache) in an airtight container.
Make-Ahead:
- Cheesecake can be made 2 days in advance and stored in the fridge.
- The ganache can be added before serving for a glossy finish.
Serving Suggestions
🍀 With Irish Coffee – A cozy St. Patrick’s Day dessert pairing.
🍷 With a Glass of Baileys – Enhances the Irish cream flavor.
☕ With Espresso – Balances the rich chocolate notes.
Frequently Asked Questions (FAQs)
1. Can I make this alcohol-free?
Yes! Swap Irish cream for heavy cream + ½ teaspoon coffee extract for a similar flavor.
2. How do I prevent cracks in my cheesecake?
- Use a water bath to maintain moisture.
- Let the cheesecake cool slowly in the oven after baking.
- Avoid overmixing the batter to reduce air bubbles.
3. Can I use a different crust?
Absolutely! Try a graham cracker crust or a shortbread crust for a lighter base.
Irish Cream Chocolate Cheesecake
Ingredients
For the Crust:
- 1 ½ cups chocolate graham cracker crumbs or Oreo crumbs
- ¼ cup unsalted butter melted
- 2 tablespoons sugar
For the Cheesecake Filling:
- 24 oz 3 blocks cream cheese, softened
- 1 cup sugar
- 3 tablespoons cocoa powder
- 3 large eggs
- ¾ cup Irish cream liqueur such as Baileys
- ½ cup sour cream
- 1 teaspoon vanilla extract
- ½ teaspoon salt
- 6 oz semi-sweet chocolate melted and slightly cooled
For the Ganache Topping:
- ½ cup heavy cream
- 4 oz dark chocolate chopped
- 1 tablespoon Irish cream liqueur
Optional Garnishes:
- Whipped cream
- Chocolate shavings
- Crushed chocolate cookies
- Mini chocolate chips
Instructions
- Preheat oven to 325°F (163°C). Grease a 9-inch springform pan and line the bottom with parchment paper.
- In a bowl, mix chocolate cookie crumbs, melted butter, and sugar until combined. Press into the bottom of the springform pan. Bake for 8 minutes, then let cool.
- In a large bowl, beat cream cheese, sugar, and cocoa powder until smooth. Add eggs one at a time, mixing after each addition. Stir in Irish cream, sour cream, vanilla, and salt until fully incorporated. Fold in melted chocolate until smooth.
- Pour the batter over the crust. Wrap the outside of the pan with foil and place it in a water bath (a larger pan with hot water about 1 inch deep).
- Bake for 55-60 minutes, or until the center is slightly set but still jiggly. Turn off the oven and crack the door open slightly. Let the cheesecake cool in the oven for 1 hour before transferring to the fridge. Chill for at least 4 hours or overnight.
- Heat heavy cream in a saucepan over medium heat until steaming (but not boiling). Pour over chopped dark chocolate, let sit for 2 minutes, then stir until smooth. Mix in 1 tablespoon Irish cream liqueur for extra flavor.
- Pour the ganache over the chilled cheesecake, spreading it evenly. Let it set for 15 minutes before slicing. Garnish with whipped cream, chocolate shavings, or crushed cookies.
Notes
Best Tips for a Perfect Cheesecake
- Room Temperature Ingredients:
- Make sure your cream cheese, eggs, and sour cream are at room temperature. This ensures a smooth, lump-free batter.
- Do Not Overmix:
- Overmixing adds air to the batter, which can cause cracks during baking. Mix just until combined.
- Use a Water Bath:
- A water bath (bain-marie) creates steam, preventing cracks and ensuring an ultra-creamy texture.
- Let It Cool Gradually:
- Turn off the oven and crack the door open slightly after baking. Let the cheesecake cool inside for 1 hour to prevent sinking.
How to Prevent Cracks in Cheesecake
✔ Use a water bath for even baking.✔ Avoid overbaking—the center should still jiggle slightly when done.
✔ Run a knife around the edge before cooling to prevent cracking.
✔ Let the cheesecake cool slowly in the oven before refrigerating.
How to Make This Cheesecake Alcohol-Free
- Swap Irish cream liqueur for:
- ½ cup heavy cream + ½ teaspoon vanilla extract
- ½ teaspoon coffee extract for a subtle Irish cream flavor
Storage & Freezing Instructions
🧊 Storing:- Keep covered in the fridge for up to 5 days.
- Freeze the cheesecake (without the ganache) for up to 3 months.
- Thaw overnight in the fridge before serving.
Variations & Customizations
🍫 Extra Chocolatey:- Add mini chocolate chips to the batter or drizzle melted chocolate over the top.
🍯 Caramel Swirl: - Swirl salted caramel into the batter before baking.
🥃 Boozy Twist: - Add 1 tablespoon of whiskey along with the Irish cream for a bolder flavor.
Best Toppings for This Cheesecake
🍫 Chocolate Ganache – A rich, smooth layer of melted chocolate.🍯 Caramel Drizzle – Sweet and buttery with a hint of salt.
☕ Whipped Cream & Cocoa Powder – Light and airy with a classic finish.
This Irish Cream Chocolate Cheesecake is a decadent, festive treat perfect for March celebrations! Whether for St. Patrick’s Day or just a cozy dessert, this cheesecake will impress every chocolate lover.
🍀 Would you try this recipe? Let me know in the comments! Don’t forget to pin this for later.
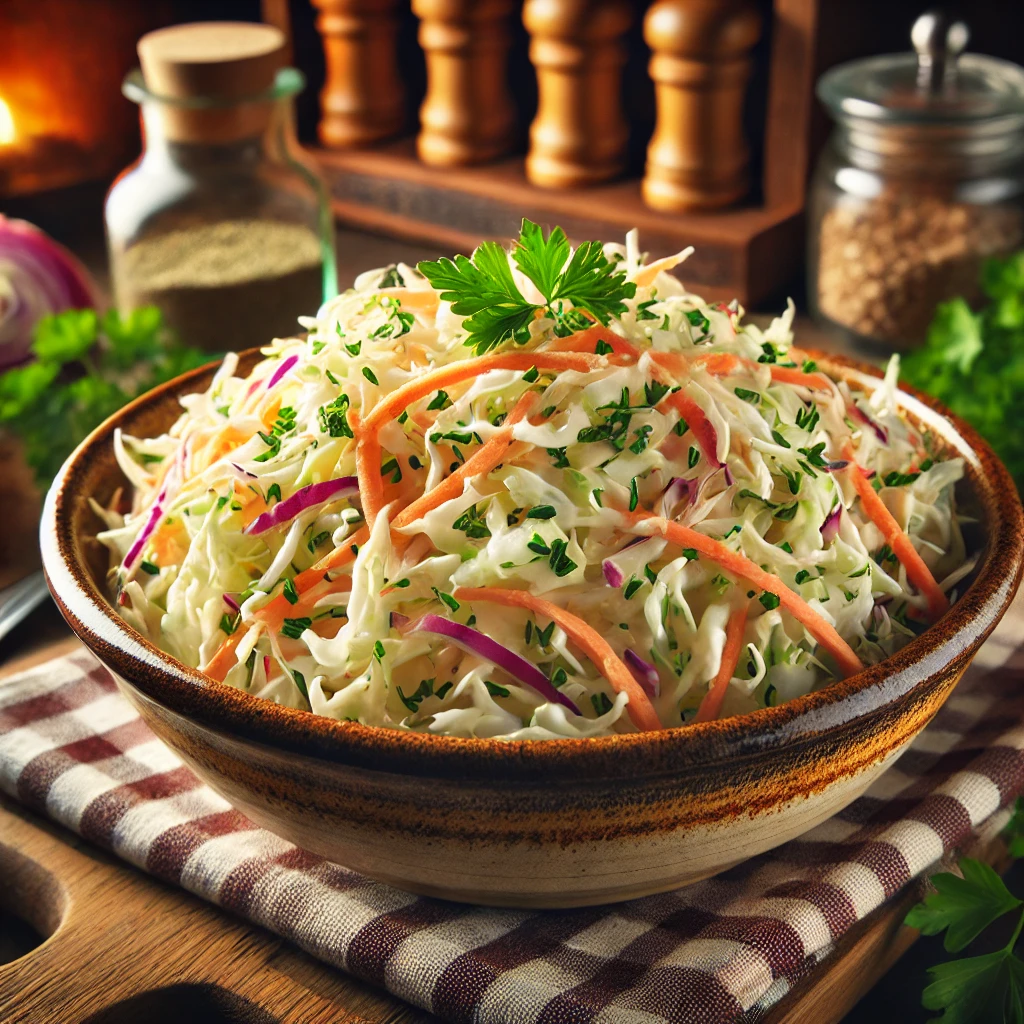
Classic Southern Coleslaw Recipe
A creamy, crunchy, and slightly tangy Southern-style coleslaw that’s the perfect side dish for BBQ, fried chicken, or pulled pork sandwiches!
Why You’ll Love This Recipe
✔ Perfectly Creamy & Crunchy – A balanced mix of crisp cabbage and a smooth, tangy dressing.
✔ Quick & Easy – Ready in just 10 minutes!
✔ Great for Meal Prep – Stays fresh and gets even better as it sits.
✔ Pairs with Everything – BBQ, burgers, sandwiches, and more.
Best Variations & Additions
🥒 Vinegar-Based Coleslaw – Skip the mayo and increase the vinegar for a tangy, light version.
🍏 Apple Slaw – Add julienned green apples for a sweet crunch.
🌿 Herbed Coleslaw – Stir in chopped parsley or dill for extra freshness.
🌶 Spicy Coleslaw – Add 1 teaspoon of hot sauce or sriracha for a kick.
Storage & Make-Ahead Tips
Storing Leftovers:
Keep coleslaw in an airtight container in the fridge for up to 3 days. Stir before serving.
Freezing? No!
Coleslaw does not freeze well due to the creamy dressing separating.
Make Ahead:
For the best texture, mix the dressing separately and combine with the cabbage just before serving to keep it crisp.
What to Serve with Coleslaw
🍗 Fried Chicken – A classic pairing.
🍔 BBQ Pulled Pork Sandwiches – The perfect topping.
🍖 Smoked Ribs or Brisket – Cuts through the richness.
🌭 Hot Dogs & Burgers – Adds a crunchy contrast.
Frequently Asked Questions (FAQs)
1. Can I make coleslaw without mayo?
Yes! Replace mayonnaise with Greek yogurt or use a vinaigrette-style dressing with oil and vinegar.
2. How do I keep coleslaw from getting watery?
Salt the shredded cabbage and let it sit for 10 minutes, then squeeze out excess moisture before adding the dressing.
3. Can I use pre-shredded coleslaw mix?
Absolutely! A 14 oz bag of coleslaw mix works perfectly for this recipe.
4. What’s the difference between Southern coleslaw and regular coleslaw?
Southern-style coleslaw is creamier and sweeter, often with a hint of vinegar for tanginess.
5. How long does coleslaw need to sit before serving?
For the best flavor, let it sit for at least 1 hour in the fridge before serving.
Classic Southern Coleslaw Recipe
Ingredients
For the Coleslaw Mix:
- 4 cups green cabbage shredded
- 2 cups purple cabbage shredded (optional for color)
- 1 cup carrots shredded
- ¼ cup red onion finely chopped (optional for extra flavor)
For the Creamy Dressing:
- ¾ cup mayonnaise
- 2 tablespoons apple cider vinegar
- 1 tablespoon Dijon mustard or yellow mustard
- 1 ½ tablespoons sugar adjust for sweetness preference
- ½ teaspoon salt
- ½ teaspoon black pepper
- ¼ teaspoon celery seed optional, for extra crunch & flavor
- 1 tablespoon fresh lemon juice for brightness, optional
Instructions
- Shred the green cabbage, purple cabbage, and carrots using a sharp knife, mandoline slicer, or food processor. If using pre-shredded coleslaw mix, measure out about 6 cups total.
- In a medium bowl, whisk together the mayonnaise, apple cider vinegar, Dijon mustard, sugar, salt, black pepper, celery seed, and lemon juice until smooth.
- Pour the dressing over the shredded cabbage and carrots, tossing well to fully coat. Let sit for at least 15-20 minutes to allow the flavors to blend.
- Coleslaw tastes best when chilled for at least 1 hour, but it can be served immediately. Stir before serving and enjoy as a side dish or sandwich topping.
Notes
-
Best Cabbage to Use:
- Green cabbage – Classic choice for traditional coleslaw.
- Purple (red) cabbage – Adds color and a slightly peppery flavor.
- Napa cabbage – Softer and more delicate, great for a lighter texture.
-
How to Keep Coleslaw Crunchy:
- Salt the cabbage – Sprinkle a little salt on shredded cabbage and let it sit for 10 minutes, then squeeze out excess moisture before adding the dressing.
- Dress just before serving – If making ahead, store the dressing separately and mix it in right before serving.
-
How to Adjust the Flavor:
- For tangier coleslaw: Add extra apple cider vinegar or Dijon mustard.
- For sweeter coleslaw: Increase the sugar or add a little honey.
- For a lighter version: Use Greek yogurt instead of mayo.
-
Make-Ahead Tips:
- The dressing can be made up to 3 days ahead and stored in the fridge.
- Fully assembled coleslaw is best eaten within 24 hours for maximum crunch.
-
Best Serving Ideas:
- BBQ Pulled Pork Sandwiches – A must-have topping!
- Fried Chicken & Coleslaw – A Southern classic combo.
- Fish Tacos – Adds freshness and crunch.
- Hot Dogs & Burgers – Perfect as a topping or side.
This classic Southern coleslaw recipe is creamy, tangy, and the perfect balance of flavors. Whether served at a BBQ, potluck, or alongside a home-cooked meal, it’s always a hit!
Did you try this recipe? Let me know in the comments! Don’t forget to pin this recipe for later. 😊
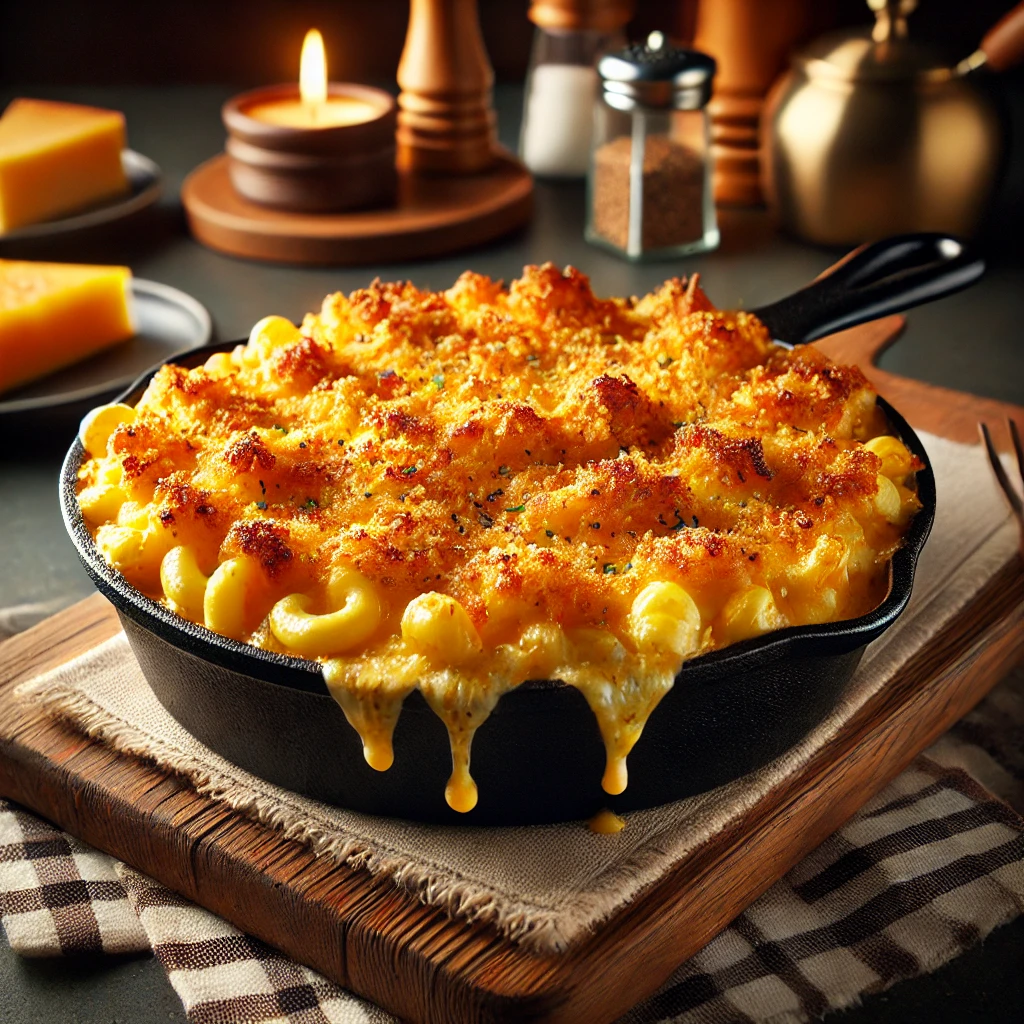
Southern-Style Baked Mac and Cheese
Rich, creamy, and loaded with layers of melted cheese, this Southern-style baked mac and cheese is the ultimate comfort food. Perfect for holidays, Sunday dinners, or anytime you crave a classic homemade dish!
Why You’ll Love This Recipe
✔ Extra Cheesy – A blend of cheddar, Colby, and mozzarella for the best flavor.
✔ Rich & Creamy – Made with eggs, heavy cream, and butter for a silky texture.
✔ No Roux Required – Simple to mix and bake!
✔ Perfect for Gatherings – A crowd-pleasing favorite for family dinners and holidays.
Best Cheeses for Southern Mac and Cheese
🧀 Sharp Cheddar – The classic bold flavor base.
🧀 Colby Jack – Adds a smooth, slightly sweet melt.
🧀 Mozzarella – Provides a stretchy, gooey texture.
🧀 Smoked Gouda – Optional for a smoky kick.
Storage & Reheating Instructions
Storing Leftovers:
Let the mac and cheese cool completely, then store in an airtight container in the fridge for up to 4 days.
Freezing:
Freeze in a freezer-safe dish for up to 2 months. Thaw in the refrigerator before reheating.
Reheating:
Reheat in a 350°F oven for 15-20 minutes with a splash of milk for moisture. You can also microwave in 30-second intervals, stirring between each.
Serving Suggestions
🍗 Southern Fried Chicken – A crispy, juicy pairing.
🥬 Collard Greens – A classic side for balance.
🍖 BBQ Ribs or Pulled Pork – Perfect for cookouts.
🥖 Cornbread or Biscuits – A comforting addition.
Frequently Asked Questions (FAQs)
1. Can I make this mac and cheese ahead of time?
Yes! Assemble everything in the baking dish, cover, and refrigerate up to 24 hours before baking. Add 5-10 extra minutes of bake time if chilled.
2. Do I have to use eggs?
Eggs help bind the mac and cheese, creating a custard-like texture. You can leave them out for a creamier consistency.
3. What can I use instead of heavy cream?
Use an extra cup of whole milk or mix milk with half-and-half for a lighter version.
4. How do I make it extra creamy?
Add an extra ½ cup of sour cream or cream cheese to the milk mixture for ultra-rich texture.
5. Can I make this without baking it?
Yes! If you prefer stovetop mac and cheese, mix the cooked pasta with the cheese sauce and serve immediately. Skip the crumb topping.
Southern Baked Mac and Cheese
Ingredients
For the Pasta:
- 1 lb elbow macaroni or cavatappi
- 1 tablespoon salt for boiling water
- 2 tablespoons butter to coat pasta
For the Cheese Sauce:
- 2 cups sharp cheddar cheese shredded
- 2 cups Colby Jack cheese shredded
- 1 cup mozzarella cheese shredded
- 2 cups whole milk
- 1 cup heavy cream
- 2 large eggs beaten
- ½ cup sour cream optional, for extra creaminess
- 1 teaspoon salt
- ½ teaspoon black pepper
- ½ teaspoon smoked paprika optional, for a smoky touch
- ½ teaspoon garlic powder
For the Topping:
- 1 cup shredded cheddar cheese
- ½ cup crushed Ritz crackers or panko breadcrumbs, for crunch
- 2 tablespoons melted butter
Instructions
- Bring a large pot of salted water to a boil. Add the elbow macaroni and cook 1 minute less than the package instructions (about 7-8 minutes). Drain the pasta and toss with 2 tablespoons butter to prevent sticking. Set aside.
- Preheat your oven to 350°F (175°C). Grease a 9×13-inch baking dish.
- Shred all cheeses and mix them in a bowl, reserving 1 cup of cheddar for the topping.
- In a large bowl, whisk together milk, heavy cream, eggs, sour cream, salt, pepper, smoked paprika, and garlic powder until smooth.
- Layer half of the cooked macaroni in the baking dish. Sprinkle half of the shredded cheese mixture over the pasta. Repeat with another layer of pasta and cheese.
- Pour the creamy milk mixture evenly over the macaroni and cheese, ensuring everything is well coated.
- In a small bowl, mix Ritz cracker crumbs (or panko) with melted butter. Sprinkle the reserved 1 cup of cheddar cheese over the mac and cheese, followed by the buttery crumb topping.
- Cover with foil and bake for 30 minutes. Remove the foil and bake for another 10-15 minutes until the top is golden brown and bubbling.
- Allow the mac and cheese to sit for 5-10 minutes before serving. This helps it set and become extra creamy!
Notes
-
Best Cheese Combinations for Ultimate Flavor:
- Sharp Cheddar: Provides a strong, bold cheese flavor.
- Colby Jack: Adds a creamy, melty texture.
- Mozzarella: Gives a gooey, stretchy consistency.
- Smoked Gouda: Optional for a rich, smoky twist.
- Monterey Jack: Milder and extra creamy.
-
Why Use Eggs in Southern Mac and Cheese?
- Eggs help bind the cheese sauce, creating a slightly firm, custard-like texture rather than a gooey, sauce-heavy consistency.
- If you prefer a creamy stovetop-style mac and cheese, omit the eggs and increase the milk/cream slightly.
-
Making It Extra Creamy:
- Stir in ½ cup sour cream or cream cheese to the cheese sauce.
- Use a blend of whole milk and heavy cream instead of just milk.
- Cook the pasta 1-2 minutes less than al dente so it absorbs more moisture while baking.
-
How to Prevent Dry Mac and Cheese:
- Do not overbake—remove from the oven once it’s bubbly and golden brown.
- Make sure the pasta is fully coated in the cheese sauce before baking.
- Cover with foil for the first 30 minutes of baking to keep moisture in.
-
Crunchy Topping Variations:
- Classic: Use crushed Ritz crackers mixed with melted butter.
- Traditional: Panko breadcrumbs for a crispy bite.
- Extra Cheesy: Add shredded Parmesan to the topping for a cheesy crust.
- Southern Twist: Crush up buttery cornbread crumbs for a slightly sweet crunch.
-
Prep Ahead & Storage Tips:
- Assemble the mac and cheese up to 24 hours ahead, cover tightly, and refrigerate. Add 5-10 minutes extra bake time if chilled.
- Store leftovers in an airtight container in the fridge for up to 4 days.
- Reheat in the oven at 350°F for 15 minutes, adding a splash of milk to keep it creamy.
This Southern-style baked mac and cheese is creamy, cheesy, and full of bold flavor—a perfect dish for holidays, BBQs, or weeknight comfort food.
Did you try this recipe? Let me know in the comments! Don’t forget to pin this recipe for later. 😊
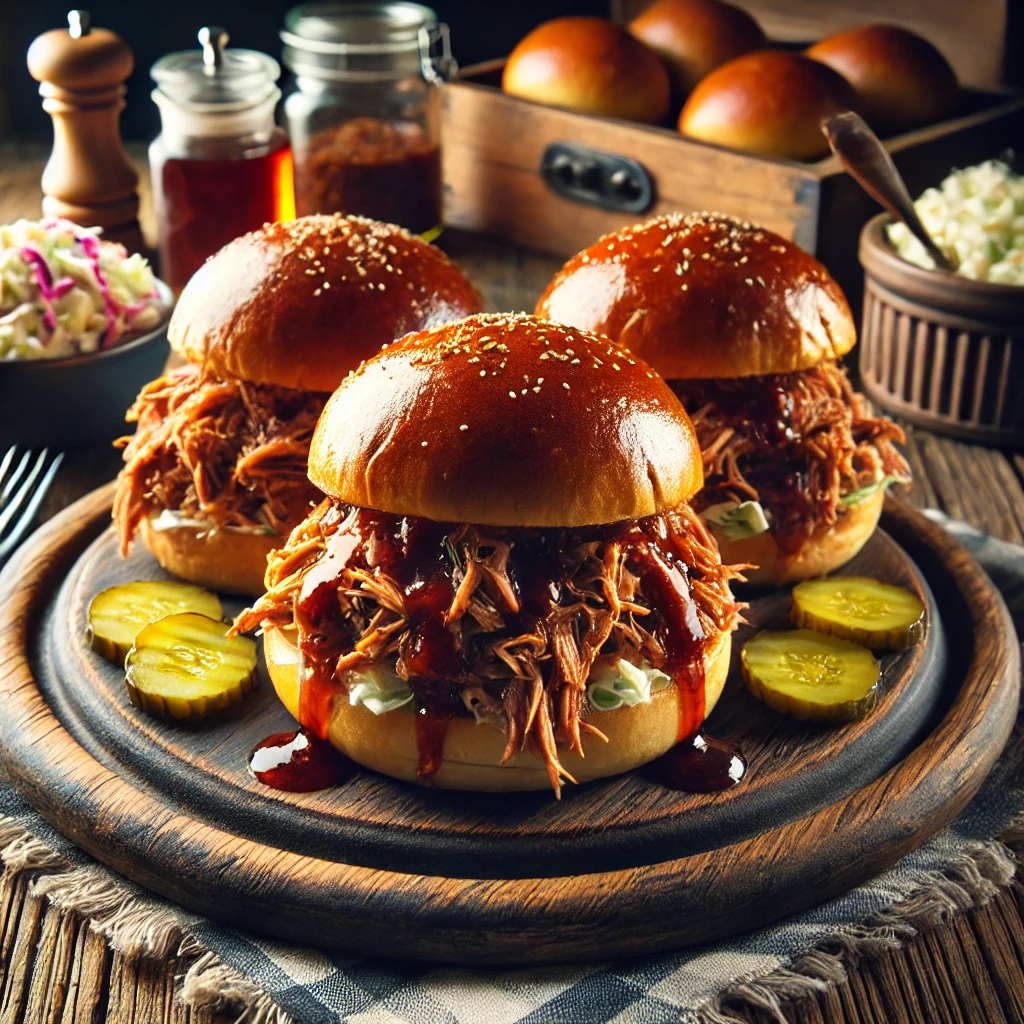
Slow-Cooked Pulled Pork
This tender, juicy pulled pork is slow-cooked to perfection and packed with smoky, sweet, and savory flavors. Perfect for sandwiches, tacos, or meal prep!
Why You’ll Love This Recipe
✔ Easy to Make – Set it and forget it!
✔ Super Tender & Juicy – Slow-cooked for the perfect texture.
✔ Versatile – Use for sandwiches, tacos, burritos, or meal prep.
✔ Feeds a Crowd – Perfect for family dinners or gatherings.
Best Pork Cuts for Pulled Pork
🐖 Pork Shoulder (Boston Butt) – Best for slow cooking, full of flavor and marbling.
🐖 Pork Butt – Similar to shoulder, slightly more fat content for extra juiciness.
🐖 Pork Loin (Lean Option) – Less fatty but can still work with a good sauce.
Storage & Reheating Instructions
Storing Leftovers:
Let the pulled pork cool completely before storing. Keep in an airtight container in the fridge for up to 4 days.
Freezing:
Freeze shredded pork in a freezer-safe bag with some of the juices for up to 3 months. Thaw overnight in the fridge before reheating.
Reheating:
Reheat in a skillet over medium heat with a splash of broth or BBQ sauce for 5-7 minutes. You can also microwave in 30-second intervals, stirring in between.
Serving Suggestions
🍽 Pulled Pork Sandwiches – Serve on brioche buns with coleslaw.
🍽 Pulled Pork Tacos – Top with avocado, onions, and cilantro.
🍽 Pulled Pork Nachos – Load up tortilla chips with cheese, jalapeños, and BBQ pork.
🍽 Pulled Pork Mac & Cheese – Mix into creamy mac for the ultimate comfort food.
Frequently Asked Questions (FAQs)
1. Can I make pulled pork in an Instant Pot?
Yes! Cook on High Pressure for 75 minutes, then do a natural release for 15 minutes before shredding.
2. What if I don’t have a slow cooker?
You can bake it in the oven at 300°F (150°C) for 4-5 hours, covered in a Dutch oven or roasting pan.
3. How do I make it spicier?
Increase the cayenne pepper in the rub or add hot sauce to the BBQ sauce.
4. Can I use pre-cut pork?
Yes, but larger cuts like pork shoulder result in juicier pulled pork due to slow-cooking the fat.
5. Can I use a different sauce?
Absolutely! Try mustard-based, vinegar-based, or chipotle BBQ sauces for different flavor profiles.
Slow Cooked Pulled Pork
Ingredients
For the Pork:
- 4-5 lbs pork shoulder Boston butt
- 2 tablespoons olive oil for searing
- 1 cup chicken broth or apple juice for extra sweetness
- 2 tablespoons apple cider vinegar for tanginess
- 1 tablespoon Worcestershire sauce
- ½ teaspoon liquid smoke optional, for smoky flavor
For the Dry Rub:
- 2 tablespoons brown sugar
- 1 tablespoon smoked paprika
- 1 tablespoon garlic powder
- 1 tablespoon onion powder
- 2 teaspoons salt
- 1 teaspoon black pepper
- ½ teaspoon cayenne pepper optional, for spice
- 1 teaspoon mustard powder optional, for depth
For the BBQ Sauce (Optional):
- 1 cup barbecue sauce your favorite brand or homemade
- 2 tablespoons honey for extra sweetness
- 1 tablespoon apple cider vinegar
- 1 teaspoon smoked paprika
Instructions
- Pat the pork shoulder dry with paper towels. In a small bowl, mix the brown sugar, smoked paprika, garlic powder, onion powder, salt, black pepper, cayenne pepper, and mustard powder. Rub this mixture generously all over the pork, pressing it into the meat for maximum flavor.
- Heat 2 tablespoons of olive oil in a large skillet over medium-high heat. Sear the pork on all sides until golden brown (about 2-3 minutes per side). This step adds a deeper flavor but can be skipped if in a hurry.
- Place the pork in a slow cooker (crockpot). Pour in chicken broth, apple cider vinegar, Worcestershire sauce, and liquid smoke (if using). Cover and cook on LOW for 8-10 hours or HIGH for 5-6 hours until the pork is fall-apart tender.
- Once the pork is done, remove it from the slow cooker and place it on a cutting board. Use two forks to shred the meat, discarding any excess fat.
- For saucy pulled pork, return the shredded meat to the slow cooker and mix it with the cooking juices. Add BBQ sauce, honey, apple cider vinegar, and smoked paprika. Let it cook on LOW for another 30 minutes to soak in the flavors.
- Serve the pulled pork on toasted buns, in tacos, over rice, or with coleslaw and cornbread for a complete meal.
Notes
-
Best Cut of Meat for Pulled Pork:
- Pork Shoulder (Boston Butt): The best choice for tender, flavorful pulled pork due to its marbling and connective tissue.
- Pork Butt: Similar to shoulder but with slightly more fat, resulting in extra juiciness.
- Pork Loin (Lean Option): Works, but it’s less fatty, so it may turn out drier unless extra liquid is added.
-
How to Prevent Dry Pulled Pork:
- Cook on LOW for the most tender, juicy meat. High heat can dry it out.
- Don’t skip the broth or apple cider vinegar—they help keep moisture in the meat.
- Shred the pork in its juices before serving to lock in flavor.
-
How to Get a Smoky BBQ Flavor Without a Smoker:
- Use smoked paprika in the dry rub.
- Add ½ teaspoon of liquid smoke to the slow cooker.
- Broil the shredded pork for 5 minutes after cooking to add a slight crisp texture.
-
Sweet vs. Tangy BBQ Sauce:
- For a sweeter flavor, use honey or brown sugar.
- For a tangier version, add extra apple cider vinegar or mustard.
- Love spicy pulled pork? Mix in a teaspoon of hot sauce or cayenne pepper.
-
Prepping Ahead:
- Season the pork the night before and refrigerate it overnight for deeper flavor.
- Store leftovers in an airtight container for up to 4 days or freeze for up to 3 months.
-
Best Ways to Serve Pulled Pork:
- On a brioche bun with coleslaw for a classic pulled pork sandwich.
- In tacos with avocado, lime, and pickled onions.
- Over rice or mashed potatoes for a comforting bowl meal.
- In a baked potato topped with cheese and BBQ sauce.
This slow-cooked pulled pork recipe is easy, flavorful, and perfect for any occasion. Whether you’re making sandwiches, tacos, or meal prepping, this dish is guaranteed to be a hit!
Did you try this recipe? Let me know in the comments! Don’t forget to pin this recipe for later. 😊
