
Old-Fashioned Butter Mints
There’s something charming about recipes that don’t ask much of us. A bowl, a spoon, three simple ingredients, and a little time. These Old-Fashioned Butter Mints are one of those treats women have been making for generations — the kind you’d find in a candy dish at Grandma’s house or on the dessert table after Sunday dinner.
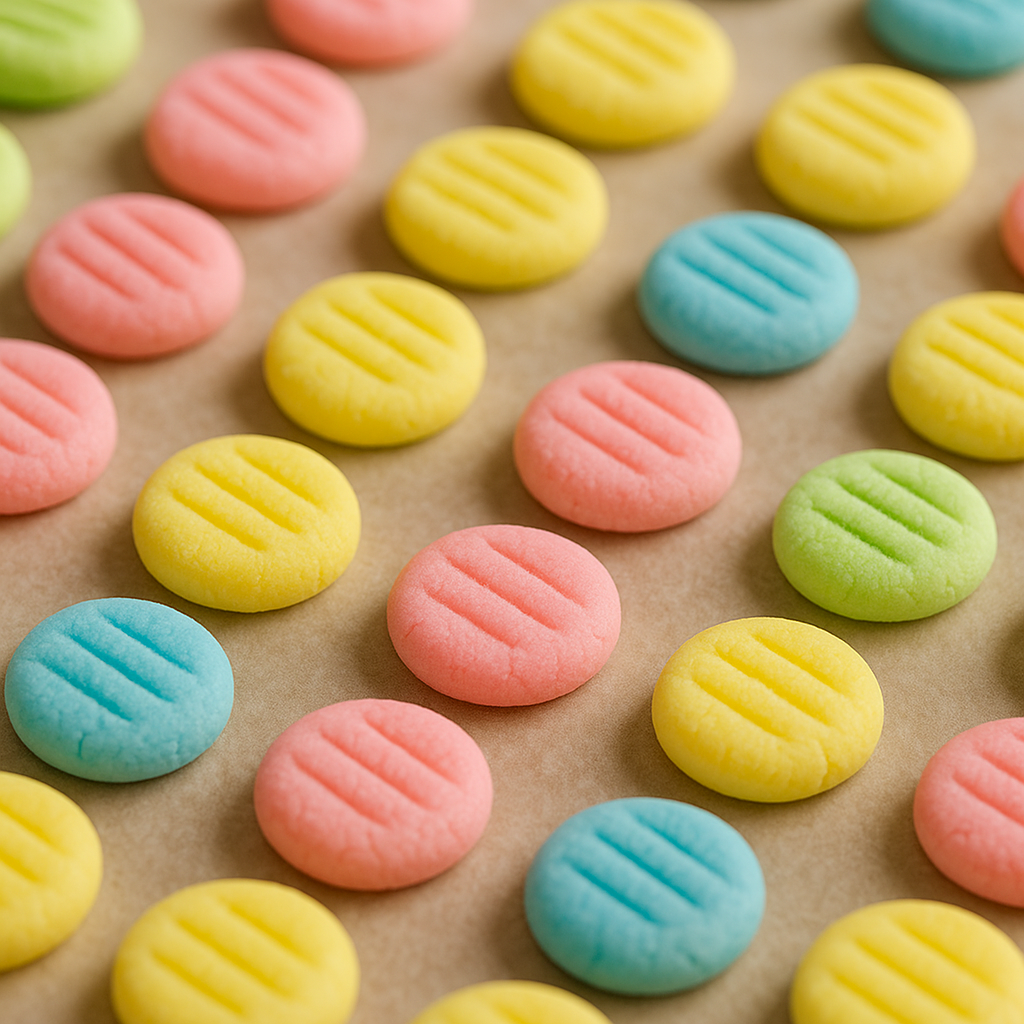
They’re soft, melt-in-your-mouth, and delicately minty… not overpowering, not fussy, and definitely not store-bought tasting. Just the simple, comforting sweetness that reminds you of slower days and warm kitchens.
If you’ve been looking for an easy homemade candy that comes together in minutes and dries overnight, you’ve found it. These butter mints are a tradition worth bringing back.
There are certain little treats that take me right back to the kitchens I grew up in — the ones where the light was softer, the days felt slower, and someone always seemed to have a candy dish sitting out for guests. These butter mints are one of those memories for me. I can still picture the older women at church making them by hand, rolling each tiny piece with the same care they gave to everything else in their homes. Nothing fancy, nothing loud… just simple sweetness meant to make people feel welcome. And somehow, that’s still what these mints do today — they bring a bit of gentleness into the room, the kind we’re all craving in our busy, modern days.
Why You’ll Love These Mints
- Only 3 ingredients
- No cooking, no thermometer, no fuss
- Budget-friendly
- Perfect for gifting
- The texture is nostalgic and soft — just like vintage after-dinner mints
- Customizable with color or flavor
Ingredients You’ll Need
Butter: Softened butter creates the smooth, creamy texture.
Powdered Sugar: The base of the entire candy — gives structure and sweetness.
Peppermint Extract: A little goes a long way.
Optional: A drop of food coloring for pastel hues.
Step-by-Step: How to Make Old-Fashioned Butter Mints
1. Cream the Butter
Start with butter that’s perfectly softened — not melted. If it’s too warm, the dough will be sticky. If it’s too cold, it won’t mix smoothly.
Beat it until fluffy.
2. Add Extract
Stir in the peppermint. Don’t overdo it — peppermint extract is strong. A half-teaspoon gives that classic after-dinner mint flavor.
3. Add Powdered Sugar
Sift your powdered sugar, then add it slowly.
You’re looking for a smooth, moldable dough — it should feel like soft play-dough in your hands.
4. Shape the Mints
Roll tiny pea-sized balls and flatten lightly with a fork for that sweet old-fashioned look. They’ll look like miniature peanut butter cookies… but prettier.
5. Let Them Dry Overnight
This step is what gives these mints their iconic texture. By morning, they’re firm on the outside while still creamy inside.
Make-Ahead Tips
Butter mints keep well, making them a great make-ahead holiday treat.
- Store in an airtight container for up to 2 weeks at room temperature.
- Freeze in a sealed bag for up to 3 months.
- If freezing, let them sit at room temperature for 10 minutes before serving.
Substitutions
Spearmint extract → for a milder mint flavor
- Lemon extract → bright and refreshing
- Vanilla or almond extract → sweet, creamy alternative
- Gel food coloring → won’t water down the dough like liquid color
Troubleshooting
Dough too crumbly?
Add milk ½ teaspoon at a time until it holds together.
Dough too sticky?
Add powdered sugar, 1 tablespoon at a time, until workable.
Mints not drying?
They may need more time if your kitchen is humid. Give them an extra 6–12 hours.
FAQs
Do these taste like the pastel mints served at weddings?
Yes — but fresher, softer, and much more flavorful.
Can I double or triple the recipe?
Absolutely. These scale beautifully.
Can I make them in different colors?
Yes! Divide the dough and knead in a tiny drop of food coloring.
Can I use salted butter?
You can, but unsalted keeps the flavor classic and sweet.
Serving Ideas
- At the end of a dinner party
- With coffee or tea
- During the holidays
- Wrapped in pretty jars for gifting
- As part of a cookie tray
- Baby showers or wedding showers
These little mints make any table look instantly sweeter and more welcoming.
Old Fashioned Butter Mints
Ingredients
Method
- In a medium bowl, beat the softened butter until smooth and fluffy.
- Mix in the peppermint extract until fully combined.
- Add the powdered sugar one cup at a time, mixing until a soft dough forms.
- If the dough is crumbly, add ½ teaspoon milk at a time until it comes together.
- If the dough is sticky, add more powdered sugar.
- Pinch off pea-sized portions (about ½ teaspoon each), roll into tiny balls, and flatten gently with a fork to create the classic crosshatch pattern.
- Place mints on a parchment-lined baking sheet and leave them out uncovered overnight to dry.
- They will firm up on the outside but stay soft and melty inside.
- Transfer to an airtight container.
- Store at room temperature for up to 2 weeks, or freeze for up to 3 months.
Notes
- Butter must be softened, not melted. Melted butter makes sticky, unusable dough.
- Color gently: One tiny drop of food coloring goes a long way.
- If you live in a humid climate, drying time may take a little longer.
- These make beautiful gifts during Christmas, weddings, or baby showers.
- For a milder mint flavor, use ¼ teaspoon extract instead.