Classic German Chocolate Cake
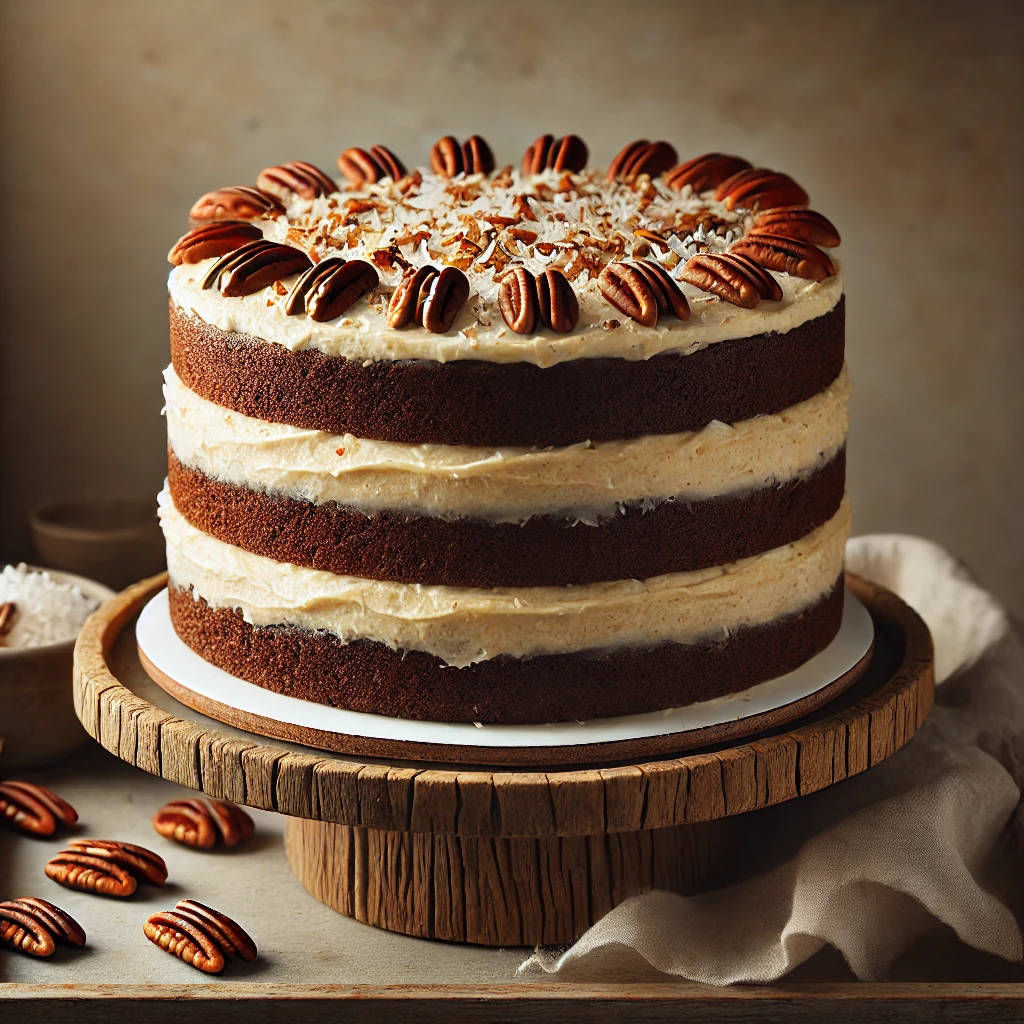
This German Chocolate Cake is a classic dessert that combines rich, moist chocolate cake layers with a luscious coconut-pecan frosting. Despite its name, this cake originated in the United States and is named after Samuel German, who developed the chocolate used in the original recipe. Perfect for holidays, birthdays, or any special occasion, this cake is sure to be a showstopper.
Why German Chocolate Cake Is My Favorite
German Chocolate Cake has always been a family tradition, especially when my kids were growing up. Each of my four children had their favorite desserts, but this cake was the one that brought us all together. I would bake it for special occasions—birthdays, holidays, or even just a surprise treat for no reason at all. The smell of the cake baking in the oven would bring everyone into the kitchen, peeking over the counter to see when it would be ready. Those moments of anticipation and togetherness are what make this cake so special to me.
Tips for the Perfect German Chocolate Cake
- Room Temperature Ingredients: Ensure that your eggs, butter, and buttermilk are at room temperature for a smoother batter.
- Don’t Skip Cooling: Let the cake layers cool completely before assembling to avoid melting the frosting.
- Storage: Store the cake in an airtight container in the refrigerator for up to 5 days. Bring to room temperature before serving.
- Make Ahead: The frosting can be made a day in advance and stored in the refrigerator. Let it come to room temperature before using.
FAQs
Can I use regular chocolate instead of Baker’s German’s Sweet Chocolate?
Yes, you can substitute semi-sweet chocolate, but the flavor will be slightly less sweet and rich.
What if I don’t have cake flour?
You can make your own by measuring 2 1/2 cups of all-purpose flour, removing 5 tablespoons, and replacing them with cornstarch. Sift well.
Can I freeze the cake?
Yes! Wrap unfrosted cake layers tightly in plastic wrap and store in the freezer for up to 3 months. Thaw at room temperature before frosting.
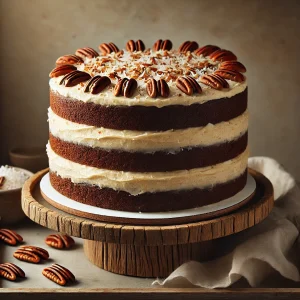
Classic German Chocolate Cake
Ingredients
For the Cake:
- 4 ounces Baker’s German’s sweet chocolate chopped (115g)
- 1/2 cup boiling water 120ml
- 1 cup unsalted butter softened (230g)
- 2 cups granulated sugar 400g
- 4 large eggs separated
- 1 teaspoon vanilla extract 5ml
- 2 1/2 cups cake flour 310g
- 1 teaspoon baking soda 5g
- 1/2 teaspoon salt 2.5g
- 1 cup buttermilk room temperature (240ml)
For the Coconut-Pecan Frosting:
- 1 cup evaporated milk 240ml
- 1 cup granulated sugar 200g
- 3 large egg yolks lightly beaten
- 1/2 cup unsalted butter 115g
- 1 teaspoon vanilla extract 5ml
- 1 1/3 cups sweetened flaked coconut 120g
- 1 cup chopped pecans 120g
Instructions
Prepare the Cake Layers
- Preheat your oven to 350°F (175°C). Grease and flour three 9-inch round cake pans or line the bottoms with parchment paper.
- In a small saucepan, melt the chocolate in boiling water, stirring until smooth. Let cool to room temperature.
- In a large bowl, cream together the butter and sugar until light and fluffy, about 2–3 minutes.
- Add the egg yolks, one at a time, beating well after each addition. Stir in the cooled chocolate and vanilla extract.
- In a separate bowl, sift together the cake flour, baking soda, and salt. Add the dry ingredients to the chocolate mixture alternately with the buttermilk, beginning and ending with the dry ingredients. Mix until just combined.
- In another bowl, beat the egg whites until stiff peaks form. Gently fold the egg whites into the batter.
- Divide the batter evenly among the prepared pans. Bake for 25–30 minutes, or until a toothpick inserted into the center comes out clean.
- Cool the cakes in the pans for 10 minutes, then remove to a wire rack to cool completely.
Make the Coconut-Pecan Frosting
- In a medium saucepan, combine the evaporated milk, sugar, egg yolks, butter, and vanilla extract. Cook over medium heat, stirring constantly, until the mixture thickens and turns golden brown, about 12 minutes.
- Remove from heat and stir in the coconut and pecans. Let the frosting cool until it reaches a spreadable consistency.
Assemble the Cake
- Place one cake layer on a serving plate. Spread a third of the coconut-pecan frosting evenly on top.
- Add the second cake layer and spread another third of the frosting on top. Repeat with the third layer, spreading the remaining frosting on top of the cake. Traditionally, the sides of the cake are left unfrosted.
Notes
Tips for the Perfect German Chocolate Cake
- Room Temperature Ingredients: Ensure that your eggs, butter, and buttermilk are at room temperature for a smoother batter.
- Don’t Skip Cooling: Let the cake layers cool completely before assembling to avoid melting the frosting.
- Storage: Store the cake in an airtight container in the refrigerator for up to 5 days. Bring to room temperature before serving.
- Make Ahead: The frosting can be made a day in advance and stored in the refrigerator. Let it come to room temperature before using.
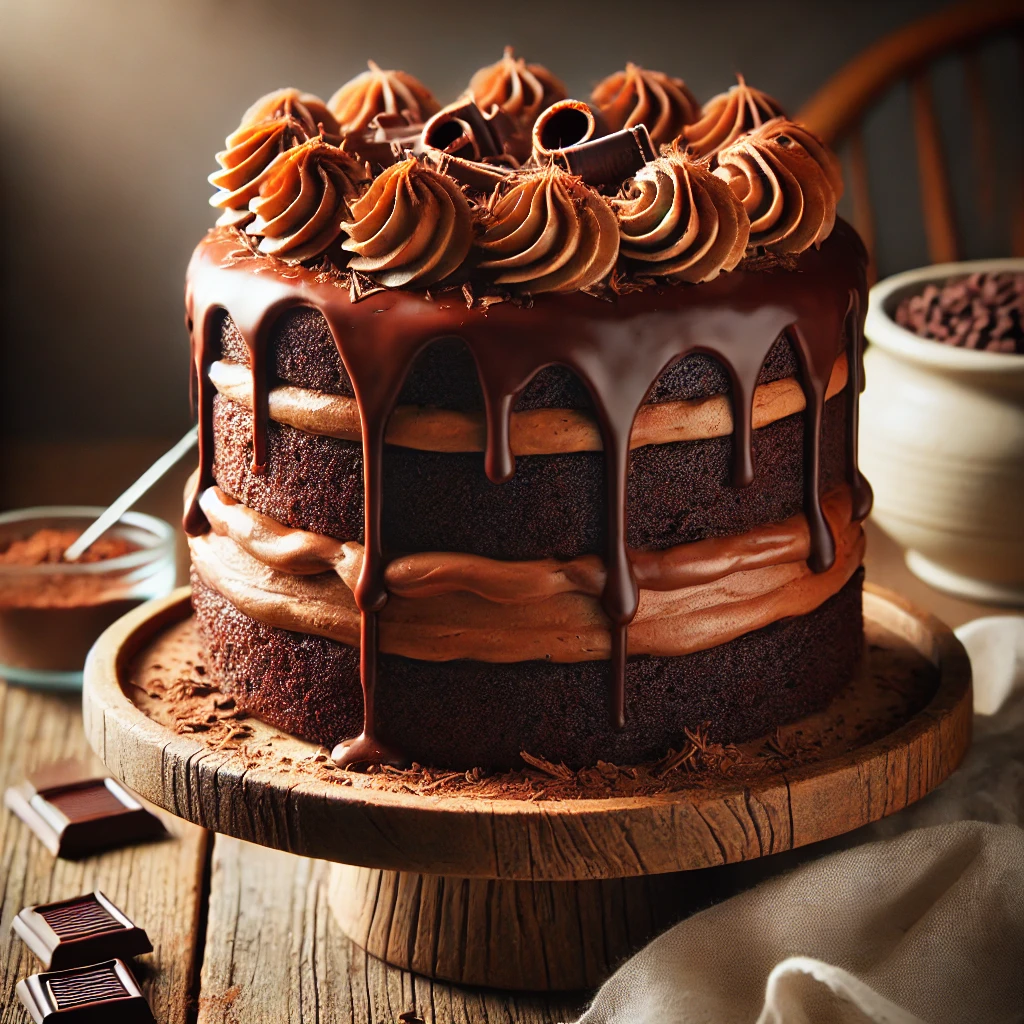
Triple Chocolate Cake
There’s nothing more decadent than a Triple Chocolate Cake to satisfy your chocolate cravings. This rich and moist chocolate cake is layered with creamy chocolate frosting and finished with a glossy ganache topping. Perfect for birthdays, special occasions, or a weekend treat, this dessert is a show-stopper that’s surprisingly easy to make. With three layers of chocolate goodness, this cake will be the star of your table and have everyone asking for seconds.
Why I Love This Triple Chocolate Cake
Chocolate has always been my ultimate comfort food, and this Triple Chocolate Cake takes it to another level. The first time I made it was for a family celebration, and it quickly became a staple dessert for special occasions. Watching everyone take their first bite and seeing their eyes light up with delight made me realize just how special this cake is. It’s not just a dessert—it’s a way to bring people together, share moments, and create lasting memories around the table.
What I love most about this cake is its versatility. While it’s perfect for a grand celebration, I’ve also made it just to brighten an ordinary day. I remember one rainy weekend when the gloomy weather had everyone in a funk. I decided to bake this cake as a surprise, and the smell of chocolate filling the kitchen lifted everyone’s spirits. We all gathered in the living room, slicing into the rich, ganache-covered masterpiece while sipping on coffee and laughing about old stories. That simple act of baking transformed the day into something memorable.
This cake also holds a nostalgic place in my heart. It reminds me of baking with my mom as a child, when she’d let me lick the frosting spoon and decorate cakes with sprinkles. Now, I carry on that tradition with my own twist by adding the ganache drizzle and chocolate curls. It feels like I’m honoring those sweet memories while creating new ones with my loved ones. Every time I make this Triple Chocolate Cake, I’m reminded of how food has the power to comfort, connect, and celebrate life’s sweetest moments.
Tips for the Best Triple Chocolate Cake
- Room Temperature Ingredients:
Room temperature eggs, milk, and butter ensure a smooth batter and consistent texture. - Don’t Skip Boiling Water:
Boiling water blooms the cocoa powder, intensifying the chocolate flavor. - Chill Before Ganache:
Chill the frosted cake for 20 minutes before adding ganache to prevent it from melting the frosting. - Use High-Quality Chocolate:
Better chocolate equals a richer and more decadent flavor. - Make Ahead:
Bake the cake layers a day in advance and store them in plastic wrap. Frost and assemble the cake on the day you plan to serve it.
Customizations and Variations
- Dark Chocolate Lovers: Use dark cocoa powder and bittersweet chocolate in the ganache for a richer flavor.
- White Chocolate Ganache: Substitute white chocolate chips for a fun twist.
- Cupcake Version: Divide the batter into cupcake liners and bake for 18–20 minutes.
FAQs
Can I freeze the cake layers?
Yes, wrap the cooled cake layers tightly in plastic wrap and freeze for up to 3 months. Thaw before frosting.
What can I use instead of heavy cream?
You can use full-fat milk or half-and-half, but the frosting and ganache may be slightly thinner.
How do I store leftovers?
Store leftover cake in an airtight container in the refrigerator for up to 5 days. Bring to room temperature before serving.
Triple Chocolate Cake
Ingredients
For the Cake:
- 2 cups all-purpose flour 250g
- 3/4 cup unsweetened cocoa powder 65g
- 1 1/2 teaspoons baking powder
- 1 1/2 teaspoons baking soda
- 1 teaspoon salt
- 2 cups granulated sugar 400g
- 2 large eggs room temperature
- 1/2 cup vegetable oil 120ml
- 1 cup whole milk 240ml
- 1 cup boiling water 240ml
- 1 teaspoon vanilla extract
For the Chocolate Frosting:
- 1 cup unsalted butter softened (230g)
- 1/2 cup unsweetened cocoa powder 40g
- 3 1/2 cups powdered sugar 440g
- 1/4 cup heavy cream 60ml
- 1 teaspoon vanilla extract
For the Chocolate Ganache:
- 1 cup semi-sweet chocolate chips 170g
- 1/2 cup heavy cream 120ml
- 1 tablespoon unsalted butter optional, for shine
Instructions
- Preheat and Prepare
- Preheat your oven to 350°F (175°C). Grease and flour two 9-inch round cake pans or line them with parchment paper.
- Mix the Dry Ingredients
- In a large bowl, whisk together the flour, cocoa powder, baking powder, baking soda, salt, and sugar until evenly combined.
- Combine the Wet Ingredients
- Add the eggs, oil, milk, and vanilla extract to the dry ingredients. Mix on medium speed until smooth and creamy.
- Add Boiling Water
- Slowly stir in the boiling water. The batter will be thin, but this ensures a moist and rich cake.
- Bake the Cake Layers
- Divide the batter evenly between the prepared pans. Bake for 30–35 minutes, or until a toothpick inserted in the center comes out clean. Let the cakes cool in the pans for 10 minutes, then transfer to a wire rack to cool completely.
- Make the Chocolate Frosting
- In a large bowl, beat the butter until creamy. Add the cocoa powder and mix until smooth. Gradually add the powdered sugar and heavy cream, alternating between the two, until the frosting is fluffy. Stir in the vanilla extract.
- Assemble the Cake
- Place one cooled cake layer on a serving plate. Spread a thick layer of frosting on top. Add the second cake layer and frost the top and sides of the cake.
- Prepare the Ganache
- In a heatproof bowl, combine the chocolate chips and heavy cream. Microwave in 20-second intervals, stirring each time, until smooth. Add the butter for extra shine. Let the ganache cool slightly, then pour it over the frosted cake, allowing it to drip down the sides.
- Decorate and Serve
- Decorate the cake with chocolate curls, sprinkles, or fresh berries. Let the ganache set for 15 minutes before slicing and serving.
Notes
Tips for the Best Triple Chocolate Cake
-
Room Temperature Ingredients:
Room temperature eggs, milk, and butter ensure a smooth batter and consistent texture. -
Don’t Skip Boiling Water:
Boiling water blooms the cocoa powder, intensifying the chocolate flavor. -
Chill Before Ganache:
Chill the frosted cake for 20 minutes before adding ganache to prevent it from melting the frosting. -
Use High-Quality Chocolate:
Better chocolate equals a richer and more decadent flavor. -
Make Ahead:
Bake the cake layers a day in advance and store them in plastic wrap. Frost and assemble the cake on the day you plan to serve it.

Homemade Pretzels Recipe
If you’re craving warm, soft pretzels with a golden, chewy crust, this recipe is your answer. Using the same dough from our homemade white bread recipe, you can easily transform it into delicious pretzels that are perfect for snacking, sharing, or impressing guests. Whether it’s a cozy night in or a party platter, these pretzels are versatile, fun to make, and even more fun to eat.
What Makes These Pretzels So Good?
Homemade pretzels have a unique appeal—soft, chewy, and slightly salty with a rich, golden crust. What sets these apart is their baking soda bath, which gives them that classic pretzel flavor and deep brown color. This recipe uses a tried-and-true bread dough base, making it beginner-friendly while yielding bakery-quality results. With simple ingredients and a straightforward method, these pretzels are a must-try for any home baker.
Ingredients You’ll Need
For the Dough:
This recipe starts with our versatile bread dough, made with simple pantry staples: flour, water, yeast, sugar, salt, and a touch of oil or butter for richness. If you’re using rapid yeast, the process is even quicker, as it eliminates the need for proofing.
For the Pretzels:
To turn bread dough into pretzels, you’ll need a few additional ingredients: water, baking soda, an optional egg wash for shine, and coarse salt for that signature pretzel topping.
How to Make Pretzels
Step 1: Prepare the Dough
Start by making the bread dough, mixing and kneading until smooth and elastic. Let it rise until doubled in size, which takes about an hour (or 30–45 minutes with rapid yeast). Once risen, punch down the dough and divide it into portions for shaping.
Step 2: Shape the Pretzels
Roll each portion of dough into a long rope and twist it into the classic pretzel shape. If you’re feeling creative, you can also shape the dough into sticks or mini bites for easier snacking.
Step 3: The Baking Soda Bath
The magic of pretzels lies in the baking soda bath. This quick boil gives them their distinct flavor and chewy texture. Gently lower the shaped pretzels into the simmering baking soda solution, flipping after 30 seconds.
Step 4: Add Toppings
After boiling, place the pretzels on a parchment-lined baking sheet. Brush them with an egg wash for a shiny finish and sprinkle with coarse salt. You can also get creative with toppings like sesame seeds, shredded cheese, or even cinnamon sugar.
Step 5: Bake to Perfection
Bake the pretzels in a hot oven until golden brown and slightly puffed. The aroma alone will have everyone eagerly waiting to dig in!
Tips for Perfect Pretzels
- Shape Matters: Keep the dough ropes uniform in size for even cooking. If the classic pretzel shape is tricky, make sticks or bites for simplicity.
- Don’t Skip the Bath: The baking soda bath is essential for that authentic pretzel texture and flavor.
- Experiment with Toppings: From savory to sweet, customize your pretzels with your favorite flavors.
- Serve Fresh: Pretzels are best enjoyed warm out of the oven. Reheat leftovers to restore their softness.
Why Use Bread Dough for Pretzels?
This recipe simplifies pretzel-making by using bread dough as the base. Bread dough is versatile and easy to work with, making it an excellent choice for homemade pretzels. Plus, you can use the same dough for other baked goods like rolls, loaves, or even pizza crust, making it a valuable addition to your recipe collection.
Customizing Your Pretzels
Sweet Pretzels
For a dessert-like twist, skip the salt and brush baked pretzels with melted butter, then coat with cinnamon sugar.
Cheesy Pretzels
Sprinkle shredded cheese over the pretzels before baking for a savory, melty topping.
Herb and Garlic
Mix garlic powder and Italian herbs into melted butter and brush over the baked pretzels for a flavor-packed snack.
Storage and Reheating
Store cooled pretzels in an airtight container for up to 2 days. To reheat, place them in a 350°F oven for a few minutes or microwave for 10–15 seconds. For longer storage, freeze the pretzels in a zip-top bag and reheat as needed.
Homemade pretzels are a delightful treat that combines the satisfaction of baking with the joy of snacking. With their soft interior, chewy crust, and endless topping options, they’re sure to become a favorite in your household. Whether you’re a seasoned baker or trying pretzels for the first time, this recipe will guide you to delicious success. Gather your ingredients, roll up your sleeves, and enjoy the process of creating these warm, golden pretzels from scratch.

Homemade Pretzels Recipe
Ingredients
- 1 packet 2 1/4 tsp rapid instant yeast
- 2 1/2 cups lukewarm water 100–110°F
- 1/3 cup granulated sugar
- 1 1/4 teaspoons salt
- 1/4 cup vegetable oil or melted butter
- 6 1/2 cup all-purpose flour
Instructions
for Dough
- Mix the Dry Ingredients:
- In a large mixing bowl, combine 6 cups of flour, sugar, salt, and instant yeast. Whisk to evenly distribute the yeast and other dry ingredients.
- Incorporate the Wet Ingredients:
- Add 2 1/2 cups of lukewarm water and oil (or melted butter) to the dry ingredients. Mix with a spoon, dough whisk, or the paddle attachment of a stand mixer until a shaggy dough forms.
- Knead the Dough:
- If kneading by hand, turn the dough out onto a floured surface and knead for 8–10 minutes, adding additional flour 1 tablespoon at a time if necessary, until the dough is smooth and elastic.
- If using a stand mixer with a dough hook, knead on medium speed for 6–8 minutes until the dough pulls away from the sides of the bowl and feels smooth.
- First Rise:
- Rapid yeast allows for a shorter rise time. Place the dough in a greased bowl, cover it with a towel or plastic wrap, and let it rise in a warm place for 30–45 minutes, or until doubled in size.
for Pretzels
- Prepare the Dough for Pretzels
- Punch down the risen dough and divide it into 12 equal portions for standard pretzels or smaller portions for mini pretzels.
- Shape the Pretzels
- Roll each piece into a rope about 20–24 inches long and shape it into a classic pretzel. (Form a “U,” cross the ends, and press them onto the base of the “U.”)
- Prepare the Baking Soda Bath
- In a large pot, bring 8 cups of water to a boil. Stir in 1/3 cup baking soda and reduce the heat to a simmer.
- Boil the Pretzels
- Carefully drop 1–2 pretzels at a time into the baking soda bath. Boil for 30 seconds on each side. Remove with a slotted spoon and place on a parchment-lined baking sheet.
- Add Toppings
- Brush boiled pretzels with beaten egg for a glossy finish (optional) and sprinkle with coarse salt or other toppings.
- Bake the Pretzels
- Preheat the oven to 425°F (220°C). Bake for 10–12 minutes, or until golden brown.
Notes
Recipe Notes
-
Baking Soda Bath:
- The baking soda bath is essential for giving pretzels their signature chewy texture and deep golden color. Don’t skip this step!
-
Shaping Tips:
- If shaping classic pretzels is too tricky, roll the dough into shorter ropes and make pretzel sticks or bites instead.
-
Uniform Sizes:
- Try to keep the pretzels a similar size for even baking.
-
Creative Toppings:
- Customize your pretzels with toppings like sesame seeds, poppy seeds, shredded cheese, or even cinnamon sugar.
-
Storing Pretzels:
- Store leftover pretzels in an airtight container for up to 2 days. Reheat them in the oven for a few minutes to regain their softness and warmth.
-
Freezing Instructions:
- Freeze boiled (but unbaked) pretzels on a baking sheet until solid, then transfer them to a freezer bag. When ready to bake, thaw, add toppings, and bake as directed.
-
Serving Ideas:
- Serve your pretzels warm with dips like mustard, cheese sauce, or even chocolate for a sweet variation.
-
Kneading Dough:
- If kneading by hand, aim for 8–10 minutes of kneading for a smooth and elastic dough. A stand mixer reduces the kneading time to 6–8 minutes.
-
Use Fresh Yeast:
- Always ensure your yeast is fresh and active for the best dough rise.
-
Soft Pretzel Option:
- For extra-soft pretzels, brush them with melted butter as soon as they come out of the oven.
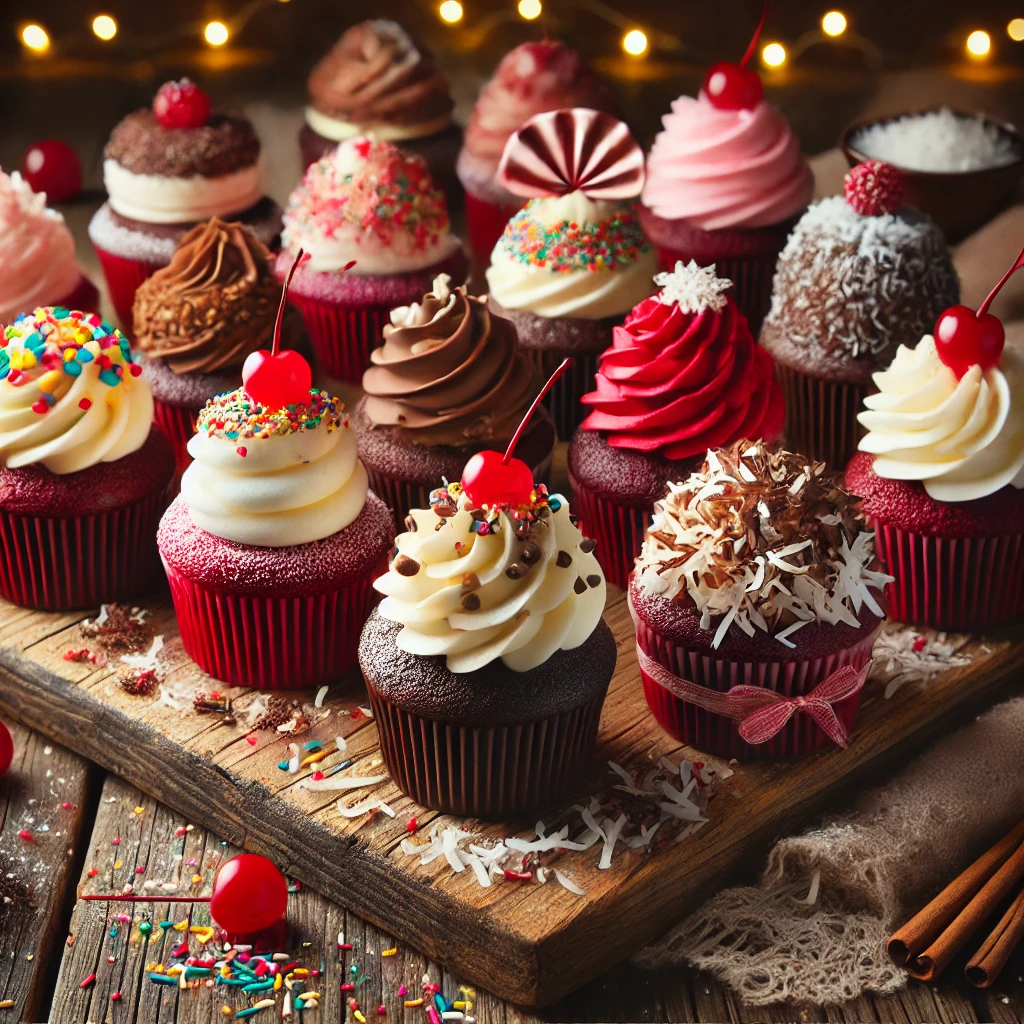
Best Red Velvet Cupcakes
Indulge in the irresistible charm of these red velvet cupcakes! With a soft, moist crumb and a subtle cocoa flavor, these cupcakes are topped with luscious cream cheese frosting, making them perfect for any occasion. Whether you’re baking for a celebration or just a treat-yourself moment, these cupcakes are easy to make and utterly delicious.
Why You’ll Love These Red Velvet Cupcakes
Red velvet cupcakes are a classic for a reason. Their signature red color, tender texture, and tangy cream cheese frosting make them an irresistible treat. This recipe is straightforward, foolproof, and produces bakery-style cupcakes right in your kitchen.
Tips for Success
- Use Room Temperature Ingredients:
Room temperature eggs, butter, and buttermilk help the batter mix evenly and produce a smoother texture. - Don’t Overmix:
Overmixing the batter can lead to dense cupcakes. Mix just until the ingredients are combined. - Measure Flour Correctly:
Use the spoon-and-level method to measure flour accurately. Too much flour can make your cupcakes dry. - Cool Completely Before Frosting:
Frosting warm cupcakes will cause the frosting to melt. Ensure the cupcakes are completely cool before decorating.
Customizations and Variations
- Mini Cupcakes: Use a mini muffin tin and reduce the bake time to 10–12 minutes.
- Chocolate Cream Cheese Frosting: Add 1/4 cup of cocoa powder to the frosting for a chocolate twist.
- Sprinkle Fun: Add themed sprinkles to match holidays or special occasions.
- Stuffed Cupcakes: Scoop out a small portion of the cupcake center and fill it with cream cheese or chocolate ganache before frosting.
FAQs
- Can I make these cupcakes ahead of time?
Yes! Bake the cupcakes and store them unfrosted in an airtight container at room temperature for up to 2 days. Frost them on the day you plan to serve. - What if I don’t have buttermilk?
Substitute buttermilk by mixing 1/2 cup milk with 1/2 tablespoon white vinegar or lemon juice. Let it sit for 5 minutes before using. - How do I store leftovers?
Store frosted cupcakes in an airtight container in the refrigerator for up to 5 days. Bring to room temperature before serving. - Can I freeze these cupcakes?
Yes, unfrosted cupcakes freeze well. Wrap each cupcake tightly in plastic wrap, place in a freezer-safe bag, and freeze for up to 3 months. Thaw at room temperature before frosting.
These red velvet cupcakes are a show-stopper for any event or dessert craving. With their rich, moist crumb and tangy cream cheese frosting, they’re guaranteed to impress. Plus, they’re easy to make, meaning you can whip up a batch anytime a special treat is in order. Whether it’s a birthday, holiday, or just a regular day, these cupcakes are always a hit.
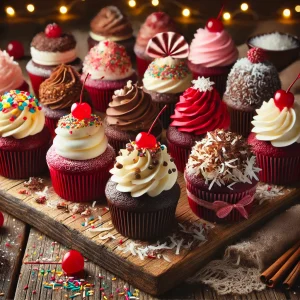
Best Red Velvet Cupcakes
Ingredients
For the Cupcakes:
- 1 1/4 cups 160g all-purpose flour
- 1 tablespoon unsweetened cocoa powder
- 1/2 teaspoon baking soda
- 1/4 teaspoon salt
- 1/2 cup 115g unsalted butter, softened
- 1 cup 200g granulated sugar
- 2 large eggs room temperature
- 1 teaspoon vanilla extract
- 1/2 cup 120ml buttermilk, room temperature
- 1 teaspoon red food coloring gel or liquid
- 1 teaspoon white vinegar
For the Cream Cheese Frosting:
- 8 ounces 225g cream cheese, softened
- 1/2 cup 115g unsalted butter, softened
- 3 1/2 cups 440g powdered sugar
- 1 teaspoon vanilla extract
- Pinch of salt
Instructions
- Step 1: Preheat and Prepare
- Preheat your oven to 350°F (175°C). Line a 12-cup muffin tin with cupcake liners. Set aside.
- Step 2: Mix Dry Ingredients
- In a medium bowl, whisk together the flour, cocoa powder, baking soda, and salt. Set aside.
- Step 3: Cream Butter and Sugar
- In a large mixing bowl, use a hand or stand mixer to beat the butter and sugar together on medium speed until light and fluffy, about 2–3 minutes.
- Step 4: Add Wet Ingredients
- Add the eggs, one at a time, mixing well after each addition. Mix in the vanilla extract and red food coloring. Scrape down the sides of the bowl as needed.
- Step 5: Combine Wet and Dry Ingredients
- With the mixer on low speed, alternate adding the dry ingredients and buttermilk, starting and ending with the dry ingredients. Mix until just combined—do not overmix. Add the white vinegar and mix gently.
- Step 6: Fill the Cupcake Liners
- Divide the batter evenly among the cupcake liners, filling each about 2/3 full.
- Step 7: Bake
- Bake in the preheated oven for 18–20 minutes, or until a toothpick inserted into the center of a cupcake comes out clean. Let the cupcakes cool in the pan for 5 minutes, then transfer to a wire rack to cool completely.
- Step 8: Make the Cream Cheese Frosting
- In a large mixing bowl, beat the cream cheese and butter together on medium speed until smooth, about 2 minutes. Add the powdered sugar, vanilla extract, and a pinch of salt. Mix on low speed until combined, then increase to high speed and beat until creamy.
- Step 9: Frost and Decorate
- Once the cupcakes are completely cool, pipe or spread the cream cheese frosting onto each cupcake. Optionally, garnish with sprinkles, red velvet crumbs, or white chocolate shavings.
Notes
Recipe Notes for Red Velvet Cupcakes
-
Room Temperature Ingredients:
- Using room temperature butter, eggs, and buttermilk ensures a smoother batter and fluffier cupcakes.
-
Don’t Overmix:
- Overmixing the batter can lead to dense cupcakes. Mix until the ingredients are just combined.
-
Measuring Flour:
- For accurate results, spoon the flour into your measuring cup and level it off with a knife. Avoid scooping directly from the bag.
-
Food Coloring:
- Gel food coloring works best for a vibrant red hue without adding extra liquid. Adjust the amount based on your preference.
-
Testing for Doneness:
- Insert a toothpick into the center of a cupcake. If it comes out clean or with a few moist crumbs, the cupcakes are done.
-
Cool Completely:
- Allow the cupcakes to cool completely before frosting. Warm cupcakes will melt the frosting.
-
Storage Tips:
- Store unfrosted cupcakes at room temperature in an airtight container for up to 2 days. Frosted cupcakes can be refrigerated for up to 5 days. Bring them to room temperature before serving.
-
Freezing:
- Freeze unfrosted cupcakes by wrapping them tightly in plastic wrap and placing them in a freezer bag. They’ll stay fresh for up to 3 months. Thaw at room temperature before decorating.
-
Make-Ahead Frosting:
- The cream cheese frosting can be made up to 3 days ahead and stored in the refrigerator. Let it soften slightly and whip before spreading or piping.
-
Custom Decorations:
- Add your own flair with sprinkles, shredded coconut, or edible glitter to match the theme of your event.
