Classic Holiday Sugar Cookies
There’s something magical about rolled sugar cookies. They’re simple, buttery, and perfectly sweet, yet they have the power to turn any ordinary day into a celebration. Whether it’s Christmas, a birthday, a rainy afternoon, or just a craving for a little something sweet, these cookies are a go-to recipe for any home baker.
Sugar cookies are timeless. What I love about them is how versatile they can be—whether you’re decorating them with colorful icing for the holidays, enjoying them plain with a cup of coffee, or even gifting them to loved ones. These cookies are soft and tender with just the right amount of sweetness. Plus, they hold their shape beautifully when cut with cookie cutters, making them ideal for baking with kids or for themed occasions.
Why You’ll Love This Recipe
- Easy to Make: This recipe is straightforward, perfect for beginners and seasoned bakers alike.
- Minimal Ingredients: Only six simple pantry staples come together to create these delightful cookies.
- Perfect for Decorating: The dough holds its shape when baked, so it’s great for intricate cutouts and decorating.
- Soft and Buttery: Creamy butter and sugar create a cookie that melts in your mouth.
- Customizable: Add fun flavors, sprinkle toppings, or frost them with royal icing.
Ingredients for Rolled Sugar Cookies
Here’s what you’ll need:
- 2 sticks (1 cup) softened butter: Butter gives these cookies their rich, buttery flavor and soft texture.
- 2/3 cup sugar: Adds just the right amount of sweetness.
- 1 egg: Provides structure and helps bind the dough together.
- 1 teaspoon vanilla extract: For that classic, comforting flavor. You can use almond extract for a twist!
- 1/2 teaspoon salt: Enhances the flavor and balances the sweetness.
- 2 1/2 cups all-purpose flour: The foundation of the cookies—enough to give structure but not too much to make them dense.
Step-by-Step Instructions
1. Cream the Butter and Sugar
In a stand-alone mixer fitted with a paddle attachment, cream the softened butter and sugar together for 2 minutes. This step is crucial to aerate the butter and achieve a light, fluffy texture.
- Tip: Ensure the butter is softened but not melted. It should be room temperature for the best creaming results.
2. Add Egg, Vanilla, and Salt
Next, add the egg, vanilla extract, and salt to the creamed butter mixture. Mix on medium speed for about 1 minute until everything is well combined.
- Why it matters: Adding the egg helps the dough come together, while the vanilla adds flavor.
3. Add the Flour
Slowly add the all-purpose flour to the mixture. Mix on low speed until a dough forms. Be careful not to overmix here—just mix until no streaks of flour remain.
- Tip: Scrape down the sides of the bowl to ensure all the flour is fully incorporated.
4. Shape and Chill the Dough
Gather the dough and shape it into a flat disc. Wrap it tightly in plastic wrap and place it in the refrigerator to chill for at least 1 hour. Chilling the dough allows the butter to firm up, making the dough easier to roll out and ensuring the cookies hold their shape when baked.
- Shortcut: If you’re short on time, you can pop the dough into the freezer for 20-30 minutes.
5. Roll Out and Cut Shapes
Once the dough is chilled, remove it from the fridge and roll it out on a lightly floured surface to about 1/4-inch thickness. Use cookie cutters to cut the dough into your favorite shapes. Transfer the shapes to a parchment-lined baking sheet.
- Pro Tip: Dip the cookie cutters in flour to prevent sticking.
6. Bake
Preheat your oven to 350°F (175°C). Bake the cookies for 10-11 minutes. You’re looking for the tops to be set and no longer shiny—do not wait for them to turn golden brown! Overbaking will make them too crispy.
- Visual cue: If the edges begin to brown, remove the cookies immediately.
7. Cool and Enjoy
Allow the cookies to cool on the baking sheet for about 5 minutes, then transfer them to a wire rack to cool completely. At this point, they’re ready to enjoy plain or to decorate!
Tips for the Perfect Rolled Sugar Cookies
- Chill the Dough: This step is non-negotiable if you want clean edges and cookies that don’t spread.
- Don’t Overmix: Overworking the dough can make the cookies tough instead of soft and tender.
- Flour Your Rolling Pin: Lightly dust the rolling pin and work surface to prevent sticking.
- Uniform Thickness: Roll the dough evenly to ensure all cookies bake at the same time.
- Don’t Overbake: Watch the cookies carefully—they’re done when the tops lose their shine.
How to Decorate Your Sugar Cookies
Rolled sugar cookies are a blank canvas for creativity! Here are a few fun ways to decorate them:
- Classic Royal Icing: Pipe intricate designs or flood the cookies for a smooth finish.
- Buttercream Frosting: Spread or pipe soft, fluffy frosting for a delicious finish.
- Sprinkles: Add colorful sprinkles before baking for a simple yet festive touch.
- Dusting with Powdered Sugar: Keep it simple with a light dusting of sugar for an elegant look.
- Food Coloring: Add a few drops to your icing or dough for vibrant, seasonal colors.
Why This Recipe is a Keeper
These rolled sugar cookies are a household favorite because they’re reliable, versatile, and downright delicious. With their buttery flavor, soft texture, and endless decorating options, they’re perfect for holidays, celebrations, or any time you’re in the mood to bake something special.
Whether you’re baking with the kids, making treats for a party, or just satisfying a sweet tooth, these cookies are guaranteed to bring smiles to your kitchen. So grab your rolling pin, dust off those cookie cutters, and let’s bake some memories together!

Why I Love These Cookies
These cookies are packed with nostalgia and holiday charm. Here’s why they’re so special:
- Simple yet Flavorful: The buttery flavor and hint of vanilla create the perfect balance of sweetness and richness.
- Fun to Decorate: Whether you’re using sprinkles, icing, or edible glitter, these cookies are a blank canvas for creativity.
- Great for Sharing: Perfect for holiday cookie swaps or as a thoughtful homemade gift.
- Easy to Make: The recipe is beginner-friendly, yet the cookies look and taste amazing.
Holiday baking is all about making memories, and these cookies are great for family baking sessions or quiet afternoons of holiday creativity.

Tips for the Perfect Holiday Sugar Cookies
Follow these tips for perfectly shaped, delicious sugar cookies:
- Use Softened Butter: Softened butter blends easily, creating a light dough that rolls smoothly and bakes evenly.
- Chill the Dough: Chilling helps the cookies hold their shape during baking and makes the dough easier to handle.
- Let Cookies Cool Completely: Before decorating, ensure the cookies are fully cooled to keep the icing from melting.
- Store Properly: After decorating, store in an airtight container to maintain freshness and keep designs intact.
These tips make baking (and decorating) holiday sugar cookies a breeze, ensuring each batch is as beautiful as it is delicious!
Variations
Looking to add a twist to the classic recipe? Try these variations:
- Spiced Cookies: Add a teaspoon of cinnamon or a pinch of nutmeg for a cozy flavor.
- Lemon or Almond Twist: Add a bit of lemon zest or almond extract for a unique flavor profile.
- Textured Sugar: Roll cookies in sanding sugar before baking for a beautiful sparkle.
- Dipped and Decorated: Dip baked cookies in melted chocolate and sprinkle with candy canes or nuts.
These little tweaks can make your sugar cookies stand out, adding a personal touch to the classic recipe.
How to Store & Give as Gifts

Holiday sugar cookies make wonderful gifts. Here’s how to store and package them:
- Storage: Keep in an airtight container at room temperature for up to a week. Freeze undecorated cookies for up to three months if preparing in advance.
- Gifting Ideas:
- Arrange cookies in a festive tin or box lined with parchment paper and decorate with holiday tissue or bows.
- Wrap individual cookies in cellophane bags with ribbon for a personal touch.
- Add a handwritten recipe card for a thoughtful addition, allowing friends and family to recreate the cookies at home.
Whether you’re giving them as gifts or enjoying them yourself, these cookies bring a touch of holiday warmth and joy to anyone who receives them. Perfect for cookie swaps, family gatherings, or as a sweet gesture for loved ones.
FAQs
1. Can I make the dough ahead of time?
Absolutely! You can make the dough up to 2 days in advance and keep it wrapped in plastic in the fridge. It also freezes well for up to 2 months.
2. Why are my cookies spreading?
Make sure the dough is chilled, and check your oven temperature. Too much warmth will cause the cookies to spread.
3. Can I use salted butter instead of unsalted butter?
Yes, but reduce or omit the added salt in the recipe.
4. How do I store sugar cookies?
Store them in an airtight container at room temperature for up to 5 days. For longer storage, freeze them for up to 3 months.
Baking Tip: Prevent Your Cookies from Spreading
Ever had your cookies flatten out on the baking sheet? Don’t worry, we’ve got you covered! Check out our latest blog post with simple tricks to keep your cookies in perfect shape, every time.
Read the Full Post
Perfect Rolled Sugar Cookies
Ingredients
- 1 cup unsalted butter, softened
- ⅔ cup granulated sugar
- 1 large egg
- 1 tsp vanilla extract
- 2 ½ cups all-purpose flour
- ½ tsp salt
Instructions
- In a stand-alone mixer with a paddle attachment, cream the softened butter and sugar together for 2 minutes until light and fluffy.
- Add the egg, vanilla, and salt. Mix for 1 minute until everything is well incorporated.
- Gradually add the all-purpose flour to the mixture. Mix until the dough comes together and no streaks of flour remain.
- Shape the dough into a disc, wrap it in plastic wrap, and chill in the refrigerator for at least 1 hour. This makes rolling out the dough easier.
- Preheat the oven to 350°F (175°C). Roll out the chilled dough on a lightly floured surface to about 1/4 inch thickness. Use your favorite cookie cutters to cut out shapes.
- Place the cookies on a parchment-lined baking sheet. Bake for 10-11 minutes, or until the tops are no longer shiny. Do not let them brown – they should be pale for the softest texture.
- Let the cookies cool on the baking sheet for 5 minutes before transferring to a wire rack to cool completely. Once cooled, decorate with icing, sprinkles, or enjoy them as they are!
Notes
Notes & Tips
- Don’t Overbake: The key to soft sugar cookies is removing them from the oven before the edges turn brown. The cookies will continue to firm up as they cool.
- Chilling is Essential: Chilling the dough ensures clean cuts with your cookie cutters and prevents the dough from spreading while baking.
- Decorating Ideas: Use royal icing, colored sprinkles, or edible glitter for festive flair.
Enjoy baking! Let me know how your cookies turn out in the comments, and don’t forget to share a picture. Happy baking, friends! 🍪✨

Hazelnut Cocoa Coins
These Hazelnut Cocoa Coins are tiny bites of chocolate heaven, perfect for when you need a touch of sweetness. Made with finely ground hazelnuts and rich cocoa powder, these buttery coins have a deep, nutty flavor with a hint of cocoa. They’re ideal as an afternoon snack, a holiday gift, or a little something special in a cookie box. If you’re a fan of chocolate and nuts, these cookies are calling your name!
Why I Love These Cookies
There’s something so special about the combination of hazelnuts and chocolate—it’s rich, satisfying, and always feels a little luxurious. These Hazelnut Cocoa Coins are easy to make and freeze beautifully, so you can keep a stash ready for any cookie emergency. Plus, they’re small and delicate, making them perfect to serve alongside coffee or tea. It’s like having a café experience right at home!
Troubleshooting
- Dough Too Crumbly? If your dough feels dry or crumbly, you can add 1-2 teaspoons of milk to help bind it. This often happens if the flour is packed too tightly during measuring.
- Difficulty Slicing Clean Coins? Make sure your dough logs are well-chilled. A sharp knife will help keep each slice neat and round.
- Overbaked Cookies? These cookies can go from perfect to overdone quickly. Look for slight firmness at the edges to know when they’re done; they will continue to set as they cool.
Ways to Make It Special for the Holidays
- Add Festive Dusting: Lightly dust each cookie with edible gold or silver dust for a sparkling effect.
- Drizzle with Chocolate: Melt some dark chocolate and drizzle over the coins for added richness and a beautiful, finished look.
- Infuse with Spices: Add a pinch of cinnamon or nutmeg to the dough for a warm, holiday twist.
Tips to Make the Best Hazelnut Cocoa Coins
- Toast the Hazelnuts: Toasting the hazelnuts adds a deeper flavor to the cookies. Don’t skip this step!
- Use High-Quality Cocoa Powder: A rich, unsweetened cocoa powder makes a big difference in flavor. Go for Dutch-processed if you want an even richer taste.
- Chill the Dough Thoroughly: Chilling helps the cookies hold their shape and makes slicing easier.
- Dust with Precision: If dusting with powdered sugar or cocoa, do it right before serving to keep the cookies looking fresh and festive.
Variations
- Chocolate Hazelnut Sandwich Cookies: Turn these cookies into sandwich cookies with a thin layer of hazelnut spread in the middle.
- Hazelnut Mocha Coins: Add 1 tablespoon of instant espresso powder to the dough to create hazelnut mocha coins with a coffee kick.
- Add a Nutty Center: Press a whole hazelnut or almond into the center of each coin before baking for an elegant look and added crunch.
- Dairy-Free Option: If you use dairy-free butter, this recipe can be dairy-free.
- Refined Sugar-Free Option: You could use coconut sugar or another unrefined sugar alternative to make this refined sugar-free.
How to Give as Gifts
These Hazelnut Cocoa Coins make excellent gifts. Here’s how to make them even more special:
- Packaging: Place cookies in a decorative tin or small gift box lined with parchment paper. Stack the coins in rows or create little sections with mini cupcake liners for a tidy look.
- Personal Touch: Attach a handwritten note or recipe card with instructions on how to enjoy them.
- Holiday Ribbon: Wrap the tin or box with a festive ribbon and tuck a small sprig of rosemary or a cinnamon stick under the bow for a cozy holiday touch.
FAQs
Can I make these cookies in advance?
Yes, you can! These cookies freeze wonderfully. Freeze the dough logs wrapped in plastic wrap and slice and bake when ready, or bake the cookies and freeze them in an airtight container.
Can I use a different nut?
Absolutely! Almonds work well in this recipe, giving the cookies a slightly different flavor. You can also use pecans for a richer, sweeter taste.
How long will these cookies keep?
These cookies will keep at room temperature in an airtight container for up to 1 week. If you want to store them longer, keep them in the freezer for up to 2 months.
Do I need to add powdered sugar on top?
No, it’s optional! Dusting the cookies is mainly for presentation. If you prefer a less sweet cookie, you can skip this step.

Hazelnut Cocoa Coins
Ingredients
- 1 cup unsalted butter, softened
- ½ cup powdered sugar, sifted
- 1 ½ cups all-purpose flour
- ½ cup cocoa powder, unsweetened and sifted
- 1 cup hazelnuts, toasted and finely ground
- ½ tsp salt
- 1 tsp vanilla extract
- Powdered sugar or cocoa powder for dusting (optional)
Instructions
- Prepare HazelnutsPreheat your oven to 350°F (175°C). Spread the hazelnuts on a baking sheet and toast for 5-7 minutes, stirring occasionally. Remove from oven, allow them to cool, and finely grind in a food processor until they resemble coarse flour. Set aside.
- Make the DoughIn a mixing bowl, beat the softened butter and powdered sugar together until light and fluffy. Add vanilla extract and mix until combined. In a separate bowl, sift together flour, cocoa powder, and salt. Gradually add the flour mixture and ground hazelnuts to the butter mixture, mixing on low speed until just combined. The dough will be soft.
- Shape and ChillDivide the dough into two portions. Shape each portion into a log about 1.5 inches in diameter. Wrap in plastic wrap and refrigerate for at least 1 hour, or until firm.
- Slice and BakePreheat oven to 350°F (175°C). Line a baking sheet with parchment paper. Remove the dough from the fridge and slice into ¼-inch thick coins. Arrange them on the prepared baking sheet about 1 inch apart. Bake for 8-10 minutes or until the edges just begin to firm. Let cool on the baking sheet for 5 minutes before transferring to a wire rack to cool completely.
- Dust and ServeFor an extra touch, dust the tops of the cookies with powdered sugar or cocoa powder before serving. Enjoy!
Notes
Tips to Make the Best Hazelnut Cocoa Coins
- Toast the Hazelnuts: Toasting the hazelnuts adds a deeper flavor to the cookies. Don’t skip this step!
- Use High-Quality Cocoa Powder: A rich, unsweetened cocoa powder makes a big difference in flavor. Go for Dutch-processed if you want an even richer taste.
- Chill the Dough Thoroughly: Chilling helps the cookies hold their shape and makes slicing easier.
- Dust with Precision: If dusting with powdered sugar or cocoa, do it right before serving to keep the cookies looking fresh and festive.
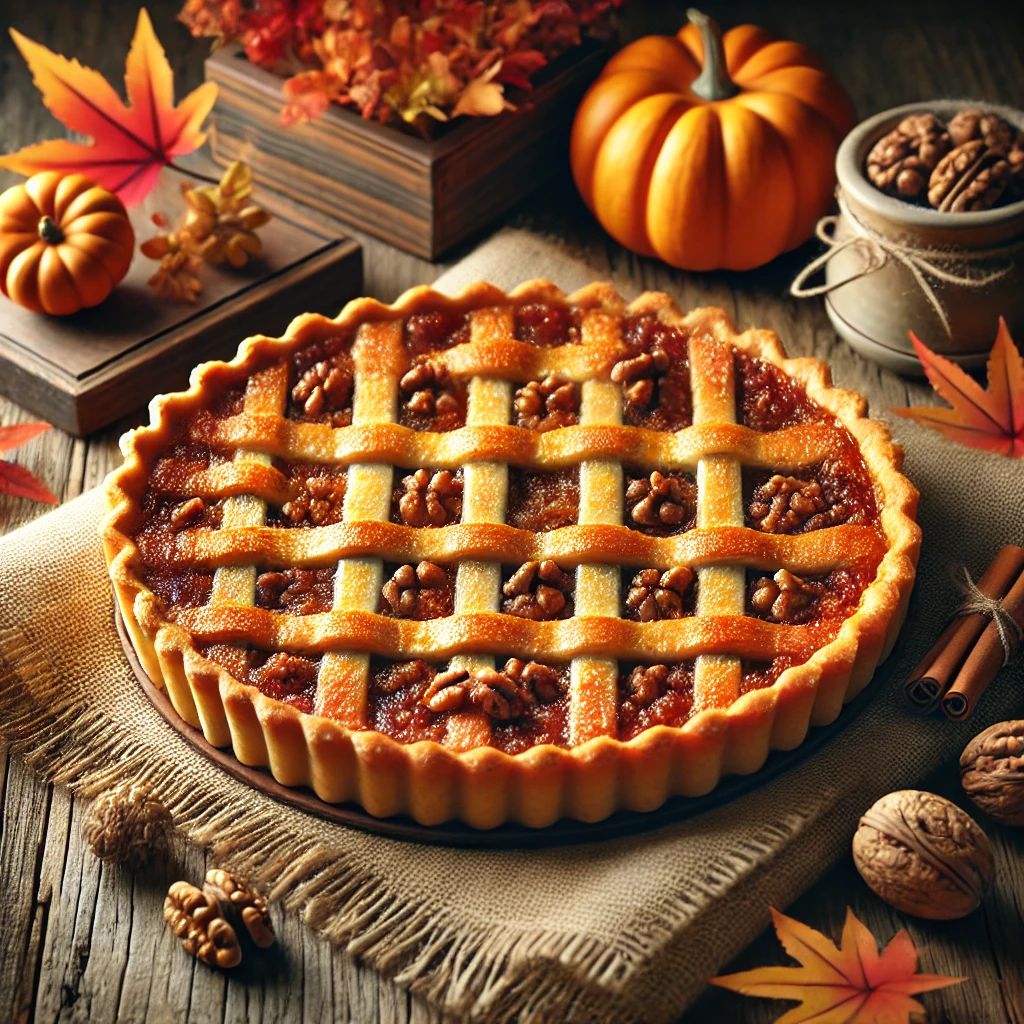
Maple Walnut Tart
Indulge in the rich, nutty flavors of this Maple Walnut Tart, a perfect autumn dessert that combines maple syrup and toasted walnuts for a cozy holiday treat. If you’re looking for a cozy dessert with warm, nutty flavors, this Maple Walnut Tart is exactly what you need. It’s an ideal recipe for fall gatherings, bringing a rich maple flavor balanced by the crunch of toasted walnuts, all nestled in a buttery crust. A hit at Thanksgiving tables, this tart is simple to make yet irresistibly delicious.
Ways to Make it Special for the Holidays
- Decorative Crust: Create a lattice or leaf pattern along the edges or top of the tart for a festive look. Use a small cookie cutter or knife to cut holiday shapes, like leaves or stars, to place along the crust’s edges.
- Maple-Glazed Walnuts: Toast a few whole walnut halves with a bit of maple syrup and salt, then place them decoratively on top after baking for extra crunch and visual appeal.
- Garnishes: Dust with powdered sugar for a snowy look or add a dollop of spiced whipped cream (with a hint of cinnamon or nutmeg) on each slice.
- Holiday Flavors: Try incorporating a touch of orange zest or a pinch of nutmeg and cloves into the filling for additional warmth and spice, perfect for winter celebrations.
Troubleshooting
- Crust Shrinking: Ensure the crust dough is cold and well-rested before baking. You can also partially freeze it in the pan before pre-baking to help it hold shape.
- Runny Filling: If the filling doesn’t set, it may need a few extra minutes in the oven. Alternatively, slightly lower the temperature and bake a bit longer to ensure a fully set but tender filling.
- Overly Sweet: Maple syrup is naturally sweet, so using unsweetened whipped cream as a garnish can help balance the flavors. Adjust the sugar amount if you prefer it less sweet.
Tips
- Cold Ingredients for Crust: Use cold butter and water for a flakier crust. Keeping the dough cool helps create pockets of steam for a tender, flaky texture.
- Pre-Baking the Crust: This step prevents a soggy crust. If you don’t have pie weights, dried beans work well as an alternative.
- Cooling Before Serving: Let the tart cool completely so it slices neatly and the filling sets well. It’s also delicious served slightly chilled.
Variations
- Pecan Swap: Replace walnuts with pecans for a classic Southern-inspired twist.
- Chocolate-Drizzled Maple Tart: Melt a few ounces of dark chocolate and drizzle over the tart after cooling for a luxurious touch.
- Nut-Free Option: For those with nut allergies, omit walnuts and replace with a mixture of oats and pumpkin seeds for a similar texture.
Frequently Asked Questions
Can I make the Maple Walnut Tart ahead of time?
Yes! This tart can be made a day in advance. Prepare the tart and let it cool completely before covering it tightly with plastic wrap or foil. Store it at room temperature if you plan to serve it within 24 hours. For longer storage, refrigerate it, but be sure to let it come to room temperature before serving to enjoy the best flavor and texture.
How should I store leftover Maple Walnut Tart?
Leftover tart can be stored in an airtight container at room temperature for up to 2 days. If you’d like to keep it longer, refrigerate it for up to 4 days. To retain the best texture, rewarm slices slightly in the oven or microwave before serving.
Can I use a different type of nut if I don’t have walnuts?
Absolutely! Pecans are a fantastic substitute and give a similar texture and flavor. Hazelnuts or almonds also work, although they will change the flavor profile a bit. Feel free to use a mix of nuts if you like!
How do I keep the crust from becoming soggy?
To prevent a soggy crust, you can blind-bake the crust slightly before adding the filling. Bake it for about 10 minutes at 350°F with pie weights or dried beans on parchment paper to set the crust before adding the walnut filling.
Can I make this tart gluten-free?
Yes, simply substitute a gluten-free flour blend for the all-purpose flour in the crust. Make sure your gluten-free blend is designed for baking to get the best texture in the crust.
Is there a way to make this tart dairy-free?
Yes, you can make this tart dairy-free by using a dairy-free butter substitute for the crust and any other dairy ingredients. Also, make sure to use a dairy-free alternative for any whipped topping or ice cream served with the tart.
How can I enhance the maple flavor in the tart?
If you’d like a stronger maple flavor, you can add a little maple extract (about ½ teaspoon) to the filling. This will amplify the maple essence without overpowering the other flavors.
What’s the best way to serve this tart?
This Maple Walnut Tart is delicious on its own, but you can take it to the next level with a scoop of vanilla ice cream or a dollop of whipped cream. For a holiday touch, try topping it with some cinnamon-spiced whipped cream or a sprinkle of cinnamon and powdered sugar.
Can I freeze the Maple Walnut Tart?
Freezing the baked tart is not recommended as it may affect the texture of the filling and crust. However, you can freeze the crust separately after shaping it in the tart pan. Wrap it tightly in plastic wrap and freeze for up to 2 months. When ready, bake it straight from the freezer and add the filling.
Why is my tart filling too runny?
If your tart filling seems runny, it may need more baking time. Make sure the tart is baked until the filling is set, with a slight jiggle in the center. It will firm up more as it cools. Using high-quality maple syrup (not pancake syrup) is also crucial, as pure maple syrup will yield the right consistency.

Maple Walnut Tart
Ingredients
For the Crust
- 1 ¼ cup all-purpose flour
- ½ cup cold unsalted butter, cut into small cubes
- 2 tbsp granulated sugar
- ¼ tsp salt
- 2-3 tbsp ice water
For the Filling
- 1 cup pure maple syrup
- ½ cup heavy cream
- 3 large eggs
- ¼ cup brown sugar, packed
- 1 tsp vanilla extract
- ¼ tsp salt
- 1 ½ cups walnut halves, toasted
Instructions
- Make the Crust:In a large bowl, mix flour, sugar, and salt. Add cold butter and cut in using a pastry cutter until the mixture resembles coarse crumbs.Gradually add ice water, 1 tablespoon at a time, until the dough just starts to come together.Shape dough into a disk, wrap in plastic wrap, and chill for 30 minutes.
- Preheat and Prepare Tart Shell:Preheat oven to 350°F (175°C). Roll out the dough on a lightly floured surface to fit a 9-inch tart pan.Press the dough into the pan, trimming any excess. Chill in the fridge for 10 minutes, then prick the base with a fork.
- Blind Bake the Crust:Line the crust with parchment paper and fill with pie weights or dried beans. Bake for 15 minutes. Remove weights and bake for an additional 5 minutes. Set aside to cool.
- Prepare the Filling:In a large bowl, whisk together maple syrup, cream, eggs, brown sugar, vanilla, and salt until smooth.Add toasted walnuts, gently folding to coat.
- Bake the Tart:Pour the filling into the prepared crust. Bake at 350°F (175°C) for 40-45 minutes or until the center is set but slightly jiggly.Let cool to room temperature before slicing.
Notes
Tips and Notes
- Tips for a Flaky Crust: Make sure your butter is cold, and don’t overwork the dough.
- Storage: Store in the refrigerator for up to 4 days, or freeze for up to 2 months.
- Serving Suggestions: Top with whipped cream or a scoop of vanilla ice cream for added indulgence.

Classic Pumpkin Pie
Savor the taste of fall with this classic pumpkin pie recipe, filled with creamy, spiced pumpkin filling and a flaky, homemade crust. There’s something magical about a slice of homemade pumpkin pie. With a creamy, spiced filling and flaky crust, this pie captures the essence of fall in every bite. Perfect for Thanksgiving or any autumn gathering, this classic pumpkin pie recipe is a comforting treat that fills your home with the rich aromas of cinnamon, nutmeg, and cloves.
Pumpkin pie is one of those desserts that makes you feel at home. As the pie bakes, the whole kitchen fills with the nostalgic scents of the holidays, setting the stage for cozy family gatherings. It’s a dessert that invites everyone to the table, eagerly awaiting that first slice with a dollop of whipped cream on top.
When you cut into this pie, you’ll find the filling to be perfectly creamy, with just the right balance of spices to bring out the natural sweetness of the pumpkin. It’s a straightforward recipe that doesn’t require a lot of fuss, yet it delivers a beautiful, show-stopping dessert that everyone will love.
Whether it’s your first time baking a pumpkin pie or your hundredth, this recipe is sure to become a family favorite. Serve it with a side of coffee or hot cider, and let the compliments roll in. There’s truly no better way to celebrate the cozy season than with a slice of this classic pie.
FAQs
- Can I make this pie in advance? Yes! Pumpkin pie can be made 1–2 days ahead and stored in the refrigerator.
- What if I don’t have all the spices? You can use pumpkin pie spice instead, which combines most of these spices.
- How can I tell when the pie is done? The center should be set but slightly wobbly; it will firm up as it cools.
Troubleshooting
- Crust is Too Hard or Tough:
- This usually happens when the dough is overworked or if there’s too much water. When adding water to the dough, do so gradually until it just comes together—avoid kneading the dough too much.
- Soggy Bottom Crust:
- To avoid a soggy bottom, pre-bake (blind bake) the crust slightly before adding the filling. Line the crust with parchment paper, add pie weights or dried beans, and bake at 375°F for 10–12 minutes before adding the filling.
- Cracks in the Filling:
- Cracks can happen if the pie is overbaked. To prevent this, bake until the center is just slightly wobbly. The filling will continue to set as it cools.
- Watery Filling:
- Make sure to use solid pumpkin puree (not pumpkin pie mix) and avoid overmixing, which can introduce excess air, leading to a watery texture.
Variations
- Maple Pumpkin Pie:
- Swap out half the brown sugar for pure maple syrup for a deeper, richer flavor. This adds a touch of natural sweetness that pairs beautifully with the pumpkin and spices.
- Spiced Pumpkin Pie:
- For an extra spiced pie, increase the cinnamon and add a pinch of allspice and cardamom. This will give the pie a more robust flavor that’s perfect for those who love spices.
- Gingerbread Pumpkin Pie:
- Add 1–2 tablespoons of molasses to the filling along with a pinch more ginger and cinnamon. The molasses brings a rich, deep flavor that combines beautifully with the pumpkin and gives it a “gingerbread” essence.
- Whiskey or Bourbon Pumpkin Pie:
- Add 1–2 tablespoons of bourbon or whiskey to the filling mixture. The alcohol will cook off, leaving a subtle, warm flavor that’s a hit for adult gatherings.

Ways to Make It Special for the Holiday
- Top with Spiced Whipped Cream:
- Add a touch of cinnamon or nutmeg to your whipped cream for an extra holiday touch. You can even add a hint of vanilla or a small amount of maple syrup for added sweetness and flavor.
- Decorative Crust:
- Use pie crust cutters or cookie cutters to create pumpkin or leaf shapes from extra pie dough, and arrange them along the edge of the pie or in a pattern on top. Brush with egg wash and bake until golden for a beautiful presentation.
- Serve with Warm Caramel Sauce:
- Drizzle each slice with warm caramel sauce or sprinkle with toffee bits for a sweet surprise. This adds a luxurious touch and pairs well with the spices in the pie.
- Add Pecans or Walnuts for Crunch:
- Sprinkle some chopped pecans or walnuts on top of the filling before baking. This adds a delightful crunch and gives the pie a festive holiday twist that makes it even more irresistible.
- Make Mini Pumpkin Pies:
- Create individual servings by baking the filling in mini pie crusts. Perfect for holiday gatherings, these are great for serving a crowd while adding a special, personal touch.
These small changes and enhancements can make your classic pumpkin pie stand out at the Thanksgiving table and bring extra warmth and joy to any holiday celebration!

Classic Pumpkin Pie
Ingredients
Pie Crust
- 1 ½ cups all-purpose flour
- ½ tsp salt
- 1 tbsp sugar
- ½ cup cold unsalted butter, cubed
- 4-6 tbsp ice water
Pumpkin Filling
- 1 (15 oz) pumpkin puree
- ¾ cup brown sugar
- ½ cup heavy cream
- ½ cup milk
- 2 large eggs
- 1 tsp cinnamon
- ½ tsp ground ginger
- ¼ tsp ground nutmeg
- ¼ tsp ground cloves
- ¼ tsp salt
Instructions
- Prepare the Crust:In a large mixing bowl, whisk together the flour, salt, and sugar.Cut in the cold butter until the mixture resembles coarse crumbs.Gradually add ice water, 1 tablespoon at a time, until the dough comes together.Roll into a ball, wrap in plastic wrap, and refrigerate for 30 minutes.
- Preheat and Roll Out:Preheat the oven to 375°F (190°C).Roll out the chilled dough on a lightly floured surface to fit a 9-inch pie plate.Place the dough into the pie plate, trimming and crimping the edges.
- Prepare the Filling:In a large mixing bowl, whisk together pumpkin puree, brown sugar, heavy cream, milk, eggs, cinnamon, ginger, nutmeg, cloves, and salt until smooth.
- Bake:Pour the filling into the prepared crust.Bake for 50–60 minutes, or until the filling is set and a knife inserted into the center comes out clean.Allow to cool completely before slicing and serving.
Notes
Tips and Notes
- Tips for a Flaky Crust: Make sure your butter is cold, and don’t overwork the dough.
- Storage: Store in the refrigerator for up to 4 days, or freeze for up to 2 months.
- Serving Suggestions: Top with whipped cream or a scoop of vanilla ice cream for added indulgence.

Homemade Buckeyes
Get ready to indulge in classic homemade buckeyes with this easy, no-bake Homemade Buckeye recipe! With a rich combination of creamy peanut butter and a smooth chocolate coating, these Buckeyes are perfect for a quick dessert or a delightful homemade gift. Made in under an hour, these bite-sized delights will add a touch of sweetness to any occasion!
Who doesn’t love the combo of peanut butter and chocolate? Buckeyes are like little bites of heaven, especially for those of us who adore a creamy peanut butter center with a shell of smooth chocolate. They’re easy to make and even easier to enjoy, making them an absolute win for any dessert lover.
What’s great about Buckeyes is their versatility—they’re perfect for just about any occasion. Whether you’re serving them at a family gathering, packing them up as holiday gifts, or sneaking one (or two!) for yourself, these little treats never disappoint. Plus, their acorn-like appearance adds a fun, homemade charm that’s instantly recognizable.
Best of all, Buckeyes are an ideal dessert for those who want something sweet without spending hours in the kitchen. No baking, minimal ingredients, and that classic flavor everyone loves. Whether you’re new to Buckeyes or they’ve been a family favorite for years, this recipe is one you’ll want to keep around!
Troubleshooting
Peanut Butter Dough Too Soft? If the peanut butter mixture is too sticky to roll, add more powdered sugar until it reaches the right consistency. Chilling it briefly before shaping can also help.
Chocolate Coating Too Thick? Add a bit of shortening to the melted chocolate to make it smoother and easier to coat the Buckeyes.
Why I Love This Recipe
Buckeyes are the ultimate no-bake treat that combines the perfect pairing of peanut butter and chocolate. This recipe is simple, doesn’t require baking, and creates bite-sized treats that are perfect for holiday parties, gift-giving, or just a sweet indulgence for yourself. Plus, they look like little acorns or buckeyes from the Ohio Buckeye tree, giving them their unique name and signature look!

Variations
- Crunchy Peanut Butter: For added texture, use crunchy peanut butter instead of creamy.
- Dark Chocolate Coating: Swap the semi-sweet chocolate chips with dark chocolate for a richer flavor.
- Sea Salt Sprinkle: Add a sprinkle of sea salt on top of the chocolate coating before it sets to enhance the flavor.
Additional Notes
Labels: This recipe is Gluten-Free (verify ingredients) and Nut-Free (if substituting peanut butter with sunflower butter). However, it is not suitable for Vegan or Keto diets due to the sugar content.
Tips to Make Them Perfect
- Use Smooth Peanut Butter: Avoid natural peanut butter as it tends to separate, making the mixture difficult to work with.
- Freeze for a Firmer Dip: If you’re in a hurry, freeze the peanut butter balls for 10-15 minutes to make dipping easier.
- Toothpick Technique: Insert the toothpick at a slight angle to ensure a smooth dip and that signature “buckeye” look.
How to Store Buckeyes
Buckeyes can be stored in an airtight container in the refrigerator for up to 2 weeks. If you’re planning to keep them longer, you can freeze them for up to 3 months. Just place them in a single layer on a baking sheet until frozen, then transfer them to a freezer-safe bag. Let them thaw in the fridge before serving.
FAQs
1. Can I make Buckeyes without powdered sugar?
Powdered sugar helps to bind the peanut butter mixture and provides the sweetness. It’s essential for achieving the right texture and consistency.
2. Can I use milk chocolate instead of semi-sweet?
Yes! Milk chocolate will make them sweeter, so choose the chocolate based on your preference. Dark chocolate also works if you prefer a less sweet coating.
3. How do I get the smoothest chocolate coating?
Adding a tablespoon of shortening to the chocolate helps it melt smoother and makes for an easier coating. Make sure not to overheat the chocolate, which can cause it to seize.
4. Can I make these ahead of time?
Absolutely! Buckeyes are great for make-ahead treats. They store wonderfully in the fridge or freezer.
How to Give Buckeyes as Holiday Gifts

Buckeye chocolate peanut butter balls make an amazing homemade gift, especially during the holidays! Here’s how to make your Buckeye treats look extra festive and thoughtful as holiday gifts:
- Festive Packaging: Start with a sturdy box or tin, ideally one with a holiday theme like snowflakes, plaids, or metallic accents. If you’re using a plain box, consider decorating it with stickers, ribbons, or twine to give it that cozy, handcrafted feel.
- Add Layers and Cushion: Line the box with parchment or festive tissue paper to keep the Buckeyes cushioned. You can add small paper liners for each Buckeye (like mini cupcake liners) to make each one stand out. This also helps keep them from sticking together.
- Finishing Touches: Top the box with a festive ribbon or twine and add a small gift tag. Write a personal note or include a holiday greeting on the tag, letting the recipient know these treats are homemade with love.
- Storage Tips for Recipients: Include a little note inside the box or on the tag with tips on storage, such as keeping the Buckeyes refrigerated for longer freshness.
This thoughtful and personalized packaging will make your Buckeyes feel extra special and truly show that they were made from the heart! 🎁

Homemade Buckeyes
Ingredients
- 1 ½ cups creamy peanut butter (smooth, not natural)
- ½ cup unsalted butter, softened
- 1 tsp vanilla extract
- 3-4 cups powdered sugar (start with 3 and add more if needed for consistency)
- 2 cups semi-sweet chocolate chips or chocolate candy coating
- 1 tbsp shortening (optional, for smoother chocolate coating)
Instructions
- In a large bowl, mix the peanut butter, softened butter, and vanilla extract until creamy. Gradually add powdered sugar, starting with 3 cups and adding more as needed, until a stiff dough forms. The mixture should be thick enough to hold its shape when rolled.
- Scoop about a tablespoon of the peanut butter mixture and roll it into a ball. Place each ball onto a parchment-lined baking sheet. Repeat until all the peanut butter mixture is used.
- Refrigerate the peanut butter balls for at least 1 hour to firm up. This step is essential for keeping the Buckeyes intact during dipping
- In a microwave-safe bowl, melt the chocolate chips and shortening (if using) in 30-second intervals, stirring between each, until smooth.
- Using a toothpick, dip each peanut butter ball into the melted chocolate, leaving a small circle of peanut butter exposed on top (this gives it the classic “Buckeye” look). Allow any excess chocolate to drip off, then place the Buckeye back onto the parchment-lined baking sheet.
- Refrigerate the dipped Buckeyes for another 30 minutes or until the chocolate is fully set.
- These Buckeyes are best served chilled and can be stored in an airtight container in the fridge for up to 2 weeks.
Notes
Tips to Make Them Perfect
- Use Smooth Peanut Butter: Avoid natural peanut butter as it tends to separate, making the mixture difficult to work with.
- Freeze for a Firmer Dip: If you’re in a hurry, freeze the peanut butter balls for 10-15 minutes to make dipping easier.
- Toothpick Technique: Insert the toothpick at a slight angle to ensure a smooth dip and that signature “buckeye” look.
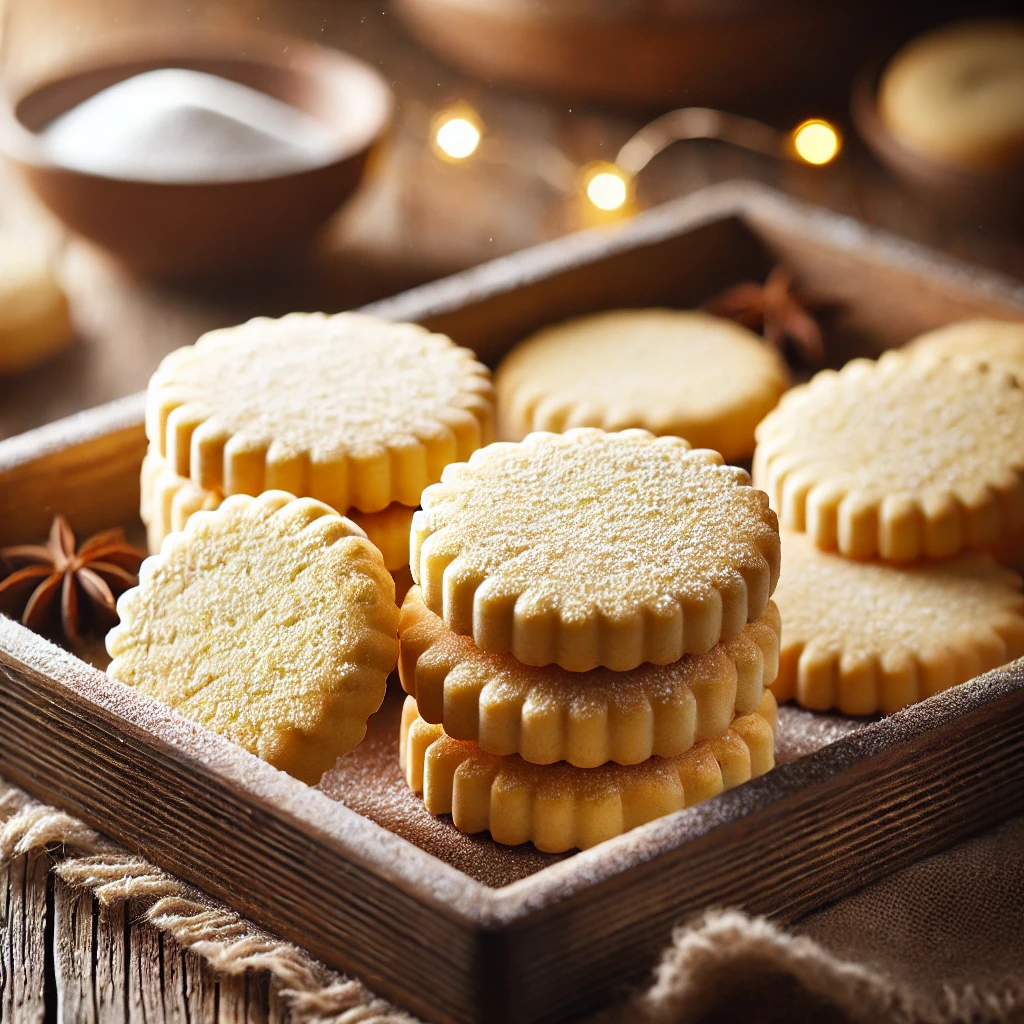
Classic Buttery Shortbread Cookies
These buttery shortbread cookies are pure, melt-in-your-mouth perfection, crafted from the simplest ingredients: butter, powdered sugar, and flour. There’s something about the creamy richness of butter blending with a hint of sweetness that makes these cookies irresistible. The result? A crisp, tender crumb that pairs effortlessly with your morning coffee or a warm cup of tea. This recipe is proof that sometimes, the simplest recipes are the best!
Baking these cookies fills the kitchen with a rich, buttery aroma that’s just so comforting. Plus, the straightforward method means you’ll have a batch ready in under an hour—perfect for last-minute treats or satisfying those afternoon cravings. And if you’re planning to share these with friends, family, or coworkers, don’t be surprised if you’re asked for the recipe. After all, who can say no to homemade shortbread that’s just this good?
Speaking of sharing, these cookies make wonderful gifts! Pack them up in a beautiful tin or cellophane bag with a little ribbon, and they instantly become a thoughtful, homemade present. Whether it’s for the holidays, a birthday, or just because, giving these shortbread cookies as a gift shows you put in that extra effort to bring a smile. And let’s be honest, sharing homemade cookies never goes out of style!
Why I Love These Shortbread Cookies
These cookies are as classic as it gets! They’re buttery, crumbly, and just melt in your mouth. Plus, they only require three simple ingredients, making them easy and affordable. Whether it’s tea time or holiday season, these shortbread cookies are the perfect cozy treat.
Troubleshooting
- Dough Too Crumbly? Add a teaspoon of milk or water if the dough isn’t holding together.
- Cookies Spread in the Oven? Make sure the dough is well-chilled before baking, which helps them keep their shape.
- Cookies Too Hard? Avoid over-baking! They should be just lightly golden around the edges.
Variations
- Lemon Zest: Add 1 tsp of lemon zest to the dough for a citrusy twist.
- Chocolate Dipped: Dip the cooled cookies halfway into melted chocolate and let them set for an elegant touch.
- Herbs or Spices: Add a pinch of cinnamon or rosemary for a hint of flavor.
- Vanilla: Add 1 tsp of vanilla extract for a subtle sweetness.
Tips to Make the Best Shortbread Cookies
- Use Quality Butter: Since butter is the star ingredient, opt for a high-quality one for the best flavor.
- Chill the Dough: Chilling is essential for maintaining the shape of your cookies and creating that perfect texture.
- Dust with Powdered Sugar: For a festive look, sprinkle a light dusting of powdered sugar over the cookies once they’ve cooled.
How to Store Them
Store these cookies in an airtight container at room temperature for up to 1 week. If you want to keep them longer, freeze the dough before baking, or freeze the baked cookies for up to 2 months. Just let them thaw at room temperature before enjoying.
Frequently Asked Questions
Can I use salted butter instead of unsalted?
Yes, but be sure to omit any added salt in the recipe. The cookies may have a slightly saltier flavor, but they’ll still be delicious!
Why is powdered sugar used instead of granulated sugar?
Powdered sugar gives shortbread a melt-in-your-mouth texture, as it dissolves better than granulated sugar. This also results in a softer cookie crumb.
How do I make these cookies more festive?
You can dip them in chocolate, sprinkle with sanding sugar, or use cookie cutters for fun shapes!
How to Give Shortbread Cookies as Gifts
Shortbread cookies make a thoughtful and delicious homemade gift. Here are some simple, elegant ideas to package them up for friends, family, or colleagues:

- Wrap in Parchment Paper and Twine
Stack 6-8 cookies in a neat pile and wrap them with parchment paper, twisting the ends like a candy wrapper. Finish with a piece of twine or ribbon for a rustic, farmhouse look. This style works beautifully for gifting single servings. - Cookie Tins or Mason Jars
Place your cookies in a decorative cookie tin or large mason jar, layering with parchment paper to prevent them from sticking. Add a personalized label with a cute note, like “Baked with Love by [Your Name]” or “Holiday Cheer in Every Bite.” - Clear Cellophane Bags
Stack a few cookies and wrap them in clear cellophane bags, tying with festive ribbon. Add a little tag with a message, such as “A Little Sweetness Just for You” or “Homemade Shortbread for the Holidays!” - Include Recipe Cards
For a personal touch, include a small card with the recipe and tips for making the cookies. This way, your loved ones can try making the cookies themselves! - Boxes with Compartments
Use a small compartmented box and place a different variation in each section. This adds a “gourmet sampler” feel and shows off the different flavors, like chocolate-dipped or lemon zest varieties.

Add a Special Touch
Include a mini jar of homemade jam or a packet of gourmet tea or hot cocoa to pair with the cookies. These thoughtful additions make your gift feel extra cozy and complete.
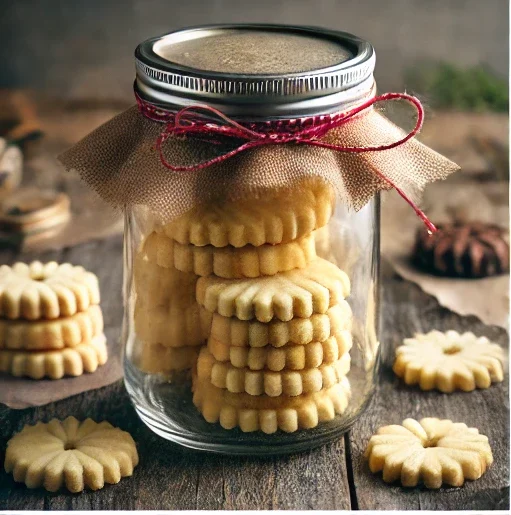
Gift Presentation Tips
- Add a Small Label: Use labels that say “Enjoy!” or “Handmade with Love.” This small touch makes the gift feel extra special.
- Add a Personal Note: A short note or holiday greeting goes a long way in making your gift feel personal and thoughtful.
These buttery shortbread cookies are easy to make and even easier to gift! Perfect for holiday gatherings, housewarmings, or just because, these cookies are sure to bring a little joy to anyone who receives them.
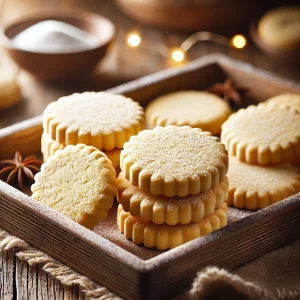
Classic Buttery Shortbread Cookies
Ingredients
- 1 cup unsalted butter, softened
- 1 cup powdered sugar, sifted
- 1 ¾ cups all-purpose flour, sifted
- 1 tsp vanilla extract
- ½ tsp salt (omit if using salted butter)
- sparkling sugar sprinkles (optional for the top)
Instructions
- In a large bowl, beat the softened butter and powdered sugar together until light and fluffy. (about 2 minutes) This creates a delicate texture in the cookies.
- Scrape down bowl and add the vanilla extract. Mix in the salt. Gradually add in the flour, mixing on low speed until just combined. The dough will be crumbly but should hold together when pressed. Avoid over-mixing to keep the cookies tender.
- Roll the dough into a log shape and wrap in plastic wrap. Chill for at least 1 hour in the refrigerator. This step helps the cookies hold their shape when baking.
- Preheat your oven to 325°F (165°C) and line a baking sheet with parchment paper.
- Slice the chilled dough into ¼-inch thick rounds and place them on the baking sheet. Sprinkle tops with the sparkling sugar. Chill for 10 minutes. Bake for 15-18 minutes, or until the edges are just lightly golden.
- Allow the cookies to cool on the baking sheet for a few minutes, then transfer to a wire rack. Once cool, store in an airtight container.
Notes
Tips to Make the Best Shortbread Cookies
- Use Quality Butter: Since butter is the star ingredient, opt for a high-quality one for the best flavor.
- Chill the Dough: Chilling is essential for maintaining the shape of your cookies and creating that perfect texture.
- Dust with Powdered Sugar: For a festive look, sprinkle a light dusting of powdered sugar over the cookies once they’ve cooled.
Troubleshooting
- Dough Too Crumbly? Add a teaspoon of milk or water if the dough isn’t holding together.
- Cookies Spread in the Oven? Make sure the dough is well-chilled before baking, which helps them keep their shape.
- Cookies Too Hard? Avoid over-baking! They should be just lightly golden around the edges.

Classic Pecan Pie
Pecan pie is a Thanksgiving tradition, with its rich, nutty filling and buttery crust that bring a perfect balance of sweetness and texture. This classic recipe keeps it simple but delicious, making it an ideal dessert centerpiece for your holiday table.
Sure, this classic pecan pie might pack around 500 calories per slice, but hey—it’s Thanksgiving! Who’s counting calories when there’s pie on the table, right? Thanksgiving is about gathering, indulging, and making memories, so go ahead, savor every rich, nutty, caramel-filled bite! After all, there’s always tomorrow to think about salads and lighter options. Today, let’s just enjoy the pie! 🥧
Nothing Says Thanksgiving Like Pecan Pie!
This pie is the real MVP of Thanksgiving desserts. It’s the one that’ll have everyone sneaking a second slice, even when they swore they couldn’t eat another bite. Between the perfectly crisp, buttery crust and the gooey, sweet pecan filling, it’s got all the makings of an absolute classic. Serve it warm with a scoop of vanilla ice cream, and you’re in dessert heaven. Let’s be honest—this pie might be the reason Thanksgiving is our favorite holiday!
Sweet, Crunchy, and Oh-So-Satisfying
There’s something magical about the way the pecans toast up on top, giving that satisfying crunch against the smooth, sugary filling underneath. This pie is like a hug from the inside out—warm, sweet, and with just the right amount of richness to make you feel festive. Every bite is a celebration of fall flavors, from the earthy pecans to the hint of vanilla and caramel in the filling.
The Secret’s in the Filling
Making this pie is easier than it looks, but the result? A total showstopper. The filling is rich, buttery, and just the right amount of sweet. And here’s a little secret—don’t forget a pinch of salt! It brings out the flavor of the pecans and balances the sweetness just perfectly. Once it’s baked and cooled, every slice is a golden, nutty masterpiece that’ll have everyone at the table asking for the recipe.
A Pie for Every Tradition
Pecan pie has been part of holiday tables for generations, and it’s no wonder why! This pie just feels like family, doesn’t it? It’s perfect for sharing, slicing up a little extra for that relative who swears, “just a sliver,” and then going back for a big, generous slice yourself. And the best part? It’s as good the next day! So save those leftovers—if there are any—and enjoy a slice with your morning coffee for a little Thanksgiving magic all over again.
Frequently Asked Questions
1. Can I make pecan pie ahead of time?
Yes! Pecan pie can be made up to two days in advance. Store it at room temperature or refrigerate it, covered.
2. Can I freeze pecan pie?
Yes, wrap it tightly in plastic wrap and foil, then freeze it for up to 2 months. Thaw overnight in the fridge before serving.
3. Can I use dark corn syrup instead of light corn syrup?
Yes, dark corn syrup will give a slightly richer flavor to the pie, while light corn syrup provides a milder, classic sweetness.

Classic Pecan Pie
Ingredients
- 1 9-inch pie crust pre-made or your favorite homemade recipe
Filling
- 1 cup light corn syrup
- 1 cup granulated sugar
- 3 large eggs
- ¼ cup melted butter
- 1 tsp vanilla extract
- 1 ½ cups pecan halves or pieces
Instructions
- Preheat your oven to 350°F (175°C).
- In a large mixing bowl, whisk together the corn syrup, sugar, eggs, melted butter, and vanilla extract until smooth.
- Place the pie crust in a 9-inch pie dish. Scatter the pecan halves evenly over the crust.Pour the filling mixture over the pecans. The pecans will float to the top as the pie bakes.
- Place the pie in the preheated oven and bake for 50–60 minutes or until the filling is set but slightly jiggly in the center. Cover the edges with foil if they start to brown too quickly.
- Let the pie cool completely before slicing. Serve with a dollop of whipped cream or a scoop of vanilla ice cream.
Notes
Tips and Notes
- Tip for the Perfect Pie Crust: Chill your crust before baking to prevent shrinking.
- Storage: Pecan pie can be stored at room temperature for up to 2 days or in the refrigerator for up to 4 days.
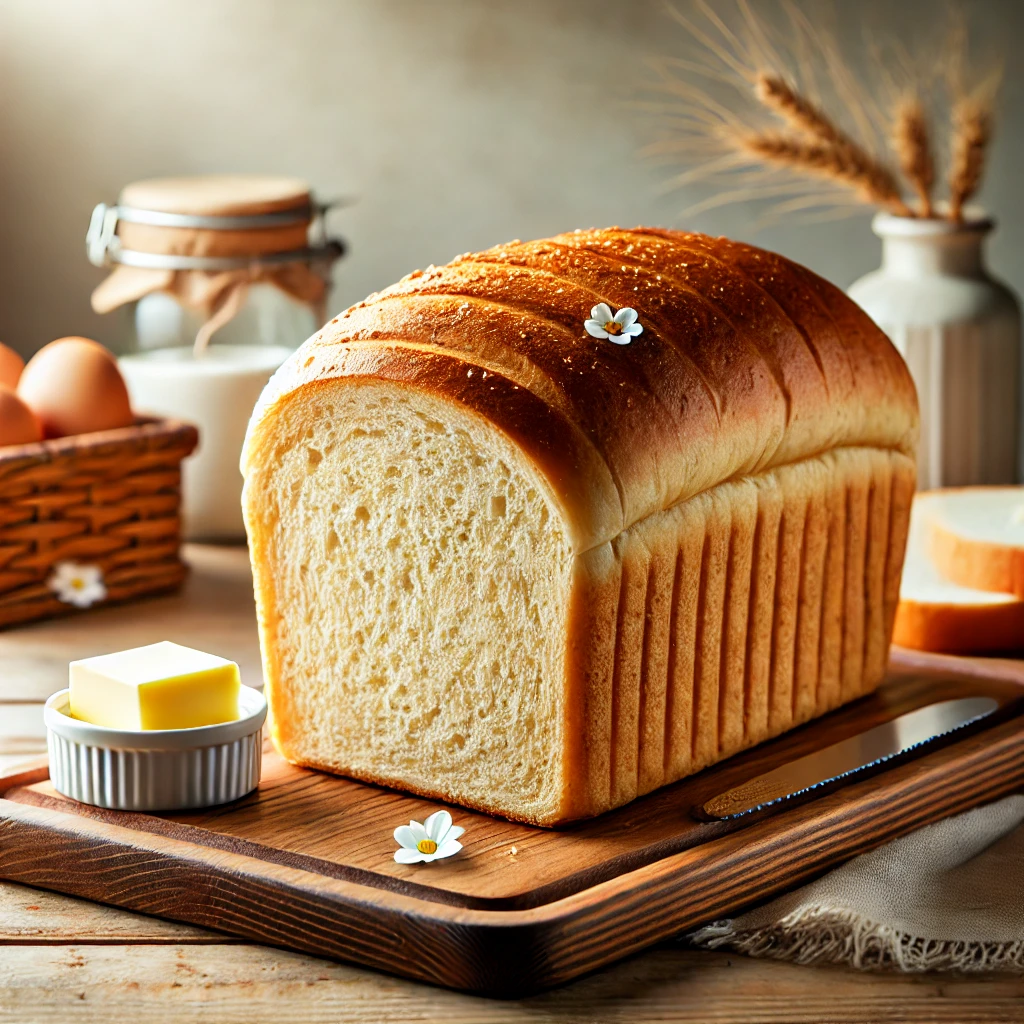
Simple Homemade Sandwich Bread
This simple homemade sandwich bread recipe is easy to make and yields a soft, fluffy loaf that’s perfect for sandwiches, toast, and all your favorite spreads. With basic ingredients and straightforward steps, it’s an ideal recipe for beginner bakers and a great addition to any family meal!
There’s nothing quite like the smell of freshly baked bread wafting through your kitchen. This simple homemade sandwich bread recipe is perfect for beginners and pros alike, using pantry staples to create a soft, fluffy, and delicious loaf that’s versatile and tasty. Ideal for sandwiches, toast, or as an accompaniment to your meals, this bread will become a staple in your home.
Ingredients
- 4 cups all-purpose flour
- 1 tbsp sugar
- 2 tsp salt
- 1 tbsp active dry yeast
- 1 ½ cups warm water (110°F)
- 3 tbsp butter, melted (plus extra for greasing and brushing)
Instructions
- Activate the Yeast:
- In a small bowl, mix warm water and sugar, then add the active dry yeast. Let sit for about 5 minutes, or until the mixture becomes foamy, indicating that the yeast is active.
- Prepare the Dough:
- In a large mixing bowl, combine the flour and salt. Pour in the yeast mixture and melted butter.
- Mix until a dough forms, then knead for about 8-10 minutes by hand (or 5-6 minutes if using a stand mixer) until the dough is smooth and elastic.
- First Rise:
- Place the dough in a greased bowl, cover it with a clean cloth, and let it rise in a warm place for about 1 hour, or until it has doubled in size.
- Shape the Dough:
- After the dough has risen, punch it down to release the air. Transfer it to a lightly floured surface and shape it into a loaf. Place the loaf in a greased 9×5-inch loaf pan.
- Second Rise:
- Cover the pan with a cloth and let it rise for another 30-40 minutes, or until the dough has risen about 1 inch above the top of the pan.
- Bake:
- Preheat the oven to 350°F (175°C). Bake the bread for 30-35 minutes, or until golden brown. The bread should sound hollow when tapped on the bottom.
- Cool and Serve:
- Remove the bread from the oven, brush the top with melted butter, and let it cool in the pan for 10 minutes. Then, transfer it to a wire rack to cool completely before slicing.
Tips and Notes
- Tip for Beginners: Don’t rush the rising time! Allowing the bread to rise properly will result in a softer, fluffier loaf.
- Storage Tip: Store the bread in an airtight container at room temperature for up to 3 days, or freeze it for up to 3 months.
- Variations: Try adding a tablespoon of honey for a touch of sweetness, or substitute half of the all-purpose flour with whole wheat flour for a heartier bread.
Frequently Asked Questions
- Can I use instant yeast instead of active dry yeast?
- Yes, you can use instant yeast, but you can skip the activation step. Just add it directly to the dry ingredients, and proceed with the recipe as usual.
- What if I don’t have a loaf pan?
- You can shape the dough into a round loaf and place it on a baking sheet lined with parchment paper. It will look more like a rustic artisan loaf but will still be delicious.
- How can I make this bread dairy-free?
- Replace the butter with olive oil or a dairy-free butter alternative for a dairy-free version.
- Can I add seeds or nuts to this bread?
- Absolutely! Sprinkle seeds like sesame, poppy, or sunflower seeds on top before baking for added texture and flavor. Note that nuts or seeds will change the texture slightly.
Simple Homemade Sandwich Bread
Ingredients
- 4 cups all-purpose flour
- 1 tbsp sugar
- 2 tsp salt
- 1 tbsp active dry yeast
- 1 ½ cups warm water (110°F)
- 3 tbsp butter, melted (plus extra for greasing and brushing)
Instructions
- In a small bowl, mix warm water and sugar, then add the active dry yeast. Let sit for about 5 minutes, or until the mixture becomes foamy, indicating that the yeast is active.
- In a large mixing bowl, combine the flour and salt. Pour in the yeast mixture and melted butter.Mix until a dough forms, then knead for about 8-10 minutes by hand (or 5-6 minutes if using a stand mixer) until the dough is smooth and elastic.
- Place the dough in a greased bowl, cover it with a clean cloth, and let it rise in a warm place for about 1 hour, or until it has doubled in size.
- After the dough has risen, punch it down to release the air. Transfer it to a lightly floured surface and shape it into a loaf. Place the loaf in a greased 9×5-inch loaf pan.
- Cover the pan with a cloth and let it rise for another 30-40 minutes, or until the dough has risen about 1 inch above the top of the pan.
- Preheat the oven to 350°F (175°C). Bake the bread for 30-35 minutes, or until golden brown. The bread should sound hollow when tapped on the bottom.
- Remove the bread from the oven, brush the top with melted butter, and let it cool in the pan for 10 minutes. Then, transfer it to a wire rack to cool completely before slicing.
Notes
Tips and Notes
- Tip for Beginners: Don’t rush the rising time! Allowing the bread to rise properly will result in a softer, fluffier loaf.
- Storage Tip: Store the bread in an airtight container at room temperature for up to 3 days, or freeze it for up to 3 months.
- Variations: Try adding a tablespoon of honey for a touch of sweetness, or substitute half of the all-purpose flour with whole wheat flour for a heartier bread.
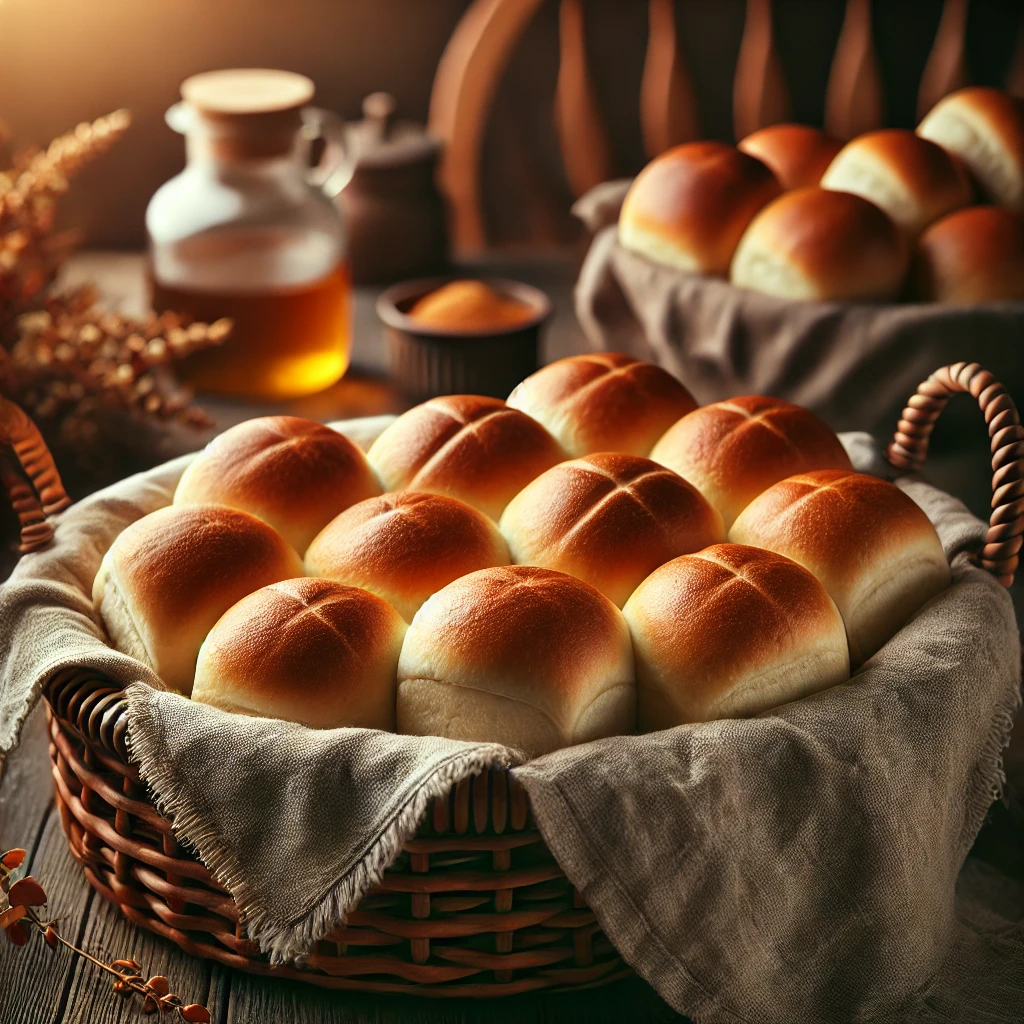
Soft and Fluffy Dinner Rolls
Discover the secret to soft, fluffy dinner rolls that are perfect for any meal. These homemade dinner rolls are tender, buttery, and ideal for beginners and experienced bakers alike.
There’s nothing quite like the smell of freshly baked bread filling your kitchen, especially when it’s a batch of soft, fluffy dinner rolls. These rolls are a must-have for any dinner, from special holiday feasts to simple weeknight meals. Made with basic ingredients and simple techniques, this recipe yields incredibly soft and tender rolls with a beautiful golden crust that will make any meal feel extra special.
Dinner rolls are one of those classic recipes that can elevate any meal, making it feel a bit cozier and more satisfying. And while you might think making bread from scratch is complicated, these rolls are actually quite simple to prepare. With just a few steps and some patience for the rising time, you’ll have homemade rolls that are worlds apart from store-bought options.
Why These Rolls Are So Special
These dinner rolls are crafted to achieve a delicate balance of softness and fluffiness with just the right amount of sweetness. The ingredients work together to create rolls that are soft yet slightly chewy with a hint of buttery flavor. They’re perfect for spreading with a little butter, or for dipping into soups, gravies, and sauces.
What makes these rolls stand out is their versatility—they’re not only ideal for dinner but also make great mini sandwiches or snacks. You can even enjoy them the next day by toasting them lightly with some jam or honey.
Dairy-Free: To make this recipe dairy-free, you can replace butter with a dairy-free alternative.
Vegan: For a vegan version, substitute dairy butter with a vegan butter alternative.
Step-by-Step Instructions with Tips
To ensure you get the best possible results with your dinner rolls, let’s dive into the step-by-step process, with a few handy tips along the way.
- Activate the Yeast
Start by combining warm water, warm milk, and sugar in a large mixing bowl. Sprinkle the active dry yeast over the liquid and give it a gentle stir. Let the mixture sit for 5-10 minutes. You’ll know the yeast is active and ready to go when it begins to bubble and form a foamy layer on top. This step is crucial—if your yeast doesn’t foam, it may be old or the water might be too hot, which can kill the yeast. Aim for liquids that are warm but not hot (around 110°F is ideal). - Add Wet Ingredients
Once your yeast is active, add melted butter and a large egg. Stir these ingredients together until well combined. The butter and egg add richness and softness to the rolls, giving them that melt-in-your-mouth quality. - Incorporate the Dry Ingredients
Slowly mix in the flour and salt, starting with about 3 cups of flour and adding more as needed until a soft dough forms. You want a dough that’s soft and slightly sticky but not too wet. Be cautious not to add too much flour, as this can make the rolls dense and heavy. - Knead the Dough
Transfer the dough to a floured surface and knead for about 5-7 minutes until it becomes smooth and elastic. Kneading is essential as it helps develop gluten, giving structure to the rolls and making them soft and chewy. If you have a stand mixer, you can also knead the dough using the dough hook attachment. - First Rise
Place the kneaded dough in a greased bowl, cover it with a damp cloth or plastic wrap, and let it rise in a warm place for 1-2 hours, or until doubled in size. This rising time allows the dough to develop flavor and texture. Pro tip: If your kitchen is cool, you can create a warm environment by placing the bowl in the oven with the light on or near a warm stovetop. - Shape the Rolls
Once the dough has risen, punch it down to release the air and divide it into 12-15 equal pieces. Roll each piece into a smooth ball and place them in a greased baking dish or on a lined baking sheet. Properly shaped rolls will rise evenly and have a smooth, domed top. - Second Rise
Cover the rolls with a damp cloth and let them rise for another 30-45 minutes until they’re puffy. This second rise is what gives the rolls their light, airy texture, so don’t skip it! - Bake to Perfection
Preheat your oven to 375°F (190°C) and bake the rolls for 15-20 minutes or until the tops are golden brown. For an extra-soft finish, brush the rolls with melted butter immediately after they come out of the oven.
Pro Tips for Success
- Don’t Rush the Rising Process: Good rolls need time to rise, so be patient. Letting the dough rise slowly will give you a better texture and richer flavor.
- Use Fresh Yeast: Make sure your yeast is fresh and active. If it doesn’t foam up when you activate it, it’s likely expired or inactive.
- Check Dough Consistency: The dough should be slightly sticky but workable. Adding too much flour can make the rolls dense, so resist the urge to add more than needed.
Storing and Reheating
- Storing: Place any leftover rolls in an airtight container at room temperature for up to 3 days. For longer storage, you can freeze the rolls in a zip-top bag for up to 2 months.
- Reheating: To reheat, simply warm the rolls in the oven at 300°F (150°C) for about 5-7 minutes. Alternatively, microwave them for 10-15 seconds to make them soft and warm.
Serving Suggestions
These dinner rolls are versatile and can be paired with a wide range of meals. Here are a few ideas:
- With Soups and Stews: Perfect for dipping into a hearty bowl of soup or stew.
- As Mini Sandwiches: Slice the rolls in half and fill them with turkey, ham, or your favorite sandwich fillings for a delightful snack or light lunch.
- As Breakfast Rolls: Serve warm with butter, honey, or your favorite jam.
Frequently Asked Questions (FAQs)
- Can I use whole wheat flour instead of all-purpose flour?
Yes, but the rolls will be denser. You can try substituting half of the all-purpose flour with whole wheat flour for a healthier option that’s still relatively soft. - Can I make the dough ahead of time?
Absolutely! Prepare the dough, let it rise, shape the rolls, and then place them in the fridge overnight. The next day, allow them to come to room temperature and rise before baking. - What if I don’t have a warm place for the dough to rise?
You can use your oven as a proofing box by turning on the light (but not the heat) to create a warm, draft-free environment.

Soft and Fluffy Dinner Rolls
Ingredients
- 4 cups all-purpose flour
- ¼ cup sugar
- 1 ½ tsp salt
- ½ cup milk, warm
- ½ cup water, warm
- ¼ cup unsalted butter, melted
- 1 large egg
Instructions
- Start by combining warm water, warm milk, and sugar in a large mixing bowl. Sprinkle the active dry yeast over the liquid and give it a gentle stir. Let the mixture sit for 5-10 minutes. You’ll know the yeast is active and ready to go when it begins to bubble and form a foamy layer on top. This step is crucial—if your yeast doesn’t foam, it may be old or the water might be too hot, which can kill the yeast. Aim for liquids that are warm but not hot (around 110°F is ideal).
- Once your yeast is active, add melted butter and a large egg. Stir these ingredients together until well combined. The butter and egg add richness and softness to the rolls, giving them that melt-in-your-mouth quality.
- Slowly mix in the flour and salt, starting with about 3 cups of flour and adding more as needed until a soft dough forms. You want a dough that’s soft and slightly sticky but not too wet. Be cautious not to add too much flour, as this can make the rolls dense and heavy.
- Transfer the dough to a floured surface and knead for about 5-7 minutes until it becomes smooth and elastic. Kneading is essential as it helps develop gluten, giving structure to the rolls and making them soft and chewy. If you have a stand mixer, you can also knead the dough using the dough hook attachment.
- Place the kneaded dough in a greased bowl, cover it with a damp cloth or plastic wrap, and let it rise in a warm place for 1-2 hours, or until doubled in size. This rising time allows the dough to develop flavor and texture. Pro tip: If your kitchen is cool, you can create a warm environment by placing the bowl in the oven with the light on or near a warm stovetop.
- Once the dough has risen, punch it down to release the air and divide it into 12-15 equal pieces. Roll each piece into a smooth ball and place them in a greased baking dish or on a lined baking sheet. Properly shaped rolls will rise evenly and have a smooth, domed top.
- Cover the rolls with a damp cloth and let them rise for another 30-45 minutes until they’re puffy. This second rise is what gives the rolls their light, airy texture, so don’t skip it!
- Preheat your oven to 375°F (190°C) and bake the rolls for 15-20 minutes or until the tops are golden brown. For an extra-soft finish, brush the rolls with melted butter immediately after they come out of the oven.
Notes
Tips & Notes
-
Measure Flour Correctly
For best results, spoon flour into your measuring cup and level it with a knife. Avoid scooping directly from the bag, which can lead to packed flour and a denser roll. -
Check Yeast Freshness
Be sure your yeast is fresh and active. If using active dry yeast, it should bubble and foam when dissolved in warm water with a pinch of sugar, indicating it’s alive. If not, the yeast might be expired. -
Adjust Flour as Needed
Dough consistency can vary depending on humidity and flour brand. Add flour gradually and stop once the dough is smooth, soft, and slightly sticky. Too much flour will make the rolls dry. -
Use Warm Liquid for Yeast Activation
The milk or water used should be warm but not hot (around 110°F/43°C). Hot liquids can kill the yeast, preventing proper rise. -
Knead Well for Best Texture
Knead the dough until it’s smooth and elastic, about 5-7 minutes if kneading by hand. Proper kneading develops gluten, which gives the rolls their soft, airy texture. -
Room Temperature Butter
Make sure to use softened, room temperature butter, as it will incorporate into the dough more evenly and add a richer flavor. -
Brush with Butter After Baking
For extra flavor and softness, brush the tops of the rolls with melted butter as soon as they come out of the oven. This adds a lovely sheen and keeps the rolls soft. -
Storage Tips
Store any leftover rolls in an airtight container at room temperature for up to 2 days. You can also freeze baked rolls by wrapping them tightly in plastic wrap, then in foil, and storing in an airtight bag. Reheat frozen rolls in the oven for a few minutes before serving. -
Make-Ahead Option
Prepare the dough and allow it to rise. After shaping, place the rolls in the baking pan, cover tightly, and refrigerate overnight. Let them come to room temperature for about 30-45 minutes before baking. -
Add Toppings
For a twist, sprinkle sesame seeds, poppy seeds, or flaky sea salt on top of the rolls before baking for added flavor and texture.
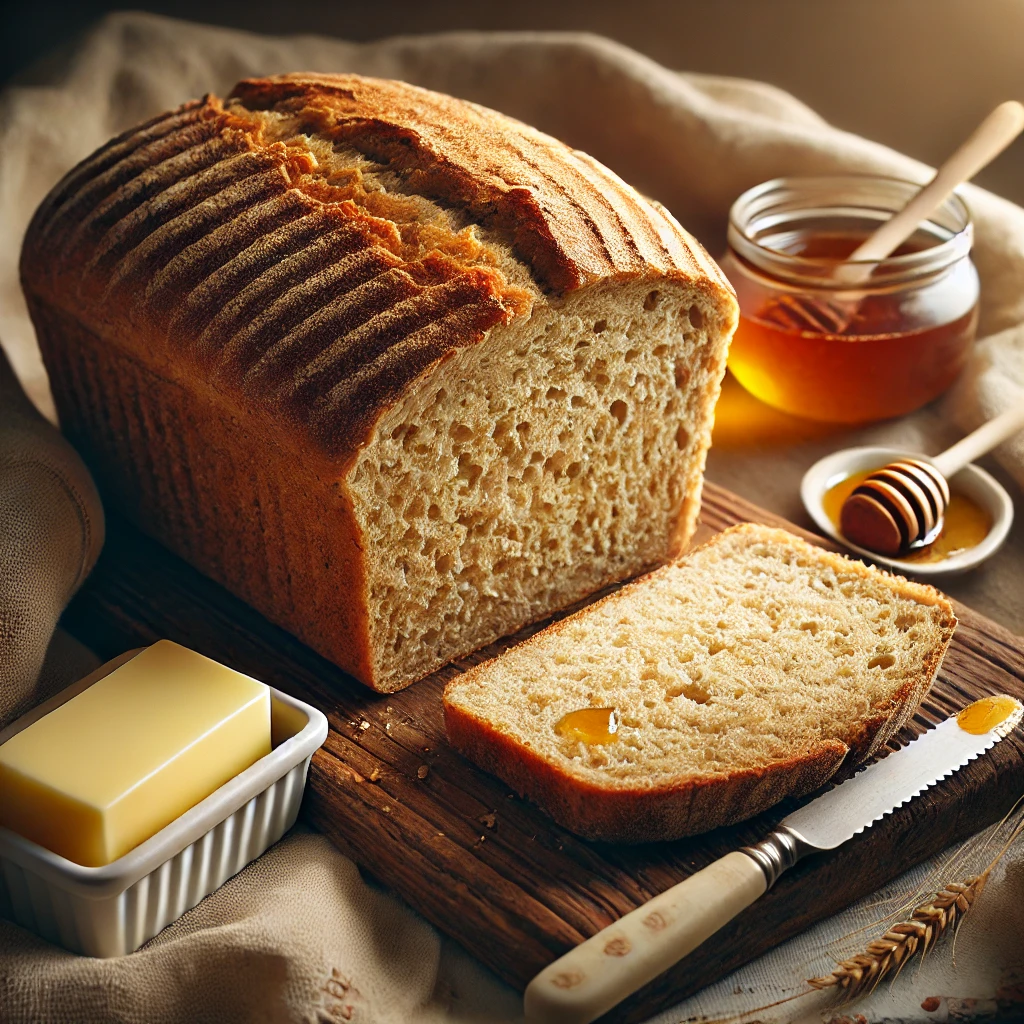
Homemade Honey Wheat Bread
This Homemade Honey Wheat Bread is soft, slightly sweet, and perfect for sandwiches or breakfast toast. Made with a blend of whole wheat and all-purpose flour, it’s wholesome, hearty, and easy to make!
A Cozy and Delicious Homemade Bread Recipe
There’s nothing quite like the aroma of freshly baked bread filling your home, especially on a cozy morning. This Honey Wheat Bread combines the earthy, nutty flavor of whole wheat flour with a touch of sweetness from honey. Perfect for toast, sandwiches, or simply enjoyed with a pat of butter.
Ingredients
- 2 cups whole wheat flour
- 1 cup all-purpose flour
- 1 1/2 cups warm water (110°F)
- 1 packet (2 1/4 tsp) active dry yeast
- 1/4 cup honey
- 2 tbsp melted butter or olive oil
- 1 1/2 tsp salt
How to Make
1. Activate the Yeast
In a small bowl, mix warm water and honey, stirring to dissolve the honey. Sprinkle in the yeast and let it sit for about 5-10 minutes until it becomes foamy.
2. Prepare the Dough
In a large mixing bowl, combine whole wheat flour, all-purpose flour, and salt. Add the yeast mixture and melted butter (or olive oil) to the dry ingredients. Stir until a sticky dough forms.
3. Knead the Dough
Turn the dough out onto a floured surface and knead for about 8-10 minutes until it’s smooth and elastic. If the dough is too sticky, add a little more flour, one tablespoon at a time, until it’s workable.
4. First Rise
Place the dough in a greased bowl, cover with a damp cloth, and let it rise in a warm spot for about 1-1.5 hours, or until it has doubled in size.
5. Shape the Loaf
Punch down the dough to release any air bubbles. Shape it into a loaf and place it into a greased 9×5-inch loaf pan.
6. Second Rise
Cover the loaf pan with a cloth and let the dough rise again for about 30-45 minutes, or until it has risen slightly above the edge of the pan.
7. Bake
Preheat your oven to 350°F (175°C). Bake the bread for 30-35 minutes, or until the top is golden brown and the bread sounds hollow when tapped on the bottom.
8. Cool and Serve
Remove the bread from the oven and let it cool in the pan for 10 minutes. Transfer it to a wire rack to cool completely before slicing.
Serving Suggestions
- For Breakfast: Toast a slice and spread it with butter and honey, or top it with avocado and a sprinkle of sea salt for a delicious morning treat.
- For Lunch: Use it for your favorite sandwich, whether it’s a classic BLT or a veggie-loaded stack.
- For Dinner: Serve it alongside soup or stew to soak up every last drop of broth.
Tips
- Storage: Wrap the bread in a cloth or store it in a bread bag to keep it fresh for 3-4 days. You can also freeze it in slices for easy-to-grab portions.
- Variations: Add 1/4 cup of oats or seeds to the dough for added texture and flavor, or sprinkle oats on top before baking for a rustic look.
Why You’ll Love This Bread
This Honey Wheat Bread strikes the perfect balance of flavors and textures, with the warmth of honey complementing the wholesome wheat. Not only is it healthier than store-bought bread, but it’s also incredibly rewarding to make. Enjoy the simple pleasure of homemade bread that brings comfort and joy to your table.
Frequently Asked Questions
Q: Can I use only whole wheat flour instead of mixing with all-purpose flour?
A: Yes, you can use only whole wheat flour, but the bread may be denser and have a stronger wheat flavor. Mixing in all-purpose flour helps achieve a lighter texture. If you prefer a fully whole wheat loaf, you might want to add a bit more water, as whole wheat flour tends to absorb more liquid.
Q: Can I use instant yeast instead of active dry yeast?
A: Yes, you can use instant yeast. You won’t need to activate it in water first. Simply mix it directly into the dry ingredients and proceed with the recipe as directed.
Q: How can I make this bread sweeter?
A: If you’d like a sweeter loaf, increase the honey to 1/3 or 1/2 cup. Keep in mind that adding more honey may slightly affect the dough’s stickiness, so you might need to add a bit more flour while kneading.
Q: Can I make this bread without honey?
A: Yes, you can substitute honey with other sweeteners like maple syrup, agave syrup, or even sugar. However, the flavor will change slightly depending on the sweetener you choose.
Q: How can I make this recipe dairy-free?
A: To make this bread dairy-free, simply replace the melted butter with olive oil, coconut oil, or a neutral vegetable oil.
Q: What’s the best way to store homemade bread?
A: Store the bread in an airtight container, bread bag, or wrapped in a clean cloth at room temperature for 3-4 days. For longer storage, slice the bread, wrap each slice, and freeze it. You can toast slices directly from the freezer.
Q: Can I add seeds or nuts to this bread?
A: Absolutely! You can add 1/4 to 1/2 cup of seeds (like sunflower, flax, or sesame) or chopped nuts into the dough for extra texture. You could also sprinkle some seeds on top before baking for a decorative touch.
Q: My bread didn’t rise much. What could have gone wrong?
A: There are a few reasons why bread might not rise well. Make sure your yeast is fresh and not expired. The water used to activate the yeast should be warm, around 110°F (43°C), not too hot, as high temperatures can kill the yeast. Additionally, letting the dough rise in a warm, draft-free area helps promote better rising.
Q: Can I make this recipe in a bread machine?
A: Yes, you can. Follow the instructions for your bread machine, adding the ingredients in the order recommended by the manufacturer. Use the whole wheat setting if your machine has one.
Q: How do I know when the bread is fully baked?
A: A fully baked loaf should have a golden-brown top and should sound hollow when tapped on the bottom. You can also use a thermometer to check the internal temperature, which should be around 190°F (88°C) when fully baked.
Q: Can I use this recipe to make rolls instead of a loaf?
A: Yes, you can! After the first rise, divide the dough into small balls, shape them into rolls, and let them rise on a baking sheet for 20-30 minutes. Bake at 350°F (175°C) for 15-20 minutes or until golden brown.
Honey Wheat Bread
Ingredients
- 1 cup warm water (about 110°F)
- 2 ¼ tsp active dry yeast (1 packet)
- ¼ cup honey
- 1 ½ cup whole wheat flour
- 1 ½ cup all-purpose flour
- 1 tsp salt
- 2 tbsp melted butter or vegetable oil
- 1 tbsp melted butter for brushing the top
Instructions
- In a small bowl, mix the warm water and honey. Sprinkle the yeast over the top and let it sit for 5-10 minutes until it becomes frothy.
- In a large mixing bowl, combine whole wheat flour, all-purpose flour, and salt. Pour in the yeast mixture and melted butter.
- Mix until a dough forms, then knead by hand or with a dough hook on a stand mixer for about 8-10 minutes until smooth and elastic. If the dough is sticky, add a little more flour, 1 tablespoon at a time.
- Place the dough in a lightly oiled bowl, cover it with a clean towel, and let it rise in a warm place for about 1 hour, or until doubled in size.
- After the dough has risen, punch it down to remove air bubbles. Turn it out onto a lightly floured surface, shape it into a loaf, and place it in a greased 9×5-inch loaf pan.
- Cover the loaf with a towel and let it rise again for about 30 minutes, or until it has risen about 1 inch above the edge of the pan.
- Preheat your oven to 350°F (175°C). Bake the bread for 30-35 minutes, or until the top is golden brown and sounds hollow when tapped.
- Remove the bread from the oven and brush the top with melted butter for a soft crust. Let it cool in the pan for a few minutes, then turn it out onto a wire rack to cool completely before slicing.
Notes
Tips
- For a Softer Crust: Cover the loaf with a towel while it cools.
- Add Texture: For a bit of crunch, sprinkle rolled oats or sunflower seeds on top before baking.
- Storage: Store in an airtight container for up to 3 days at room temperature or freeze for up to 3 months.
